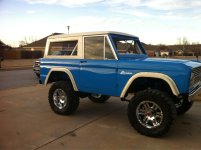
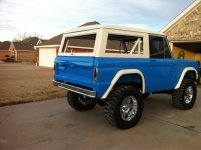
• Just a reminder that you won't be able to start new posts or reply to existings posts in the Archive forum.

    This is where all the old posts go so they can still be used for reference and searched.
  • Welcome to ClassicBroncos! - You are currently viewing the forums as a GUEST. To take advantage of all the site features, please take a moment to register. It's fast, simple and absolutely free. So please join our community today!
    If you have problems registering or can't log into your account, please contact Admin.

Razorbackbronco build thread

DirtDonk

Contributor
Bronco Guru
Joined
Nov 3, 2003
Messages
49,346
Yep. Like JAK said, a Duraspark "box" or Ignition Control Module. Would have been mounted to the driver's side wheel well most likely.
Looks to have the Blue grommet ("wire strain relief") there where the wires go in?
Wonder what that additional Red wire crimped on to the other one is for? You follow it to it's other end during the dis-assembly?

Not sure it's the first time I've ever seen it called a "modulator", but the more common term is simply "module". As in, ignition control module. Their Chinese supplier's English interpretation of the Korean sample they were given possibly? Or someone in the chain of command that wasn't paying attention, OR, had a better education than most and just decided that it actually IS a modulator, so changed the name.
Hey, it's all possible. ;D

Paul
 
OP
OP
Razorbackbronco

Razorbackbronco

Sr. Member
Joined
Dec 29, 2012
Messages
402
I have the same bumper! So I got my seat covers and foam from toms....and I'm looking at it and thinking about having a shop do it for me. I found a place that said it was about a 4 hour job $60 an hour. $160 sounds pretty good at this point. Thoughts?
 

sprdv1

Contributor
REBEL
Joined
Mar 8, 2007
Messages
81,983
Great build... Keep up the good work, Great pics too
 
OP
OP
Razorbackbronco

Razorbackbronco

Sr. Member
Joined
Dec 29, 2012
Messages
402
The extra red wire from the box is ran to the old electric fuel pump.
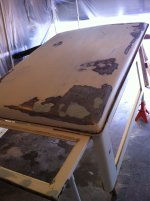
Thanks for the compliments I'm beginning to see the end! Gonna start with the body work this week. Got 3-4 decent size dents to pull, got to weld the tailgate patch panel on, and my hood is rust free but has some straightening out issues.

I think I'm leaning toward rolling on bedliner and then painting over it with the grabber blue on the interior tub. I've read that certain brands can be painted over. Have any of you guys done this?
 

Buldozer

Bronco Virtuoso
Joined
Oct 17, 2007
Messages
3,065
Loc.
God's Country
I have the same bumper! So I got my seat covers and foam from toms....and I'm looking at it and thinking about having a shop do it for me. I found a place that said it was about a 4 hour job $60 an hour. $160 sounds pretty good at this point. Thoughts?

I purchased seats mine were trash and that is one thing I could never do so I think that sounds reasonable...I know a guy in hot springs told me he would do a set for around $4-600 depending on how bad they were but that was him furnishing everything.
 
OP
OP
Razorbackbronco

Razorbackbronco

Sr. Member
Joined
Dec 29, 2012
Messages
402
I purchased seats mine were trash and that is one thing I could never do so I think that sounds reasonable...I know a guy in hot springs told me he would do a set for around $4-600 depending on how bad they were but that was him furnishing everything.

Thanks dozer. Yea I'm leaning toward having it done. If it takes a professional 4 hours it would take me 8 and $160 is not worth that much time when I could be doing one of 50 other things on the bronco
 
OP
OP
Razorbackbronco

Razorbackbronco

Sr. Member
Joined
Dec 29, 2012
Messages
402
Razorbackbronco build thread**UPDATE- its done!!**

Well I've been steadily plugging away. Most of the things I've been doing are little things that take a lot of time but don't show a ton of progress.

My engine just needs the wiring hooked up and carb put on. I bought an electric choke kit for my edelbrock 1405 and I need to put that on, seems pretty straight forward install.
Quick question on wiring. The new dizzy only has 1 wire coming out of it where my old one had 2. I'm putting a msd igniter on. Would the single black wire from the dizzy go to the positive igniter connection?

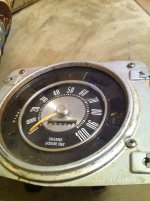
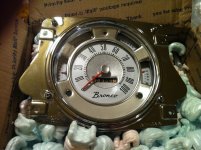
I shipped my gauge cluster to Kevin at classy restorations. I'm going to have him calibrate it for 35's and I'm going with chrome with white decals. ImageUploadedByTapatalk1377477516.953189.jpg

I also dropped my seats and seat covers at a local auto upholstery shop. I have the pearl white covers and new foam from TBP. The more I read about installing them the more I thought I'd like to have someone else do it! He quoted me $150 to install the new foam and all 3 seats which I thought was a great deal.

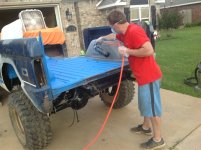
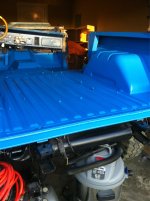
I've ordered the Raptor liner kit and it should be here on Tuesday. I got the tintable kit that I'm going to tint with grabber blue. I spent all afternoon today prepping the tub, so I hope to get that sprayed on this week.

I put this in the tech forum but thought I'd add it here just in case i might get someone who knows an answer for my wheel offset/backspace question.

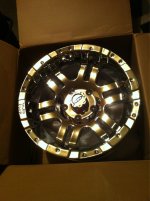
So I'm looking for wheels for my rebuild. I've already bought my tires which are 35x12.50r18 mud grapplers. I have a 76 with front disc brakes and a 5.5 lift. I believe that backspacing stays constant while offset can change depending on the width of the wheel correct?

So, I really like the moto metal 951's and it looks like you can get them in

-12mm offset and 4.53"BS and

18mm offset and 5.71"BS

both of which are 18x9

Which one should I go with?

I think the only picture I've taken in the last week was today of my new steering wheel I stained. I got the 2 inch extension adapter and got it put on ImageUploadedByTapatalk1377477482.410823.jpg ImageUploadedByTapatalk1377477493.276959.jpg
 
Last edited:
OP
OP
Razorbackbronco

Razorbackbronco

Sr. Member
Joined
Dec 29, 2012
Messages
402
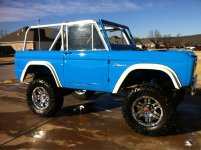
WOOOOHOOOOO, the build is done!!! I drove it to work today! I realize that I haven't done an update since August, but I have been working a ton to get it finished. After I had gone a month or so in the fall with no update, I thought that I would just wait until I finished and then just add everything all at once.

I started on June 22 which means it took me right at 8 months to do everything. I was hoping to do it in 4, but I have learned, over and over I might add, that old broncos laugh at timeframes!

I've got a ton of pics to upload and I'll try to comment on some of the stuff as I post the pictures. My pics are on my phone and I'm typing this on my computer, because I hate writing on my phone. My wife can vouch for that as most of my reply texts to her are; yes, no, maybe, and Taco Bell.

So, here goes with the pics..
 
OP
OP
Razorbackbronco

Razorbackbronco

Sr. Member
Joined
Dec 29, 2012
Messages
402
ImageUploadedByTapatalk1393009888.014673.jpg ImageUploadedByTapatalk1393009914.371079.jpg ImageUploadedByTapatalk1393009938.269816.jpg ImageUploadedByTapatalk1393009956.329783.jpg ImageUploadedByTapatalk1393009992.905424.jpg ImageUploadedByTapatalk1393010054.271518.jpg

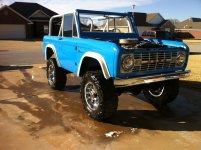
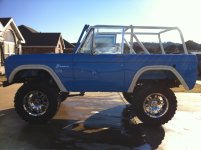
I went with the tint able Raptor liner and I am sooo happy with it. Very easy to apply, and a very uniform coverage. Make sure that you just get the pigment and not the binder if you are going to add color to it. After much debate I went with the chrome Moto Metal 18" 951's. I had already bought my mud grapplers (35's) way back in the spring, but I couldn't make up my mind on which wheels.

I ordered the white pearl seat covers from Tom's and was going to attempt to put them on myself. But after much reading on here about how it can be difficult to get perfect, I called local upholstery shops and found a guy who would all 3 seats and install the new foam I had for $150. I said, "I'm on my way!" He did a phenomenal job they look brand new.
 
OP
OP
Razorbackbronco

Razorbackbronco

Sr. Member
Joined
Dec 29, 2012
Messages
402
ImageUploadedByTapatalk1393010507.932013.jpg ImageUploadedByTapatalk1393010526.812912.jpg ImageUploadedByTapatalk1393010556.747444.jpg ImageUploadedByTapatalk1393010572.589615.jpg

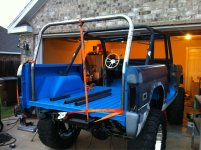
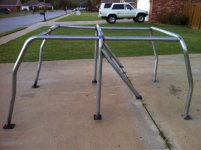
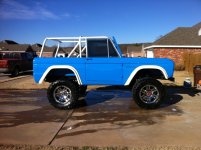
I bought a used 6 point roll bar from a member here, and then I ordered the rear hoop and connectors from Toms. (Man shipping heavy DOM from Oregon to NW Ark. is expensive!) Got the cage set in and welded up in an afternoon. Couldn't get and extra set of hands that day so I rigged up some tie downs and it actually held it better than a person could have I think!

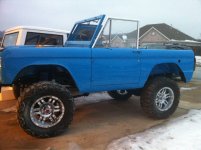
Got my wheels and tires mounted up! Man I love this combo. Had to enlarge the bore on the front tires as they were too small to fit over the hubs. (Always something right?!)
 
OP
OP
Razorbackbronco

Razorbackbronco

Sr. Member
Joined
Dec 29, 2012
Messages
402
ImageUploadedByTapatalk1393010901.287858.jpg ImageUploadedByTapatalk1393010925.891366.jpg ImageUploadedByTapatalk1393010941.091690.jpg ImageUploadedByTapatalk1393010954.417546.jpg ImageUploadedByTapatalk1393010982.434992.jpg ImageUploadedByTapatalk1393010996.307056.jpg ImageUploadedByTapatalk1393011015.569243.jpg


I sent my gauge off to classy chassis and they did a great job! Got it calibrated to run 35's.

With the 5.5 lift my driveshaft was way short, so I took it to a local driveshaft shop called Larry's driveshaft and had them extend it a few inches. I really liked the bare metal look, so rather than painting it black I cleaned it up and put a few coats of clearcoat on it. I'm not sure if it will stand up, but so far so good.

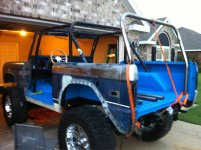
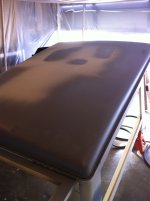
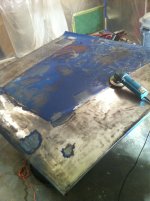
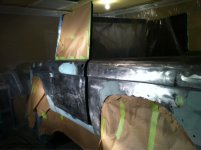
Say goodbye to the side marker lights and the aux fuel tank hole. I welded those over with new metal. It seemed like I was never going to get the whole body sanded down to bare metal! It had the original paint, which is great because there were no rust or bondo suprises, but man that stuff is really on there!

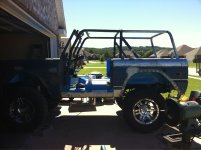
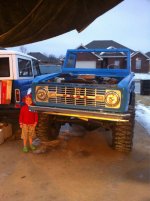
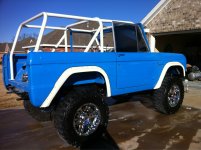
Here are 3 pictures of my 8 point roll cage in bare metal, primered and painted and clearcoated Wimbledon White. I've got a 4 year old boy and 18 month old girl so a family cage was a must for me
 
OP
OP
Razorbackbronco

Razorbackbronco

Sr. Member
Joined
Dec 29, 2012
Messages
402
ImageUploadedByTapatalk1393074968.139152.jpg ImageUploadedByTapatalk1393074992.159791.jpg ImageUploadedByTapatalk1393075011.796021.jpg ImageUploadedByTapatalk1393075032.778274.jpg ImageUploadedByTapatalk1393075058.043234.jpg ImageUploadedByTapatalk1393075082.225297.jpg

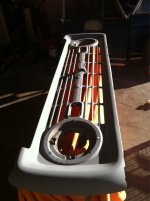
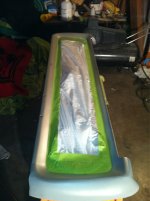
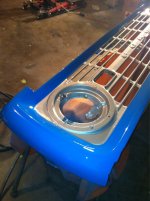
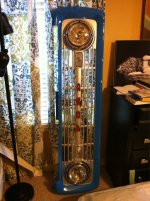
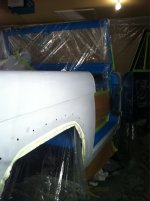
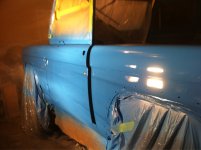
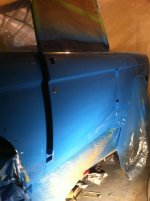
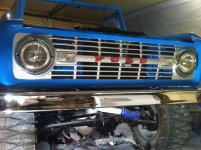
My first real taste of body work and paint. Had a huge dent on the grill right on the rounded edge that meets the fender. Got it hammered out and smoothed over. I painted everything thing myself in my garage. I found a nice used devilbiss gun at a local pawnshop, I paid $30 for it. After many hours of sanding it is so rewarding to finally see a finished part!
 
OP
OP
Razorbackbronco

Razorbackbronco

Sr. Member
Joined
Dec 29, 2012
Messages
402
ImageUploadedByTapatalk1393075540.469670.jpg ImageUploadedByTapatalk1393075556.968937.jpg ImageUploadedByTapatalk1393075574.033823.jpg ImageUploadedByTapatalk1393075589.610112.jpg ImageUploadedByTapatalk1393075607.685964.jpg ImageUploadedByTapatalk1393075623.417542.jpg ImageUploadedByTapatalk1393075639.230962.jpg ImageUploadedByTapatalk1393075657.897324.jpg ImageUploadedByTapatalk1393075674.154143.jpg ImageUploadedByTapatalk1393075689.648404.jpg ImageUploadedByTapatalk1393075704.618083.jpg

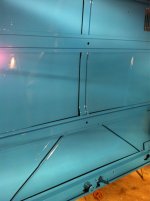
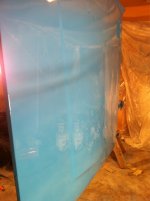
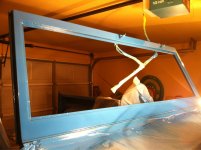
My camera on phone doesn't do a good job of showing how bright the grabber blue is. Painting during the winter in my garage was a bit of a challenge because its hard to vent and keep it warm inside. I bought a 60k btu forced air propane heater and it might be the best $150 I've ever spent! It will warm my 2 car garage from 30 degrees to 65-70 in about 15 minutes.
 
OP
OP
Razorbackbronco

Razorbackbronco

Sr. Member
Joined
Dec 29, 2012
Messages
402
ImageUploadedByTapatalk1393076102.753977.jpg ImageUploadedByTapatalk1393076118.936646.jpg ImageUploadedByTapatalk1393076134.471133.jpg ImageUploadedByTapatalk1393076157.055368.jpg ImageUploadedByTapatalk1393076173.340814.jpg ImageUploadedByTapatalk1393076192.458232.jpg ImageUploadedByTapatalk1393076337.456220.jpg ImageUploadedByTapatalk1393076362.160917.jpg

I was able to get a ton of work done at the end of December because I am a teacher so I have a two week break for Christmas. We also have had 10 snow days which have been renamed bronco days by my wife!

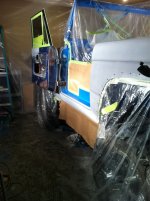
I spent about $75 in materials from Home Depot to set up my garage to paint in. I bought 4 eye bolts that I screwed into the ceiling. I then ran a small steel braided cable though the cables to make a square about 12x12. I used 3.5 mill clear plastic that I attached to the cable with zip ties. It essentially looked like a giant four sided shower curtain. I'm going to see if I took a picture of it
 
OP
OP
Razorbackbronco

Razorbackbronco

Sr. Member
Joined
Dec 29, 2012
Messages
402
ImageUploadedByTapatalk1393103014.437983.jpg

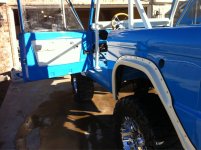
Got my wild horses war flares painted and installed. I wanted a little bigger screw than comes with the kit so I used some bigger diameter machine screws with nuts behind the flare. ImageUploadedByTapatalk1393103175.988057.jpg ImageUploadedByTapatalk1393103196.209633.jpg ImageUploadedByTapatalk1393103221.188990.jpg ImageUploadedByTapatalk1393103240.143199.jpg ImageUploadedByTapatalk1393103255.084647.jpg
I had a sheet of 14 gauge metal so I made my panel inserts and painted them to match.
 
Top