• Welcome to ClassicBroncos! - You are currently viewing the forums as a GUEST. To take advantage of all the site features, please take a moment to register. It's fast, simple and absolutely free. So please join our community today!
    If you have problems registering or can't log into your account, please contact Admin.

Relocating battery box - #1 or 1/0 cable?

bsquared

Contributor
Sr. Member
Joined
Dec 4, 2010
Messages
963
Howdy folks,
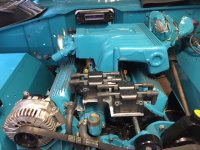
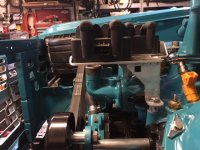
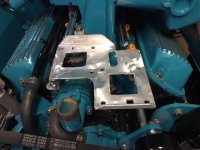
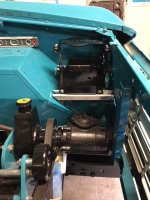
I've relocated my battery box to the drivers side and am going to run both pos and neg cables back to the pass side to power it up. My run is about 5' to get back to original location and I've seen a couple of posts recommending larger gauge wires for long runs.

Question is....will #1 flex wire work for a run as short as 5', or should I stick with 1/0 flex for it? Reason I ask is I have the crimp dies to work with #1 and will have to source some to be able to crimp the 1/0 flex cable. Relocated batt box to driver's side. (you'd think I would know this as I sell all of this stuff, just not to the automotive industry!)

Thanks for your input. B2
 

Attachments

  • BattBoxPainted.JPG
    BattBoxPainted.JPG
    117.4 KB · Views: 131
  • BattBoxSide.JPG
    BattBoxSide.JPG
    113.5 KB · Views: 126
  • BattBoxTop.JPG
    BattBoxTop.JPG
    122.5 KB · Views: 127

Rustytruck

Bronco Guru
Joined
Feb 24, 2002
Messages
10,875
A marine supplier can crimp the larger cable. Houston shouldn't be too hard to find some one that can do it. Welding equipment suppliers should be able to do it too.
 

Broncobowsher

Total hack
Joined
Jun 4, 2002
Messages
35,316
5 feet isn't that long of a run. Mounted by the tailgate might be.

Just move the ground wire off the passenger side and move to the driver side. No need to go long on it.

2 gauge would be Overkill shy of a big diesel. 4 would be fine but if you insist on over size, 2 will do
 

DirtDonk

Contributor
Bronco Guru
Joined
Nov 3, 2003
Messages
48,570
In which case 1ga would be just right...;D
Since you've already got the equipment for 1ga and can do it yourself, that would be the way to go for a custom length setup I would think.

I'm a big fan of overkill in the battery cable department, so I think that the #1 is fine for that length without going to 1/0.
I've used 1/0 on much shorter runs because that's what I had access too, really liked it, and don't feel it was the least bit overdone.
Could have done quite well with less of course, but that kind of welding cable is not so big it's getting in the way or making it hard to route cleanly even in tight quarters.

You moving the starter relay over to the firewall area, or somewhere besides the original location?
Going to run the cables on top of the crossmember, or across the firewall?

Paul
 

DirtDonk

Contributor
Bronco Guru
Joined
Nov 3, 2003
Messages
48,570
And the driver too!
And I'm only guessing, but I suspect it's for a different air intake/filter box for EFI.

Whatcha got going in over there in that other corner B2?

Paul
 

DirtDonk

Contributor
Bronco Guru
Joined
Nov 3, 2003
Messages
48,570
Oh, and I should add, that this is exactly why the battery in my '68 is on the driver's side now...;):cool:

I would actually prefer to keep batteries in the original location, but there are some things that are easier said than done.

Paul
 
OP
OP
bsquared

bsquared

Contributor
Sr. Member
Joined
Dec 4, 2010
Messages
963
Thanks a million, Guys! That makes me feel a lot better about it. #1 it is then.

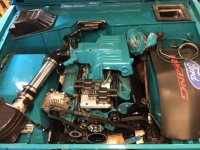
Paul is a winner winner, chicken dinner! Yep, I was dumpster diving at the boneyard for a 97 - 2001 MAF w/ the integrated IAT sensor and scored an air box from a 2001 Exploder that is a perfect fit on the PS. Pulls air in from the bottom to the outside of the battery support brace. I stuck with the 96 MAF because that's how EFI Guy has my 'puter configured and was able to fit a grommet in the intake tube.

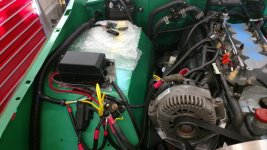
Yes, my relay / fuse panel will be on the PS Fender as shown in one of the pics. Running power over to the mega-fuse, which is hiding between the airbox and relay panel.

So, Broncobowsher, the ground will be okay to the frame on the passenger side? I read one post that was saying it should run as close to the starter as possible. If I can ground to the frame just below my battery, I can also run a ground from the frame over to the starter so the engine will have a nice ground as well.

Many thanks for the replies and here's some build porn for ya!

Cheers, Bill
 

Attachments

  • 6WithPacks.JPG
    6WithPacks.JPG
    134.4 KB · Views: 93
  • 3DriverSide.JPG
    3DriverSide.JPG
    129.1 KB · Views: 95
  • 5Front.JPG
    5Front.JPG
    110.2 KB · Views: 98
  • BattBox3.JPG
    BattBox3.JPG
    133.4 KB · Views: 96
  • FusePanel.JPG
    FusePanel.JPG
    107.9 KB · Views: 94
  • Intake2.jpg
    Intake2.jpg
    141.8 KB · Views: 106
  • Airbox2.JPG
    Airbox2.JPG
    104.7 KB · Views: 101
  • Airbox1.JPG
    Airbox1.JPG
    121 KB · Views: 109

DirtDonk

Contributor
Bronco Guru
Joined
Nov 3, 2003
Messages
48,570
x2 on the engine block. Nothing wrong with using the frame as well, to keep it all bonded to one system, but I always try to make the main battery ground go to the engine block first.
Whether you run it straight to the driver's lower corner where there is a threaded hole, or run it over and around to the other side where it's closer to the starter motor, is likely not a huge deal. Or at least less of a big deal with modern PMGR starters than it was with the older design. And the larger cables help here too.
I always consider battery cables to be a minimal cost for a good investment, so don't mind making slightly longer runs to get what I want. If needed...

My other Bronco had the ground cable run to the threaded hole nearest the starter motor, while my '79 with 400 has the 1ga ground cable run straight to one of the starters attaching bolts. I believe Explorers ran it to one of the studs sticking out of the serpentine drive brackets?
Doug put the main ground to the lower driver's side of the block on the '68, with an additional jumper from there to the frame. Then on the passenger side there is another one from the body (at the starter relay) to the engine block. Satisfies my appreciation of overkill just right!
I've also run one of those heavy braided jumpers between the block and the motor mount tower on the frame.

In other words, plenty of options and you should be fine whichever way you choose.

Paul
 
OP
OP
bsquared

bsquared

Contributor
Sr. Member
Joined
Dec 4, 2010
Messages
963
Thanks Guys! Then that's the plan.....Battery to motor and braided jumper from block to motor tower and probably another from body to frame somewhere out of the way. (I've got 6 2,000 amp nice ones from work!)

Many thanks and I'll post pics when I'm done.

Cheers, B2
 

Dlish

Sr. Member
Joined
Dec 6, 2011
Messages
552
So clean and nice, well done!

Slightly off topic, which # optima did ya go with to fit the WH battery tray?
 

904Bronco

Contributor
Bronco Guru
Joined
Sep 28, 2004
Messages
5,903
Loc.
San Martin, CA
Here is my .02

Ground to Drvr side, I used the single hole on the Timing cover where the mechanical fuel would have been on an earlier motor.

Then a frame grnd strap, same gauge, same location as Batt, to the frame.
I also have multiple Grounds... from engine compartment to Fuel pump, block to firewall, and there is another from block to passenger fender for everything else.

Pos Batt cable goes to Passenger fender to Explorer starter relay.

I also re-purpose the double sided green bolt ground from the Explorer firewall. It is installed in the Heater re-enforcement on the fire wall, it is self taping (metric) on one side so just drill a pilot hole. I do this on all my EFI builds.

Hope it helps, Doug
 

Attachments

  • DSCN3946.jpg
    DSCN3946.jpg
    115.4 KB · Views: 96
  • IMG_20170612_140603574.jpg
    IMG_20170612_140603574.jpg
    95.7 KB · Views: 92
  • IMG_20160905_134205131.jpg
    IMG_20160905_134205131.jpg
    91.9 KB · Views: 94
  • DSCN4001.jpg
    DSCN4001.jpg
    99.6 KB · Views: 91
Last edited:

bamabaja

Contributor
Sr. Member
Joined
Mar 25, 2012
Messages
729
Loc.
The Shoals
Very nice work, Doug. You should do Tech article on grounding for shade tree mechanics like me !
 
OP
OP
bsquared

bsquared

Contributor
Sr. Member
Joined
Dec 4, 2010
Messages
963
Very nice work, Doug. You should do Tech article on grounding for shade tree mechanics like me !

Wow! No kidding and thanks Doug! I'm going to have to look at your pics real close. Got a lot going on over there!

I don't know why I've been struggling with it, but it's clearing up a bit. (and to think I give lunch and learns on electrical products to engineers!)

I ended up getting 10' of red and black to work with, so I may just run the ground all the way over to the PS frame and then use a braided strap from there for both the engine and body. (love free stuff!)

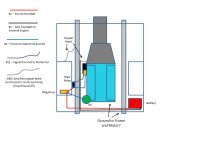
Please check out the hot side I have drawn up in the first two pics. I'm running a 3G and have the BCB mini starter. I can go from the Batt positive straight to the MegaFuse and then buss it from there, right?

Sure appreciate this forum and all of the help! Even though I sell this stuff, I have brain farts on the installation!

Any comments on the pics is appreciated.

Cheers, B2
 

Attachments

  • BatteryCableWiring.jpg
    BatteryCableWiring.jpg
    50 KB · Views: 60
  • BatteryCableWiring2.jpg
    BatteryCableWiring2.jpg
    50.2 KB · Views: 54
  • BatteryCableSupplies.jpg
    BatteryCableSupplies.jpg
    132.7 KB · Views: 50

Broncobowsher

Total hack
Joined
Jun 4, 2002
Messages
35,316
Photo 1 is pretty good
Photo 2 runs way too much ground for no good reason.
Neither has a good body ground. Too many connections between the battery and the body. It isn't the wire gauge that will cause problems, it is the connections. If you don't just run a lead off the battery directly to the body, do it just off the engine to the body. Don't put extra junction points routing through the frame first. Bad practice.

As for grounding the frame, you don't need much. Think about it, what is grounded to the frame? The engine, no that sits on rubber mounts. The body is on rubber as well. All the lights and light electrical stuff is on the body. Don't skimp the ground to the body. Bad ground gets you flickering lights, weird voltage dips and spikes, fried regulators, and other oddities that will drive you mad. So battery to engine. Battery to body (engine to body as an acceptable plan "B"). Engine to frame ground is the lowest priority.
 
OP
OP
bsquared

bsquared

Contributor
Sr. Member
Joined
Dec 4, 2010
Messages
963
Photo 1 is pretty good
Photo 2 runs way too much ground for no good reason.QUOTE]

Thank you B-Bowsher!
All good points. I did a mock run this eve and so long as the hot side looks okay, I think I'll run the length of the ground to the pass side. It will help clean up my install in a big way and I can run the braided cables for motor and body ground leads, clean, sweet and outta sight. Not worried about the wasted cable....already dedicated to this install and I'll have left overs.

Many thanks for the input on this. Would have sucked to do it without your help. Here's what I think is the latest. (winch added) So long as the hot side looks okay, I'm ready to crimp and pimp!

Cheers, B2
 

Attachments

  • BatteryCableWiring4.jpg
    BatteryCableWiring4.jpg
    52.6 KB · Views: 49
  • BattHSLinetoMegaFuse.JPG
    BattHSLinetoMegaFuse.JPG
    140 KB · Views: 50
  • BattPSGround.JPG
    BattPSGround.JPG
    125.6 KB · Views: 46

ntsqd

heratic car camper
Joined
Jan 30, 2005
Messages
3,448
Loc.
Upper SoKA
Ground the battery to engine block with large cable. I don't even like going to timing covers or front dress brackets as those put an unintentional joint in the circuit. Straight to the block itself. This isn't negotiable.

Then battery to body. Block to body if that works better. Then battery or block, which ever the previous grounding used, to the frame.

The frame will have a surprising amount of resistance if the circuit path crosses any welds. A low amp draw, even headlights, won't show this, but try starter current or winching current and it becomes a big deal.

Winch: straight to the battery. Nothing else.
 
Top