• Welcome to ClassicBroncos! - You are currently viewing the forums as a GUEST. To take advantage of all the site features, please take a moment to register. It's fast, simple and absolutely free. So please join our community today!
    If you have problems registering or can't log into your account, please contact Admin.

Sharp Motorsports 4600 Class Early Bronco

ntsqd

heratic car camper
Joined
Jan 30, 2005
Messages
3,306
Loc.
Upper SoKA
That one in the pic is my second one, inherited it from my grandfather. Might be older than me. And it's still in calibration! LOL....

True corner scales will have better resolution than this system, but the cost of this is significantly less and when speed is essential it is far faster to use.
 

Yeller

Contributor
Bronco Guru
Joined
Mar 27, 2012
Messages
6,181
Loc.
Rogers County Oklahoma
Corner weight scale that can be built in the shop:

If you make the ratio of the total length of the lever, including the the length of the torque wrench, to the length from the rim tab to the pivot 10:1 then the reading on the wrench is easy. 100 ft-lbs indicated is 1000 lbs on that wheel.

Best practice requires a helper. Set the pivot height such that with the tire just barely off the ground the beam is level. Lift the tire off the ground and put a piece of paper under it. Set the tire down and then while the helper is gently pulling on the paper you slowly push down on the wrench. When the paper slides free is your corner weight. Two of us, skilled in using this tool, could weigh a car, in the hot pits, and adjust the spring seats in less than 10 minutes.

The things I've never thought of! Thanks TS, got a new tool to build;D
 

ntsqd

heratic car camper
Joined
Jan 30, 2005
Messages
3,306
Loc.
Upper SoKA
You're welcome!

Tool was given to me years ago. I think that it came from Pegasus, but I've not seen anything like it offered for sale in a very long time.
 

Yeller

Contributor
Bronco Guru
Joined
Mar 27, 2012
Messages
6,181
Loc.
Rogers County Oklahoma
Shared this with my shop mates and one came up with using the tongue scale on the post, then you don't need the torque wrench and he could accurately measure is SxS stuff that is less than 200#.
 

ntsqd

heratic car camper
Joined
Jan 30, 2005
Messages
3,306
Loc.
Upper SoKA
Shared this with my shop mates and one came up with using the tongue scale on the post, then you don't need the torque wrench and he could accurately measure is SxS stuff that is less than 200#.
In the past I have pondered doing something like that using a valve spring tester, which seem to come with 300# or 600# gauges. That wasn't enough for a full size vehicle, but could work well for a side by each. The tongue scale makes it possible to use on a full size.

The lever on mine telescopes so that you can change the ratio. Would be easy to to make it 2:1 or 5:1 for lighter vehicles.

Ditto, like to see what y'all come up with.
 
OP
OP
LSharpNM

LSharpNM

Full Member
Joined
Mar 9, 2020
Messages
164
Maybe I need to start a side business selling cheap hydraulic corner scales ;D

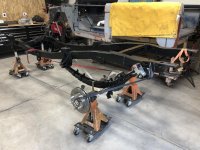
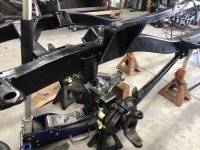
Not too much of an update today, but I managed to get most of the mounts I won't be using cut off the frame last weekend. I left the factory leaf spring hangers for now since I haven't committed to rear springs yet. I was shocked how much rust was hiding under the rear shock mounts No holes through the frame, but it is obviously a bit thin where it was covered. I might add some plate over those sections depending on what I end up doing for shock mounts.


The pile of removed bits

fetch


The frame looking a bit sleeker

fetch


I am going to pick up the tubing for the cage tomorrow. Ironically, Craig En Taggert in Las Cruces is the only steel supplier in the state that stocks DOM apparently %)


Oh, and Sharp Motorsports swag is now available on TeeSpring!

fetch


I hope Jon doesn't mind me pimping my swag on here, but we have men's and women's T-shirts and hoodies. Look good and support the team!
 

landshark99

Bronco Guru
Joined
Oct 13, 2011
Messages
1,401
when i cut off my rear shock mounts i also was concerned about the weakened areas and plated both sides with 1/4" plate and made another weld pass on the rear hangers. This bronco was a Colorado native and I was shocked on the rot there...

IMG_5770.jpg
 
OP
OP
LSharpNM

LSharpNM

Full Member
Joined
Mar 9, 2020
Messages
164
when i cut off my rear shock mounts i also was concerned about the weakened areas and plated both sides with 1/4" plate and made another weld pass on the rear hangers. This bronco was a Colorado native and I was shocked on the rot there...

View attachment 519557

Where else did you end up plating? Have you had any issues with cracks or damage since you've been racing? I read through your build thread a while back, but I don't recall all the details. I am planning on reinforcing the area around the steering box and track bar, but I was curious where other racers have been making reinforcements.
 

landshark99

Bronco Guru
Joined
Oct 13, 2011
Messages
1,401
Where else did you end up plating? Have you had any issues with cracks or damage since you've been racing? I read through your build thread a while back, but I don't recall all the details. I am planning on reinforcing the area around the steering box and track bar, but I was curious where other racers have been making reinforcements.

I haven't seen any cracks in the frame (last time I checked is after our crash from 2019). We did insert square tube into the ends of the frame horns and then plated it and welded the cage to the rear and front bumper/engine cage into the front.

I did plate both sides of the frame where the steering box mounts and cut off the old track bar mount and then customized one from Ruff Stuff and gusseted it to the frame and coil bucket.

After you tie in the main cage and especially the engine cage the flex is all but gone in the frame. My main concern was the factory welds holding up on the engine mounts, coil buckets, radius arm frame brackets, rear spring hangers etc. Obviously you wont have to worry about some of those but I made a couple of welding passes to close the gaps on those factory welds.

I plan on adding re-enforcements to the rear spring hangers before our race next month as insurance but they look fine even with 500lbs out back and about 2000 race miles on them

IMG_5788.jpg

I was trying to avoid adding a bunch of weight and just adding re-enforcements where needed. I figured all those early broncos in the 60's and 70's racing for years were just fine...
 
OP
OP
LSharpNM

LSharpNM

Full Member
Joined
Mar 9, 2020
Messages
164
My main concern was the factory welds holding up on the engine mounts, coil buckets, radius arm frame brackets, rear spring hangers etc. Obviously you wont have to worry about some of those but I made a couple of welding passes to close the gaps on those factory welds.

No kidding on those factory welds! I think Ray Charles must have been on the assembly line the day they put my frame together :eek:
 

markw

Contributor
Bronco Guru
Joined
Sep 10, 2009
Messages
2,053
The frame wants to flex upwards in the kick up from the radius arm mount to the spring bucket. Tied in cage helps but a hard hit will flex everything. Ask me how I know . Randy had diamond cut plate reinforcements in that area, wish I would’ve.


Sent from my iPhone using Tapatalk Pro
 
OP
OP
LSharpNM

LSharpNM

Full Member
Joined
Mar 9, 2020
Messages
164
The frame wants to flex upwards in the kick up from the radius arm mount to the spring bucket. Tied in cage helps but a hard hit will flex everything. Ask me how I know . Randy had diamond cut plate reinforcements in that area, wish I would’ve.


Sent from my iPhone using Tapatalk Pro

Any pictures of said reinforcements?
 

ntsqd

heratic car camper
Joined
Jan 30, 2005
Messages
3,306
Loc.
Upper SoKA
Something to be aware of is that when you plate some small part of the frame you make that part of the frame stiffer than the rest of the unplated frame. Where the frame changes from stiff to not so stiff is where it will eventually crack. If a part of the frame is flexing in a localized spot it means that the cage design is insufficient for the use. Rather than plating it, I'd look at how to tie that spot into the cage in a way that will make the whole thing stronger.
 
OP
OP
LSharpNM

LSharpNM

Full Member
Joined
Mar 9, 2020
Messages
164
Here's what 300' of DOM looks like ;D I got 4 sticks of 2"x.120", 2 sticks of 1.75"x.120", and 1/2 a stick of 1.5"x.120". I picked up tubing for a couple other guys too when I went down.

fetch
 

nvrstuk

Contributor
Just a Bronco driver for over 50 yrs!
Joined
Jul 31, 2001
Messages
8,923
Yup, would like to see some other home-made setups. Thanks TS!! :)
 
OP
OP
LSharpNM

LSharpNM

Full Member
Joined
Mar 9, 2020
Messages
164
I was finally able to find and read the BOM numbers for the axles from the beater Bronco II; I wish I had found them earlier because it would have saved me some headache :p The front was 603394-5 and came back as a '73 F100/F150 Dana 44 with 4.09 gears and an open carrier which I had figured out the hard way already. The rear axle was the real mystery since it had 3.5" tubes 9/16" lug nuts with left hand threads and a really heavy-looking center section casting with a non-machined boss for an ABS sensor, but a Dana 60-sized cover. The BOM for that axle was 605212-5 which came back as a 1984-85 E-350 Van SRW Full Float Dana 61 with a 4.10 open carrier. Apparently Dana 61s came with the stronger housings and large-bore spindles unlike standard Dana 60 full float rears, but the pinion is further offset than a regular Dana 60 (in order to accommodate 3.07 gear sets regular Dana 60s can't run) which means 4.10s are as deep as you can go without getting janky with spacers and non-standard bearing races. I had already been keeping my eyes open for a '99+ E350 full float Dana 60U, but I guess I really need to find one now.

For anyone else having trouble finding Dana BOM numbers, both of them were on the passenger-side axle tubes on the side with the cover. The numbers were only about 1/8" tall and not stamped very deeply into the tube which makes them really hard to see with paint, dirt, and/or rust on the tubes.

Dana 44 BOM about 2" to the left of the casting
fetch


Dana 61 BOM location
fetch


Before cutting the front axle housing, I measured the length fo the tubes from the ID with my best tape measure a few times. I hooked the end of the tape on the edge of the tube where it was pressed into the center section next to the carrier bearings and measured to the edge of the ID where the tube was pressed into the "C"s. Then I cut it up and left ~2.75" stubs of the original axle tube sticking out from the differential casting and "C"s to give me plenty of material to make plug welds and to help keep everything straight with the new tube sleeved over it.

fetch


The original tubing turned out to not be particularly round and was worst around the center section casting. It seems like whatever tooling Dana Spicer used to press the tubes and assemble the housings caused a bit of deformation creating an interference fit with the ID of the new DOM tubing. I used a sanding drum to take down the high spots and did a lot of test fitting with the DOM tubing to create a snug slip fit. I didn't need to remove a lot of material, but I took my time to avoid taking too much material off.

fetch


fetch


Then I rough-cut the new DOM tubing to length accounting for the change in inner shaft length by adding and subtracting the difference from my original measurements before cutting the housing. Then I sleeved the rough-cut tubes onto the housing and measured the distance from where the original tube was pressed into the center section to the edge of the ID where it pressed into the "C"s to determine the final amount to turn the DOM tubes down. Afterwards, I chucked the DOM up in a friend's lathe to turn them down to length, square the faces, and bevel the edges for welding. While I was over at that same friend's shop, I put the tubes up on his mill to drill the plug weld holes instead of trying to do it on my crappy Harbor Freight bench-top drill press ;D Proper machine tools are really nice; one day I'll be able to equip my shop with some real equipment :p

fetch


fetch


I also got the body tub back from the blaster's. It looks much better without the rattle-can camo job :cool: Unfortunately, the blasting revealed a few more cancer areas that will need to be addressed.

fetch
 
Last edited:

ntsqd

heratic car camper
Joined
Jan 30, 2005
Messages
3,306
Loc.
Upper SoKA
I learned this the hard way on a project a couple years ago. Round tubing is not actually round, it just looks like it is. It is actually not even very close to the specific diameter either. I found that Ø1.00" round tube could vary .03"-.05" in diameter pretty commonly.

Funny that the 35 spline clearance in a D60 topic should come up. I'm in the middle of building a semi-clone of the Yukon tool. It is only a semi-clone because I will be using a Hougen annular cutter instead of their shell mill. The annular cutter is designed for exactly this kind of cut where the shell mill really is not. It is not a surprise to me that the shell mill is good for maybe two housings max before it's toast. Once I'm finished making it I'll be detailing what I did in "My Distraction" build thread on GFB. So far it's looking like it can be built for about $300 and some time on the lathe with a little drill press and welding time thrown in.
 

landshark99

Bronco Guru
Joined
Oct 13, 2011
Messages
1,401
I had the same cancer in the rockers (along with 50lbs of body filler) and someone local had these: https://dufftuff.com/product/1-4-rocker-guards-1966-77-bronco/

so i went that way... i kept having to tell myself this isn't a restore and it will get messed up so made it easy on myself...

I did replace some of the door posts, but just made sure there were structurally sound. The pans and rear floor were really bad in the one i picked up and required replacement/fabrication...
 
Top