• Welcome to ClassicBroncos! - You are currently viewing the forums as a GUEST. To take advantage of all the site features, please take a moment to register. It's fast, simple and absolutely free. So please join our community today!
    If you have problems registering or can't log into your account, please contact Admin.

Vintage Air Gen V Install

bronco italiano

Contributor
Bronco Guru
Joined
Feb 1, 2004
Messages
2,173
Thank you so much for all your time. I was going insane trying to figure 2 wires out!!
I did see your block now that you re-mentioned it!!
Thank you.
 

bronco italiano

Contributor
Bronco Guru
Joined
Feb 1, 2004
Messages
2,173
What type/rating diode?

-I apologize as I am an idiot with the electrical diagrams/symbols.
-So is tie the diode into the two wires from the pigtail to make one wire that connect to the EFI Harness blue wire?
-I saw 904's picture but it was a little hard to see.
 
OP
OP
ba123

ba123

Contributor
Bronco Guru
Joined
Oct 29, 2022
Messages
1,948
Loc.
CA
Like this:
Ground is green, positive is red, the connector blue.

1695703303127.png
 

bronco italiano

Contributor
Bronco Guru
Joined
Feb 1, 2004
Messages
2,173
That is great. The motorcraft pigtail I bought has two black wires and no marking for ground or positive. Nor does the AC compressor
 
OP
OP
ba123

ba123

Contributor
Bronco Guru
Joined
Oct 29, 2022
Messages
1,948
Loc.
CA
That is great. The motorcraft pigtail I bought has two black wires and no marking for ground or positive. Nor does the AC compressor
Yup, I got the same one which is why I had to go through that. Glad I could help you not go through it.
 
OP
OP
ba123

ba123

Contributor
Bronco Guru
Joined
Oct 29, 2022
Messages
1,948
Loc.
CA
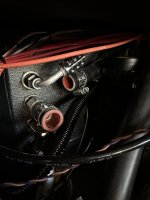
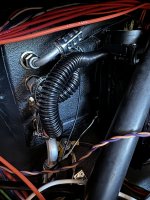
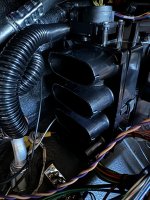
So, I really struggled with what to do with these inside the cab heater fittings. I’m not sure but maybe there is less room with the Gen V or maybe less room if you are running individual vents, but there is no room.

Certainly no worry at all and plenty of room if you don’t out the bulkhead where I did. If you do run it there, maybe my methods will help. I tried lots of stuff. The aluminum fittings standard will run into the vent outlets. This is the only thing I could come up with.

IMG_6286.jpeg IMG_6287.jpeg IMG_6288.jpeg
This stainless flex stuff, I’ve really grown to love. It’s not expensive, is stainless, and bends how you want it to. I did read crappy reviews about the rubber connectors they give you with the kit, so I went all out and got silicone connectors that added up quickly but at least I won’t have to worry about it. I hope.

I didn’t have to buy the kit for this, I had a ton left over from doing this inside my engine compartment, but kit here:
https://www.amazon.com/gp/product/B07SZT4KKL/?tag=classicbroncos-20

The stainless hose is 3/4” and the fittings are 5/8” so you need an adapter. You could use what they give you in the kit, but I used these:
https://www.amazon.com/gp/product/B07BQV8MR8/?tag=classicbroncos-20

I got a good amount of stuff from HPS and seems like good stuff. You can order it directly but price lower on Amazon slightly and occasionally it goes even lower. I have regular heater hose from the evap to the heater valve and then this from the valve to the bulkhead. I also have regular heater hose on the out to the bulkhead and just spliced in a connector as I didn’t have enough to run the whole way and would have been too difficult to be sure I cut the length just right. I wanted (and needed) to be able to pull the return with the evap mounted in order to get the size right.

Oh, and on those HPS connectors, I cut 3/4” I think on each side of the ones on the bulkhead.
 
Last edited:

bronco italiano

Contributor
Bronco Guru
Joined
Feb 1, 2004
Messages
2,173
Wow. Lots of layout work.
Had you routed the way Vintage air suggests, would the clearance issues you have not been a problem?
 
OP
OP
ba123

ba123

Contributor
Bronco Guru
Joined
Oct 29, 2022
Messages
1,948
Loc.
CA
No, I did absolutely nothing vintage air suggests. The way they say to do it, the install is extremely simple. Anything that I’ve done that is complicated, is not what VA suggests.

So, so anyone considering this install, I’d say on a scale of difficulty from 1-10 (easy-hard), if you have the tools and your dash out, I’d give it a 3-4 the way they recommend doing it.

For me, I wanted it my way, I wanted my engine compartment pretty and minimal things showing and higher tech controls, it was a good amount more difficult. You could even route the hoses through the inner fender and that would be much easier than what I did, but I didn’t want to see hoses.
 

bronco italiano

Contributor
Bronco Guru
Joined
Feb 1, 2004
Messages
2,173
I personally don't like the VA hose routing recommendations because it is unsightly, but simple indeed.
 
OP
OP
ba123

ba123

Contributor
Bronco Guru
Joined
Oct 29, 2022
Messages
1,948
Loc.
CA
So…had some troubles with getting my radiator in right and ended up having to ditch the #8 line I made. It was too tight a fit and I needed that 1/8-1/4” extra.

So, while I’m at it, since I have to redo it anyway, I decided to see what it would be like if I flipped it around and ran the #6 hard line underneath like the BC kit does.

First off, using the same holes I drilled on the bottom, it moved it slightly toward the pass side, and second off, it fit so much better. I’ll have to modify or make a top bracket as those holes no longer line up and it also want to push it further away, which I don’t want, so will see. Parts ordered.
 
OP
OP
ba123

ba123

Contributor
Bronco Guru
Joined
Oct 29, 2022
Messages
1,948
Loc.
CA
Got the tube today and sadly, instead of looking before ordering, I assumed I needed the same male/female fittings on each and end really need a double female (insert distasteful male jokes here, sorry if any ladies reading).

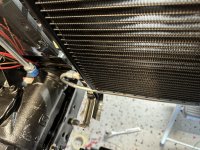
Here is the better fit of the condenser:

IMG_6330.jpeg
Since I already got the line, I figured it would not be worth returning and I’d use it to make a line how I want it.

1696284495467.png

1696284570351.png

If anyone wants my “template” after I make the next line, they are welcome to it for the cost of shipping.

[Btw, @admin , not sure what the picture size limit is but uploading pics from my new iPhone has been really difficult as it keeps saying it’s too large. I’ve been having to take screenshots of my pics to post them often.]
 
Last edited:
OP
OP
ba123

ba123

Contributor
Bronco Guru
Joined
Oct 29, 2022
Messages
1,948
Loc.
CA
Pic with the radiator in and line taped in place:
1696285690936.jpeg
 
OP
OP
ba123

ba123

Contributor
Bronco Guru
Joined
Oct 29, 2022
Messages
1,948
Loc.
CA
Sometimes and some things come quickly from Summit

New correct line already came. Def easier the second time.
IMG_6348.jpeg IMG_6349.jpeg
 
OP
OP
ba123

ba123

Contributor
Bronco Guru
Joined
Oct 29, 2022
Messages
1,948
Loc.
CA
And then for the bracket, I was able to manipulate it a bit so it wouldn’t push the condenser away and then drill new holes that line up.
IMG_6351.jpeg
 
OP
OP
ba123

ba123

Contributor
Bronco Guru
Joined
Oct 29, 2022
Messages
1,948
Loc.
CA
Finally got my redone wires from Dakota Digital after USPS lost the first one they sent. ✅

I might have to put another end on the #8 hose on the condenser but won’t know for sure until I do a couple more things.

Need to do the ducting once the dash is in.

Otherwise, this is done.

@Madgyver confirming that I can see the sight glass with the battery in.
 
OP
OP
ba123

ba123

Contributor
Bronco Guru
Joined
Oct 29, 2022
Messages
1,948
Loc.
CA
Ok, so as you’ve seen, the way my life experiences work, I’m the “trouble-finder guy” for literally everything. If some product has a 1% chance of having an issue, it’s me that will find it (or it finds me). So if I can get through something, chances are, it’ll be easier for you. Now, moving on…

So, the compressor relay. Is my brain not working, or is something wrong with either this relay or the VA wiring of the really. Please give input.

86 & 30 are hot always
85 is switched ground
87 is power to the compressor

Seems ok to me, but when I connect power and there is NO GROUND to the relay, the relay switches closed and sends power to the compressor. If I remove the relay while hot, I feel it switch off and plug it back in, I feel it switch on.

Again, there is no ground to close the circuit. No ground at all to the relay. There is only power. What’s going on?
 
OP
OP
ba123

ba123

Contributor
Bronco Guru
Joined
Oct 29, 2022
Messages
1,948
Loc.
CA
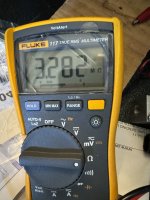
Nvm. Apparently, it fails the continuity test but my MS3 is putting out the most slight ground to it that this is enough to trigger the relay. Will have to figure out how to change this or use another output.

IMG_6381.jpeg
 
Top