• Welcome to ClassicBroncos! - You are currently viewing the forums as a GUEST. To take advantage of all the site features, please take a moment to register. It's fast, simple and absolutely free. So please join our community today!
    If you have problems registering or can't log into your account, please contact Admin.

Yet another tail light wiring issue LEDs

broncobuddha

Jr. Member
Joined
Apr 9, 2007
Messages
233
Been looking through the archives and found some stuff but I'm at a bit of a loss.

Have a 73' with stock wiring. Now the tail lights and rear side markers aren't working.

Two things of note:

All stock lights were working prior to whatever I did.
I'm not Joe Electrician so that may be part of the issue.

I decided to upgrade the exterior lighting on the bronco to LED with new LED headlights (with upgraded harness there) and LED side markers with new lenses and LED tail light boards (with relay for signals) all sourced from Tom's.

Headlights and turn signals up front work. I had all side markers working as well when I got to the tail lights.

Tail light buckets are originals.

I removed the stock bulbs and pulled the buckets out to splice in the relay things to help the signals work. Both boards are fine. I inadvertently spliced into the yellow wire thinking it was power when in fact it's the ground on that end. so they stopped working. I put the stock bulb back in and set to troubleshooting.

Thinking i messed up the ground somehow. I took a 12 gauge wire that I gator clipped to the neg battery terminal and ran it down the outside of the vehicle to the back. When I plugged the bucket harness in sideways, with the power hooked up but ground not, and used the test wire, the bulb lit up. Trying the new LED board lights up dimly and no matter how I make contact it won't stay bright (like it's supposed to).

I traced the wiring from the passenger side across the tailgate to the driver's side I saw the brown and green wires not connected to anything. As if they hand't been connected all along but that makes no sense.

I tried the splice connector for the drivers side and got the same results.

I found the main loom that comes from the front down the driver's side frame rail where the tail lights supposedly tie in. I believe there's supposed to be one of those male/female connectors that's supposed to tie into the light harness. Mine looks all cobbled together and even saw some butt splices in use.

I've owned the vehicle since 1995 so this was done before I've owned it.

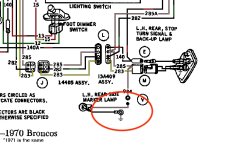
Based on this diagram from an archive thread I found, I'm not sure where to go from here. Along the bottom of the pic, the connectors in the middle seem to be what I'm missing. Yet the lights and signals have worked all this time. I tried butt splicing the brown and green wires together but that didn't work.

attachment.php
 

MarsChariot

Contributor
Planetary Offroader
Joined
Oct 12, 2004
Messages
2,499
Loc.
Albuquerque, New Mexico
Check the ground wires inside the tail light buckets. Otherwise all the power is coming from the lower left corner of your circuit diagram and would be a good start, as you seem to be targeting already.
 

diggs00

Sr. Member
Joined
Jul 8, 2016
Messages
355
Check the ground wires inside the tail light buckets. Otherwise all the power is coming from the lower left corner of your circuit diagram and would be a good start, as you seem to be targeting already.

My 76 the buckets to the body is the ground.
 

ared77

Contributor
Bronco Guru
Joined
Apr 21, 2013
Messages
2,939
"I inadvertently spliced into the yellow wire thinking it was power when in fact it's the ground on that end. so they stopped working. I put the stock bulb back in and set to troubleshooting.

Thinking i messed up the ground somehow. I took a 12 gauge wire that I gator clipped to the neg battery terminal and ran it down the outside of the vehicle to the back. When I plugged the bucket harness in sideways, with the power hooked up but ground not, and used the test wire, the bulb lit up. Trying the new LED board lights up dimly and no matter how I make contact it won't stay bright (like it's supposed to).

I traced the wiring from the passenger side across the tailgate to the driver's side I saw the brown and green wires not connected to anything. As if they hand't been connected all along but that makes no sense.

I tried the splice connector for the drivers side and got the same results.

I found the main loom that comes from the front down the driver's side frame rail where the tail lights supposedly tie in. I believe there's supposed to be one of those male/female connectors that's supposed to tie into the light harness. Mine looks all cobbled together and even saw some butt splices in use."

-------------------------------------------------------------------------------------
Because of this part of the story you may be better off replacing the rear wiring harness, just so you can get back to square one. Or if somebody you know is good on electric work maybe get them to help you? Good luck!
 

charlie6976

Sr. Member
Joined
Jan 19, 2014
Messages
404
Loc.
Grand Coulee WA
I switched to LEDs all around, including 'taillight board'. Just used two LED flashers, one turn signal and one for four way flashers. Did not use an LED resister in the system.
 

Slowleak

Bronco Guru
Joined
Sep 12, 2013
Messages
3,818
Loc.
Georgia
LED resistors cause a lot of issues. Its much easier to just change the flasher to a solid state led flasher instead of cutting and splicing the harness.

Polarity cannot be reversed when using LEDs so make sure you have not reversed wires at the LED boards....
 

Bronco-Brian

Contributor
Jr. Member
Joined
Jun 30, 2015
Messages
289
Loc.
Lake Oswego, OR
The body serves as ground for all rear lights. When testing the lights if removed from the body, you need to jumper a ground to the taillight housings. Make sure you have good ground before proceeding on your tests. As far as the Tom's LEDs go, I have these in my bronco and they work great - 1st time out of the box. The LED's will only work with power onto its power side - if they aren't working on side markers, reverse the bulb. On the taillights, Yellow is park and turn signal Left, Green is same for right, Tan is running lights. The resistor goes from turn signal to ground do this for each side, otherwise your stock flasher will not switch.

The finding of "wires not connected to anything" are likely some old trailer connector leftovers. Might be a good time to clean that up or tape it securely.
 
OP
OP
broncobuddha

broncobuddha

Jr. Member
Joined
Apr 9, 2007
Messages
233
Thanks all. At this point I'm almost ready to just use standard LEDs instead of the boards to save some trouble.

I'd like to have the stock connectors that tie the rear harness into the driver's frame up to the firewall section. Anyone know roughly how far down from the front that was?

I know one set of wires that were cut off and off to the side (another green, brown, black and yellow) were most likely a towing harness of some sort. The green and brown that I found not connected (and cut) were on the driver's side of the gas tank and they run back over to the passenger bucket. I've verified that's where they route.

Just don't understand how things were working as long as they did.

For the rear running light/side markers) I had them working as LEDs before I started messing with this. I can try flipping them and see what happens.

I wanted to take this time as well to make sure my reverse lights and license plate (which have never worked) get sorted.


I'll add that hands down the LED headlights not the ring version but the standard headlamps with the LED bulbs and the upgraded harness from Tom's are hands down one of the best upgrades I ever done to my EB.
 
Last edited:

MarsChariot

Contributor
Planetary Offroader
Joined
Oct 12, 2004
Messages
2,499
Loc.
Albuquerque, New Mexico
There is a ground wire behind the buckets. But I think it must be for the side marker lights. In any case, it is a circular termination like this example held in place with a sheet metal screw behind the buckets.
 

Attachments

  • 17881_14045_popup.jpg
    17881_14045_popup.jpg
    90.1 KB · Views: 27
  • side_marker.jpg
    side_marker.jpg
    108.4 KB · Views: 26
OP
OP
broncobuddha

broncobuddha

Jr. Member
Joined
Apr 9, 2007
Messages
233
Update:

Got the lights/brake lights working and the rear side markers.

Turn signals not working even though I used those relays that came with the kit.

Maybe I hooked them up wrong but the front signals don't work now either. Someone mentioned a solid state flasher? Have more info on that?

I unwrapped more tape near the end of the harness coming from the front. It allowed me to see better where I needed to splice things together using the diagram I posted.

It's progress anyways...

Brian you mentioned using the led boards from Tom's. Did you have issue with the stock bucket bolt heads hitting the foam backing of the boards?

dbdb48a0c961daa2b4cf83114f9d215d.jpg


Sent from my Pixel 4 XL using Tapatalk
 
OP
OP
broncobuddha

broncobuddha

Jr. Member
Joined
Apr 9, 2007
Messages
233
Those who mentioned getting a LED flasher instead of messing with the resistors, you got a part number?

Not finding anything locally.

Sent from my Pixel 4 XL using Tapatalk
 

diggs00

Sr. Member
Joined
Jul 8, 2016
Messages
355
Awesome thanks. Picked one up at NAPA. Plugged it up and grounded and nothing. May still have some wires screwed up. Won't flash but will manually if I move the signal lever back and forth and only if I have the running lights on.

Sent from my Pixel 4 XL using Tapatalk


make sure you have the 12V wire going to the B+ terminal on the flasher
 
OP
OP
broncobuddha

broncobuddha

Jr. Member
Joined
Apr 9, 2007
Messages
233
So the prongs are oriented one way. So did you slit the plug housing so you could reverse them?


Sent from my Pixel 4 XL using Tapatalk
 

diggs00

Sr. Member
Joined
Jul 8, 2016
Messages
355
I kept stock housing and connected new wires from stock housing to flasher using spade female and male terminal ends on the wires
 

diggs00

Sr. Member
Joined
Jul 8, 2016
Messages
355
Check voltage and orientation first on the wires coming out of stock housing and see if the 12v wire orients to the B+ on the flasher , if not do what I did
 
Top