


Community
Message Forum
Photo Gallery
Event Calendar
Book Reviews
Bronco Wallpaper
Bronco FAQ
Link Back to CB!
Photo Gallery
Event Calendar
Book Reviews
Bronco Wallpaper
Bronco FAQ
Link Back to CB!
Buy / Sell


Bronco Tech
3 Arm Wiper Setup
Fix Motor Mount
Roll Cage Braces
Throttle Body 65mm
Wheel Alignment
Heat Riser Replacement
Vent Window Repair
Center Console Mount
Straighten Bumper
Ford 6R80 6 spd
More Tech...
Fix Motor Mount
Roll Cage Braces
Throttle Body 65mm
Wheel Alignment
Heat Riser Replacement
Vent Window Repair
Center Console Mount
Straighten Bumper
Ford 6R80 6 spd
More Tech...

Install the app
-
Welcome to ClassicBroncos! - You are currently viewing the forums as a GUEST. To take advantage of all the site features, please take a moment to register. It's fast, simple and absolutely free. So please join our community today!If you have problems registering or can't log into your account, please contact Admin.
You are using an out of date browser. It may not display this or other websites correctly.
You should upgrade or use an alternative browser.
You should upgrade or use an alternative browser.
Third times a charm v3.0
- Thread starter JSmall
- Start date
Fireball05
Bronco Guru
- Joined
- Oct 7, 2012
- Messages
- 1,822
Were you having door alignment trouble originally? Were the pins/bushings wore and needed replaced? Or did you just did to adjust the doors to fit the soft top?
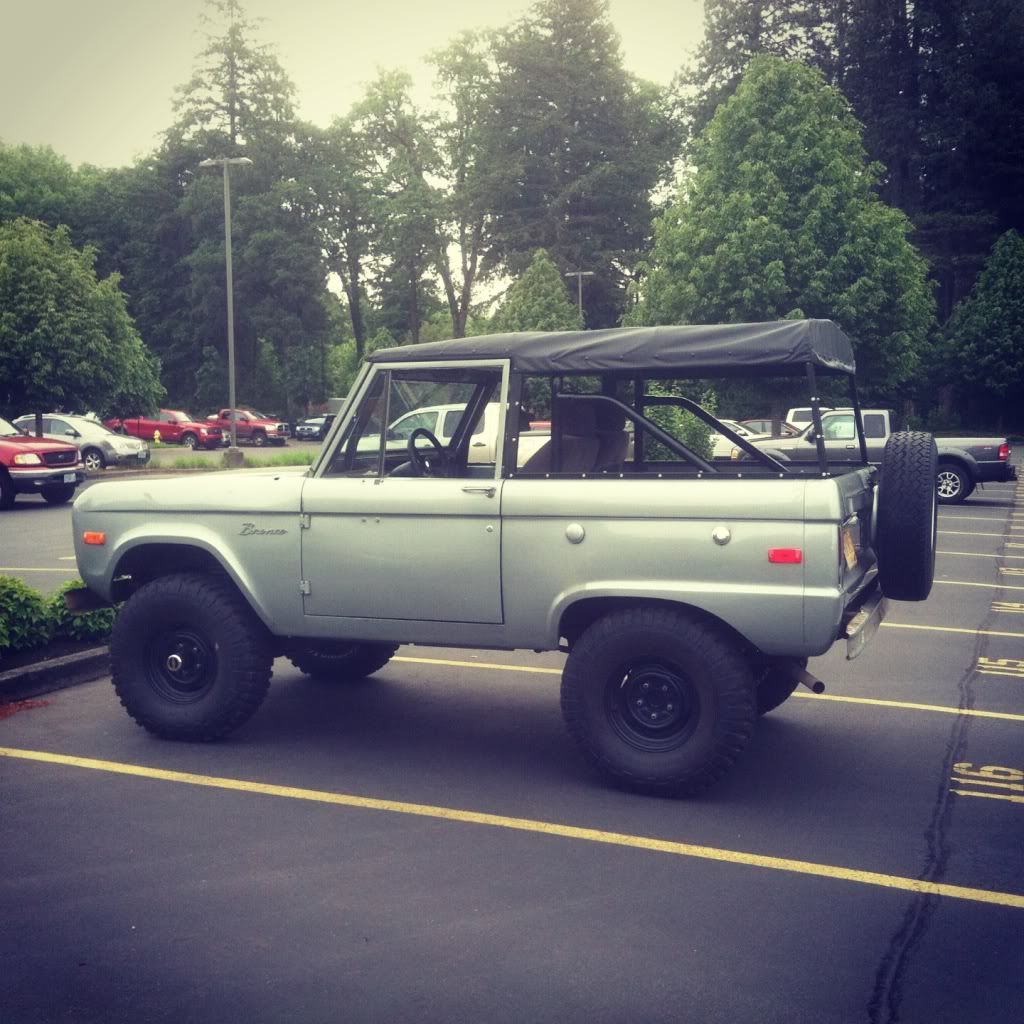
I've got my doors fitted pretty nicely to the hardtop. Wouldn't be too excited if the soft top needed them changed around. I guess it's hard to have your cake and eat it too...
I've got my doors fitted pretty nicely to the hardtop. Wouldn't be too excited if the soft top needed them changed around. I guess it's hard to have your cake and eat it too...
OP
OP
JSmall
Bronco Guru
- Joined
- Feb 18, 2004
- Messages
- 3,223
Were you having door alignment trouble originally? Were the pins/bushings wore and needed replaced? Or did you just did to adjust the doors to fit the soft top?
I've got my doors fitted pretty nicely to the hardtop. Wouldn't be too excited if the soft top needed them changed around. I guess it's hard to have your cake and eat it too...
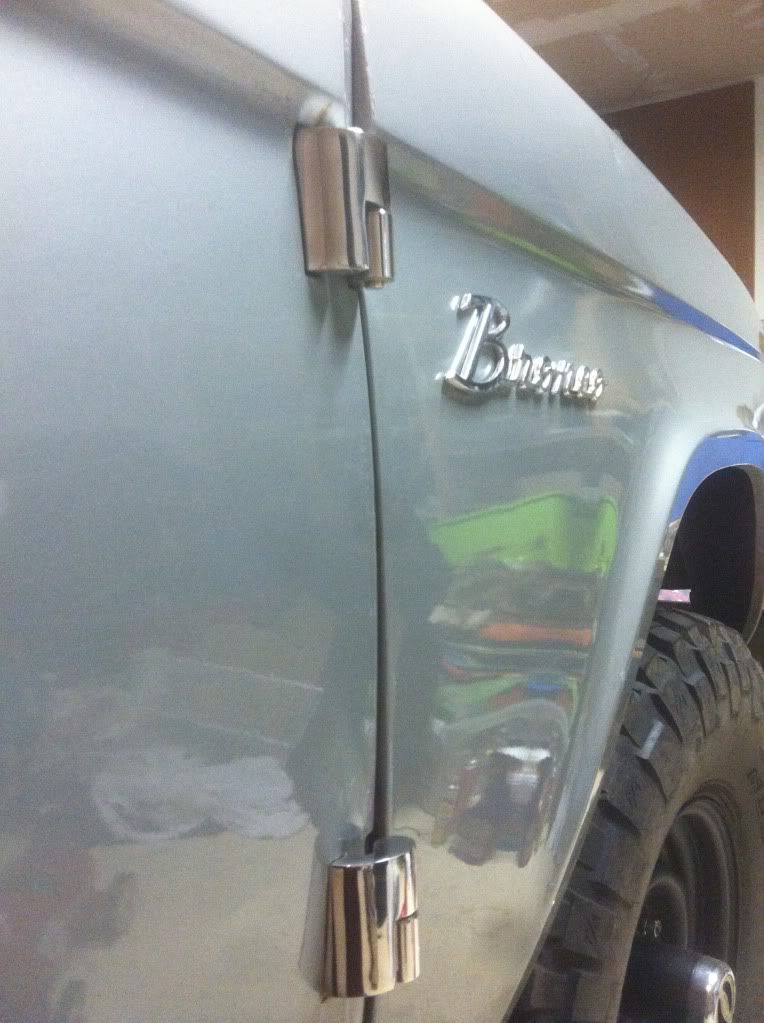
My door gaps weren't perfect with my hard top, but they would open and close without issue. I think the tolerances are tighter with the soft top frame. I figured the new hinges would take away any doubt that the issues I'm having are due to 36 year old hinges.
I'm working with Chuck right now on some of my issues. He game me a few suggestions so I'll give them a try and report back.
I'm sure I could have purchased a pin replacement kit, but I like to install the parts I want if I'm making a change. It gets expensive, but I think it will show when I can this thing on the road.
motoman
Bronco Guru
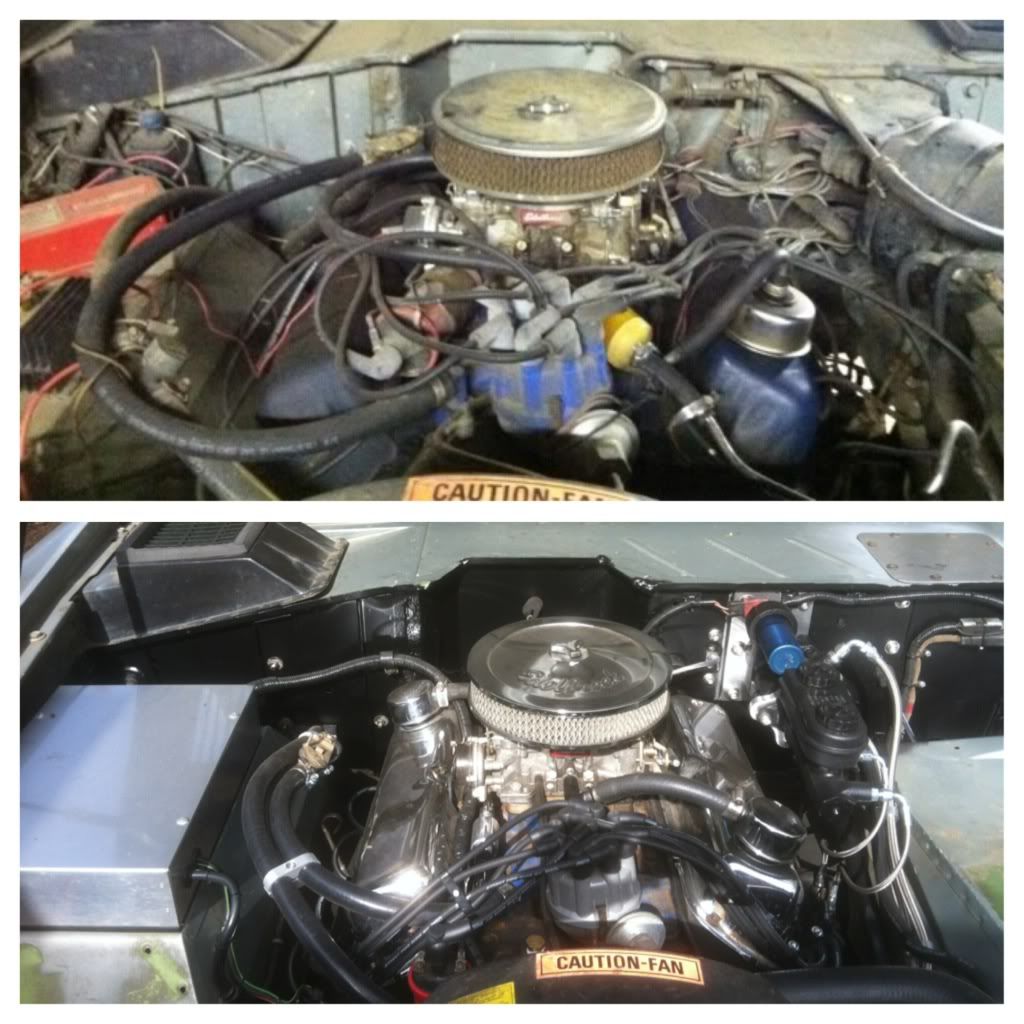
Absolutely love the before and after pictures. Job very well done! Very clean.... and the shots of your truck from the outside are astounding! Again job well done! Keep it up!
OP
OP
JSmall
Bronco Guru
- Joined
- Feb 18, 2004
- Messages
- 3,223
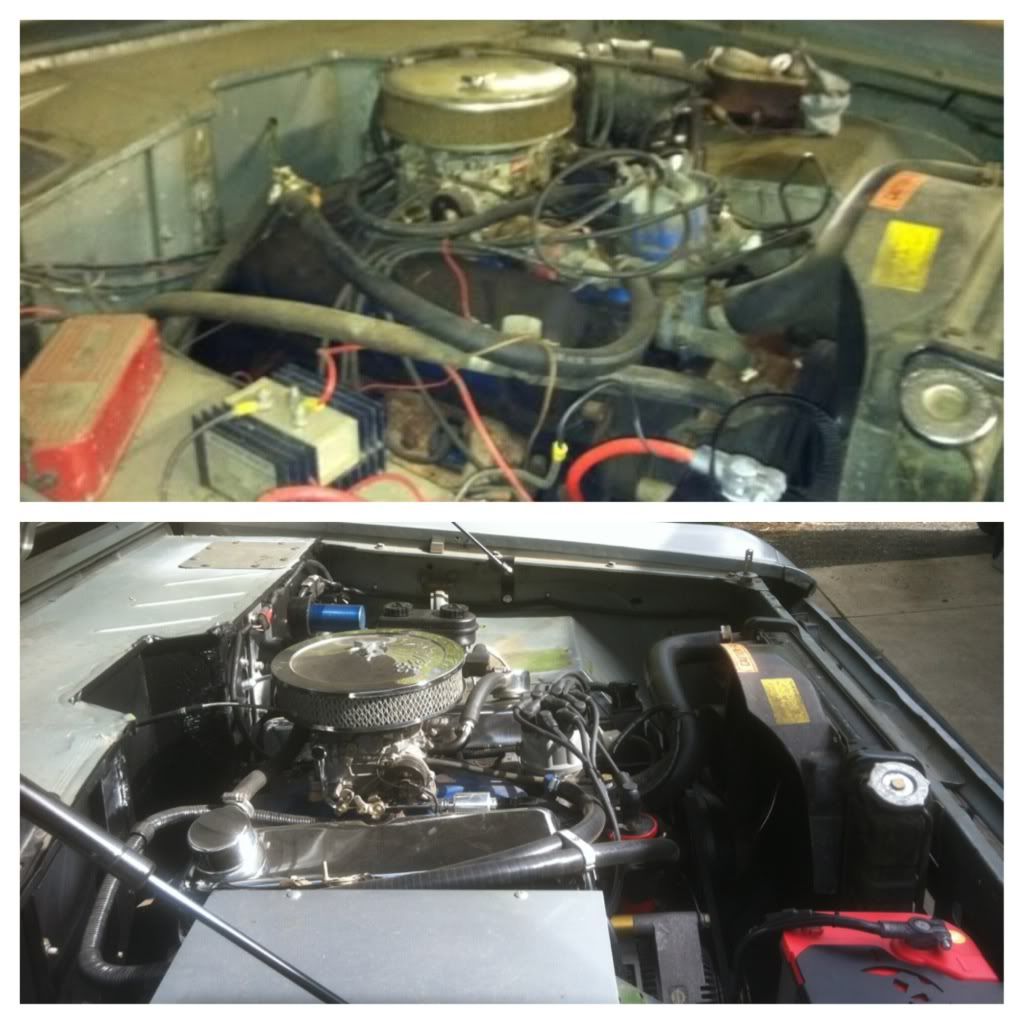
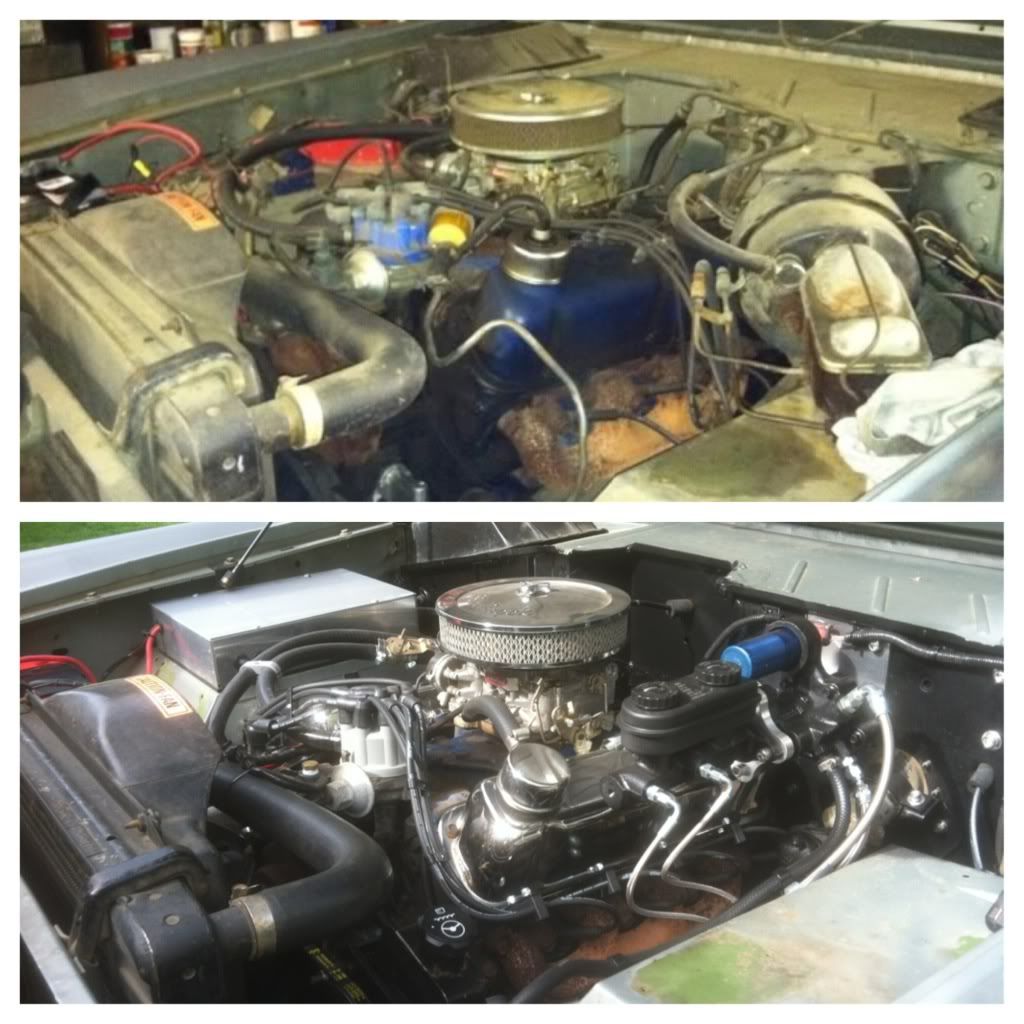
The engine cleanup just upped the value of your sweet rig by a couple grand. Looking good.
Absolutely love the before and after pictures. Job very well done! Very clean.... and the shots of your truck from the outside are astounding! Again job well done! Keep it up!
Thank you! I can still remember saying "where do I start...this thing is a mess" the first time I opened the hood. It took awhile to get to this point and I still have lots to do, but I'm happy with the progress.
OP
OP
JSmall
Bronco Guru
- Joined
- Feb 18, 2004
- Messages
- 3,223
Absolutely love the before and after pictures. Job very well done! Very clean.... and the shots of your truck from the outside are astounding! Again job well done! Keep it up!
I owe the sweet looking HB setup to you and your web sight.
motoman
Bronco Guru
I owe the sweet looking HB setup to you and your web sight.
Glad I could help amigo! I get alot of emails about that write up!
chuck
Bronco Guru
The last bow is held by 2 bolts on each side. Put only the front bolt in when you install the rear bow. After the canvas is on attach the adjuster on each side and slide the rear bow back to adjust the canvas. Then install the 2ed bolt. Be sure to have the upper door area adjusted before adjusting the rear bow. You can see the rear bow and 2 bolts installed in the above picture.My plan all along has always been garage art...I thought everyone knew that
I have the same thoughts as you. Not sure where the adjustment comes from. I'm hoping Chuck chimes in on the other post to explain. If not, I can always call.
OP
OP
JSmall
Bronco Guru
- Joined
- Feb 18, 2004
- Messages
- 3,223
The last bow is held by 2 bolts on each side. Put only the front bolt in when you install the rear bow. After the canvas is on attach the adjuster on each side and slide the rear bow back to adjust the canvas. Then install the 2ed bolt. Be sure to have the upper door area adjusted before adjusting the rear bow. You can see the rear bow and 2 bolts installed in the above picture.
Thanks Chuck! I'll follow these steps when I install the canvas again. I'm getting the doors to fit and then I'll try the canvas again. I'll give you a call when I'm done with that step.
broncoitis
Bronco Guru
- Joined
- Jul 23, 2010
- Messages
- 4,449
Top is lookin good! Saw one at BYOB and it is a nice and sturdy top for sure. It looks pretty cool as well! ;D
The engine bay area came out really nice! Great Job!!!!
The engine bay area came out really nice! Great Job!!!!
OP
OP
JSmall
Bronco Guru
- Joined
- Feb 18, 2004
- Messages
- 3,223
Top is lookin good! Saw one at BYOB and it is a nice and sturdy top for sure. It looks pretty cool as well! ;D
The engine bay area came out really nice! Great Job!!!!
Thanks. I think some Special Decor stripes would set it off real nice
")
Crawdad
Bronco Guru
- Joined
- Feb 16, 2011
- Messages
- 3,635
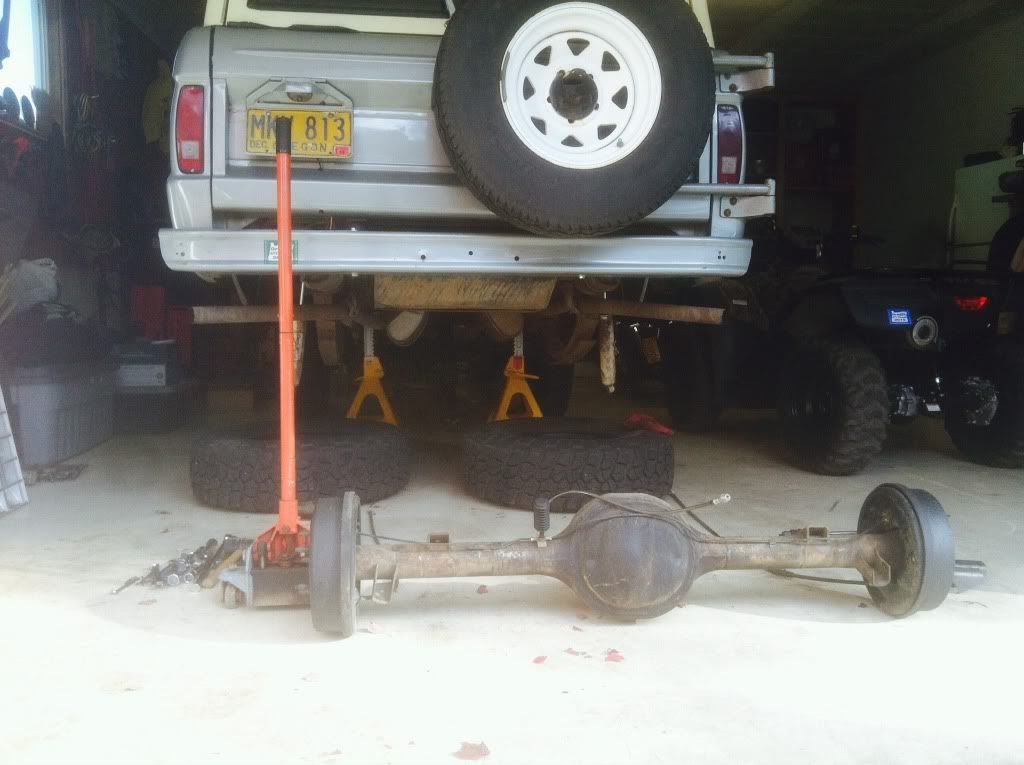
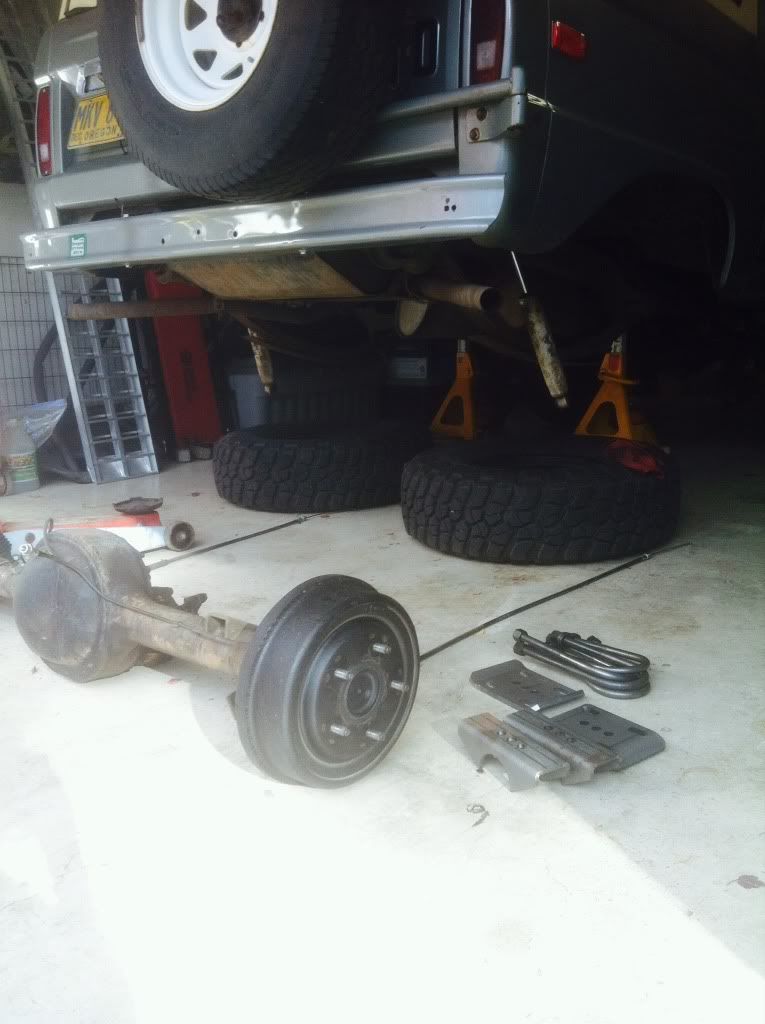
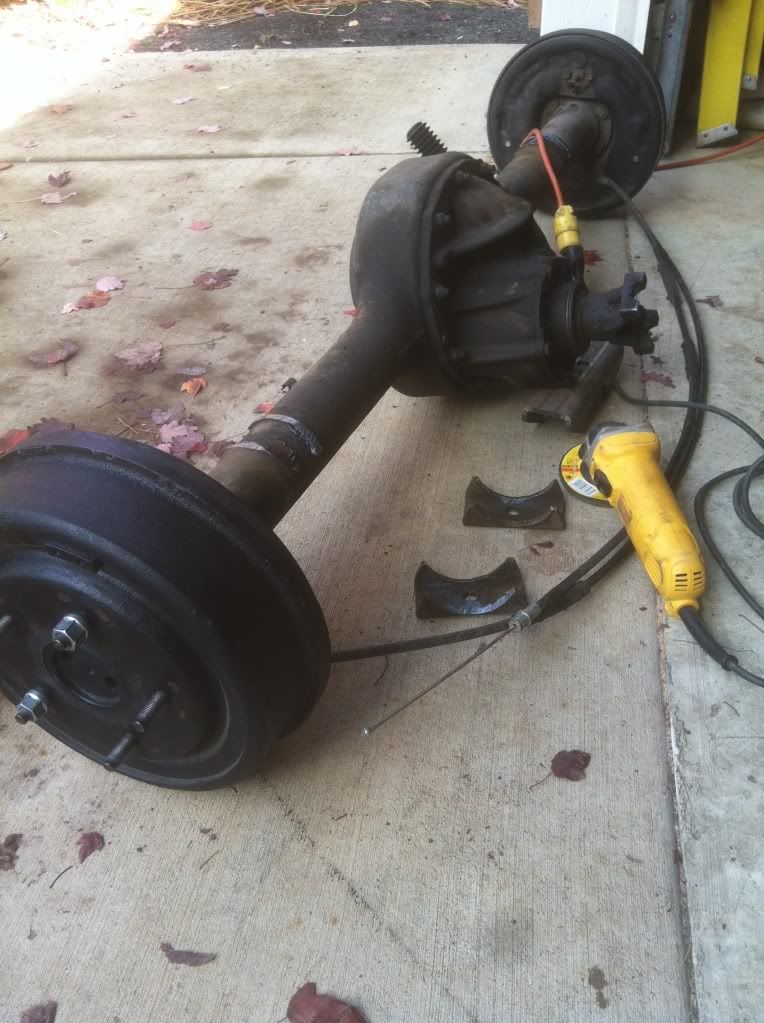
I'm looking forward to you doing this upgrade, please take lots of pics! I got one question though. Couldn't you just drill another equal size hole one inch back from the original hole on the spring pad? I'm curious how the U bolts will line up when the axle is pushed back.
OP
OP
JSmall
Bronco Guru
- Joined
- Feb 18, 2004
- Messages
- 3,223
I'm looking forward to you doing this upgrade, please take lots of pics! I got one question though. Couldn't you just drill another equal size hole one inch back from the original hole on the spring pad? I'm curious how the U bolts will line up when the axle is pushed back.
My pinion angle isn't correct so I'm rotating that as well. I have the Ruffstuff perches, top plates and U bolts so I won't have an issue.
Similar threads
- Replies
- 8
- Views
- 1K
- Replies
- 14
- Views
- 472
- Locked
City: Midland
Price: $250
- Replies
- 3
- Views
- 262