


Removing your Bronco Dash
Tech article by IowaMike and filed under - Dash & Guages, InteriorTech article by Mike Henningsen (IowaMike)
Since I had to ask several questions when I removed my dash, I’m sure there are others with some of the same issues; here’s how I ended up doing it:

This was the starting point, an intact dash. First thing to do would be get the W/S out of the way. Do this by removing the bolts holding the W/S to the top if the top is still installed and loosening the rest of the top to body bolts. In hindsight, I would suggest removing the top completely if possible (storage space was my reason for not doing exactly that). Disconnect the wiring for the wiper motor and/or wiper motor cover light at the connectors behind the dash on the left side. This will allow the wire bundle the slack needed to lower the W/S. Next remove the large bolts that go through the dash into the W/S frame (one on each side).

With this done, the W/S should go forward to give you access to the screws that were hidden on the front side of the dash.


Remove these screws (I think there are seven of them), make sure you get the dash screws and not the dash pad screws (the harder ones to get to, I used an offset screwdriver). Then go back to the inside of the cab. Disconnect all the wiring you can from the back of the dash including ignition switch, headlight switch, hazards, etc. Unclamp the main wire bundle that runs in the trough formed by the lower back of the dash. Disconnect the heater control cables by loosening the screw on the cable clamps and slipping the cable spring loop off the pin. 2 of these are under the dash and one is in the engine compartment, make sure you disconnect all 3. This would also be a good time to remove the steering wheel, turn signal lever, and column shift lever if not already off. Now you can remove the steering column shroud and the remaining bolts/screws holding the dash in place.
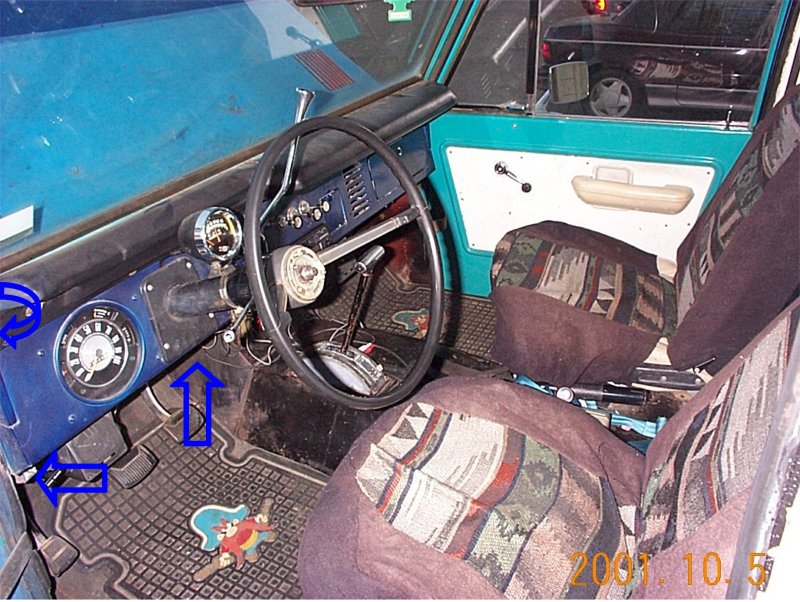
The emergency brake pedal assembly may have to be removed to get to the bracket bolts on the lower left attach point. The curved arrow in the picture is referencing the outboard most attach bolt on the side of the dash. There is also 1 screw in the center of the dash just below the dash pad. The right side attach points are located just like the left side depictions. With everything disconnected, double check that you didn’t miss something. The dash isn’t heavy but trying to pull it out and finding something still connected can get interesting in a hurry, especially if there’s not a second set of hands around to help. The end result will look like this:

Now you can tackle any rust, wiring, or dash modification issues a little easier.by Mike Henningsen
September 20th, 2010 at 9:50 am
i just bought a 21 circuit should be here anyday. send some more pics on how your ran your wires i want mine to look good like yours
September 21st, 2010 at 3:31 pm
It’s still in pieces as it’s taken a back burner to 3 moves & other projects. Life has gotten in the way of any progress.