• Just a reminder that you won't be able to start new posts or reply to existings posts in the Archive forum.

    This is where all the old posts go so they can still be used for reference and searched.
  • Welcome to ClassicBroncos! - You are currently viewing the forums as a GUEST. To take advantage of all the site features, please take a moment to register. It's fast, simple and absolutely free. So please join our community today!
    If you have problems registering or can't log into your account, please contact Admin.

1971 Stroppe Baja Restoration

OP
OP
Baja71

Baja71

Bronco Guru
Joined
Oct 16, 2004
Messages
2,908
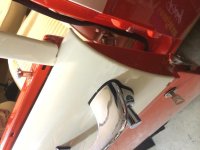
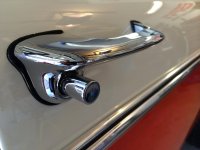
Body chrome was next. All new hardware. This stuff is a pretty easy install but be careful with your paint.
 

Attachments

  • IMG_5523.jpg
    IMG_5523.jpg
    77.3 KB · Views: 79
  • IMG_5522.jpg
    IMG_5522.jpg
    44.8 KB · Views: 84
  • IMG_5526.jpg
    IMG_5526.jpg
    60.6 KB · Views: 74
  • IMG_5530.jpg
    IMG_5530.jpg
    79.9 KB · Views: 76
  • IMG_5641.jpg
    IMG_5641.jpg
    100.3 KB · Views: 77
OP
OP
Baja71

Baja71

Bronco Guru
Joined
Oct 16, 2004
Messages
2,908
Flares with a flair...

This is probably an unorthodox approach to attaching the flares, but I had the advantage of using the existing holes in both the flare and the body panel since my vintage fiberglass flares were in great shape. First, I ran the appropriately sized drill through the existing holes to just clean up the new paint and primer from them, not touching the metal, and being careful not to bite into the paint and creating any divots.

Then I clamped on the new welting to the flare and drilled holes only through the welting, again careful not to mar the paint with the drill or the clamps. The flex additive in the paint will help with this, but you can still cause problems.

I pushed the rivets through the holes to hold the welting to the flare and then held up the whole thing to the body and pushed the rivets through the body holes to ensure even stress and give myself a 'third' hand.
 

Attachments

  • IMG_5551.jpg
    IMG_5551.jpg
    94.7 KB · Views: 88
  • IMG_5549.jpg
    IMG_5549.jpg
    65.4 KB · Views: 74
  • IMG_5547.jpg
    IMG_5547.jpg
    62.8 KB · Views: 77
  • IMG_5545.jpg
    IMG_5545.jpg
    90.1 KB · Views: 78
  • IMG_5544.jpg
    IMG_5544.jpg
    92.4 KB · Views: 76
  • IMG_5543.jpg
    IMG_5543.jpg
    86.7 KB · Views: 79
  • IMG_5539.jpg
    IMG_5539.jpg
    48.7 KB · Views: 76
Last edited:

ford man

Bronco Guru
Joined
Aug 31, 2008
Messages
2,269
Loc.
Leesburg Ga
Hey your build looks good great work. By the way what is the color and type on the carpet? I really like the looks of it.Keep the pic coming :cool:
 

DrLathrop

Jr. Member
Joined
Oct 11, 2009
Messages
297
Loc.
Fulshear, TX
I started with Dennis Carpenter door weather strip but didn't like the consistency of it and changed to Metro which is much softer. I actually had to loosen up the AUX tank and slide it over a bit to get the lower clips in.

TW,
What is the website to order the metro weather strip? Thanks

Colin
 
OP
OP
Baja71

Baja71

Bronco Guru
Joined
Oct 16, 2004
Messages
2,908
Hey your build looks good great work. By the way what is the color and type on the carpet? I really like the looks of it.Keep the pic coming :cool:

It's ACC Carpet and the dye was Parchment or Fawn...they were so close I can't remember which I ultimately selected. I couldn't tell them apart unless they were right next to each other. I think Parchment was a hair darker.
 
OP
OP
Baja71

Baja71

Bronco Guru
Joined
Oct 16, 2004
Messages
2,908
TW,
What is the website to order the metro weather strip? Thanks

Colin

Hey Colin! I got mine from Rock Auto. I don't think any of our normal vendors carry them. Rock Auto was fast on delivery too.
 
OP
OP
Baja71

Baja71

Bronco Guru
Joined
Oct 16, 2004
Messages
2,908
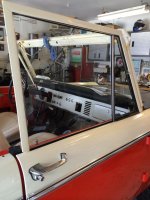
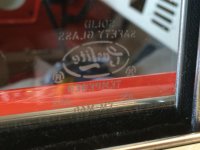
Like most of this project, I'm attempting to do these things on my own. I was going to get some help with the windshield but didn't want to lean the new windshield against the garage wall on the concrete and risk damage so I forged on to see if I could at least get part of the job done alone. I used Windex to make everything slippery and it's easy to clean off. I placed the rubber gasket around the glass and started sliding in the bright trim. The harder part was getting the assembly over and onto the Bronco windshield frame without it all coming apart. The rubber was looser than expected and was flopping around and letting go of the trim. After two attempts, I decided to build it in the window frame. I pulled the trim, inserted a rope, and made sure the bottom and two sides of the rubber were fitted properly around the glass and let the top flop around. I set it very loosely in the window frame. I then tucked in the upper rubber since the frame was giving me some structure. I then inserted all of the bright trim while it was in the hole. Once all of the trim was seated, I used the rope technique to properly set the glass into the hole. Plan B was an easy one-man windshield job.
 

Attachments

  • IMG_5672.jpg
    IMG_5672.jpg
    97.5 KB · Views: 101
  • IMG_5671.jpg
    IMG_5671.jpg
    93.9 KB · Views: 103
  • IMG_5669.jpg
    IMG_5669.jpg
    101.6 KB · Views: 99
  • IMG_5667.jpg
    IMG_5667.jpg
    103.9 KB · Views: 94
  • IMG_5666.jpg
    IMG_5666.jpg
    93.9 KB · Views: 99
  • IMG_5664.jpg
    IMG_5664.jpg
    88.2 KB · Views: 97
  • IMG_5663.jpg
    IMG_5663.jpg
    95.4 KB · Views: 104

coachbarnes

Contributor
Bronco Guru
Joined
Aug 3, 2001
Messages
2,717
Loc.
Franktown/Breck, CO
Like most of this project, I'm attempting to do these things on my own. I was going to get some help with the windshield but didn't want to lean the new windshield against the garage wall on the concrete and risk damage so I forged on to see if I could at least get part of the job done alone. I used Windex to make everything slippery and it's easy to clean off. I placed the rubber gasket around the glass and started sliding in the bright trim. The harder part was getting the assembly over and onto the Bronco windshield frame without it all coming apart. The rubber was looser than expected and was flopping around and letting go of the trim. After two attempts, I decided to build it in the window frame. I pulled the trim, inserted a rope, and made sure the bottom and two sides of the rubber were fitted properly around the glass and let the top flop around. I set it very loosely in the window frame. I then tucked in the upper rubber since the frame was giving me some structure. I then inserted all of the bright trim while it was in the hole. Once all of the trim was seated, I used the rope technique to properly set the glass into the hole. Plan B was an easy one-man windshield job.
Dang it -- I wish you woulda called me on this one!! It's actually one of the things I know how to do on these old trucks! Pretty impressed that you got it done, especially with the chrome trim. It's tricky, and I'm surprised you got the chrome lip in the rubber with it in the frame. But hey..whatever it takes! Really, really loving what you are doing here!!
 

AZ73

Contributor
Bronco Guru
Joined
Mar 28, 2012
Messages
3,610
I was wondering where you were. I don't know how I missed the last month worth of posts. Look FANTASTIC!
 
OP
OP
Baja71

Baja71

Bronco Guru
Joined
Oct 16, 2004
Messages
2,908
Dang it -- I wish you woulda called me on this one!! It's actually one of the things I know how to do on these old trucks! Pretty impressed that you got it done, especially with the chrome trim. It's tricky, and I'm surprised you got the chrome lip in the rubber with it in the frame. But hey..whatever it takes! Really, really loving what you are doing here!!

You mean there's a trick to some of this stuff? ;D It really went in pretty easily this way. I'd do it again, but love to hear your method sometime. I've got to check out your racer sometime soon.
 
OP
OP
Baja71

Baja71

Bronco Guru
Joined
Oct 16, 2004
Messages
2,908
Wing and a prayer...

Both wing windows had to come completely apart to replace things like felt, springs, pins, handles, rubber, etc.
 

Attachments

  • BajaResto2014_Day53 (32).jpg
    BajaResto2014_Day53 (32).jpg
    104.7 KB · Views: 55
  • BajaResto2014_Day53 (27).jpg
    BajaResto2014_Day53 (27).jpg
    77.6 KB · Views: 57
  • BajaResto2014_Day53 (21).jpg
    BajaResto2014_Day53 (21).jpg
    82.7 KB · Views: 57
  • BajaResto2014_Day53 (18).jpg
    BajaResto2014_Day53 (18).jpg
    74.2 KB · Views: 57
  • BajaResto2014_Day53 (16).jpg
    BajaResto2014_Day53 (16).jpg
    113.9 KB · Views: 64
OP
OP
Baja71

Baja71

Bronco Guru
Joined
Oct 16, 2004
Messages
2,908
I did three stages of polishing, emery down to jeweler's rouge.
 

Attachments

  • BajaResto2014_Day53 (37).jpg
    BajaResto2014_Day53 (37).jpg
    115.2 KB · Views: 53
  • BajaResto2014_Day53 (38).jpg
    BajaResto2014_Day53 (38).jpg
    110.4 KB · Views: 50
  • BajaResto2014_Day53 (48).jpg
    BajaResto2014_Day53 (48).jpg
    101.3 KB · Views: 48
Last edited:
OP
OP
Baja71

Baja71

Bronco Guru
Joined
Oct 16, 2004
Messages
2,908
Then reassembly with all of the new parts...
 

Attachments

  • BajaResto2014_Day55 (33).jpg
    BajaResto2014_Day55 (33).jpg
    95.6 KB · Views: 48
  • BajaResto2014_Day55 (32).jpg
    BajaResto2014_Day55 (32).jpg
    106.3 KB · Views: 48
  • BajaResto2014_Day55 (30).jpg
    BajaResto2014_Day55 (30).jpg
    101.3 KB · Views: 46
  • BajaResto2014_Day55 (26).jpg
    BajaResto2014_Day55 (26).jpg
    101.9 KB · Views: 46
OP
OP
Baja71

Baja71

Bronco Guru
Joined
Oct 16, 2004
Messages
2,908
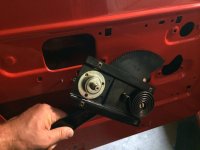
On to the exciting sport of door assembly. Oddly, my dis-assembly in reverse didn't work, so I had to backtrack a couple of times. I started with the door handles, regulator, main glass, wing window, latch, guides and stop. Or something to that affect.
 

Attachments

  • BajaResto2014_Day55 (23).jpg
    BajaResto2014_Day55 (23).jpg
    68.2 KB · Views: 53
  • BajaResto2014_Day55 (21).jpg
    BajaResto2014_Day55 (21).jpg
    64 KB · Views: 54
  • BajaResto2014_Day55 (40).jpg
    BajaResto2014_Day55 (40).jpg
    68.4 KB · Views: 57
  • BajaResto2014_Day55 (35).jpg
    BajaResto2014_Day55 (35).jpg
    75.6 KB · Views: 53
  • BajaResto2014_Day55 (39).jpg
    BajaResto2014_Day55 (39).jpg
    72.3 KB · Views: 52
  • BajaResto2014_Day55 (58).jpg
    BajaResto2014_Day55 (58).jpg
    103.4 KB · Views: 63
  • BajaResto2014_Day55 (59).jpg
    BajaResto2014_Day55 (59).jpg
    66.2 KB · Views: 55
Top