• Just a reminder that you won't be able to start new posts or reply to existings posts in the Archive forum.

    This is where all the old posts go so they can still be used for reference and searched.
  • Welcome to ClassicBroncos! - You are currently viewing the forums as a GUEST. To take advantage of all the site features, please take a moment to register. It's fast, simple and absolutely free. So please join our community today!
    If you have problems registering or can't log into your account, please contact Admin.

68 custom in NM: Build Thread *** Lot's O' Photos***

nrramse

Sr. Member
Joined
Apr 20, 2008
Messages
522
How about the world's first animation embedded into a paint job? -
anisql3.gif


I like Tom's pic better.
 

Chief Master Sergeant

Retired U.S. Air Force
Joined
Nov 6, 2002
Messages
5,216
My guess

Looks like it could be a new molding for the rear edge of the bed. Would sit under the tailgate. I stared at the darn thing for 5 minutes and really don't have a clue. That's my best guess.
 
OP
OP
GraficO

GraficO

Bronco Guru
Joined
Oct 2, 2007
Messages
1,381
Loc.
Albuquerque, NM
OK... I will announce the winner of the "Secret Squirrel" shortly...;D

I got some fiberglass down over the weekend. I have a couple more layers to put on to make it structurally sound... but you get the drift. I'll post more photos of it in process as I go. Right now it's almost the right thickness and I just sanded it to accept the next few layers. It's been a grueling project as you have to put on like 7 layers of fabric to build it up enough to get it solid.

After it's done I'll do a skim coat of Bondo and finish it out. I have trim edging to go on it so when I make my final cut I can have a nice edge. I will also be making aluminum stiffeners in the right places to add to the structure and for the mounting of it. When done it will have a laser-cut stainless facing.
 

Attachments

  • IMG_7171_WR.jpg
    IMG_7171_WR.jpg
    180.2 KB · Views: 271
  • IMG_7172_WR.jpg
    IMG_7172_WR.jpg
    222.7 KB · Views: 232

NicksTrix

Bronco Guru
Joined
Aug 1, 2001
Messages
6,389
is a squirrel carrier built into the consol? ;)

glad to see you're making progress on it.
 

Wyflyer

Bronco Guru
Joined
Apr 1, 2008
Messages
2,920
I was thumbing through the want ads in the Shelby County Tribune, and this picture caught my eye.
More accurately, I saw this early picture in your build, and i'm wondering what is the little box extruding from the kick panel?
thanks
 

Attachments

  • odd kick panel.jpg
    odd kick panel.jpg
    191.7 KB · Views: 91
OP
OP
GraficO

GraficO

Bronco Guru
Joined
Oct 2, 2007
Messages
1,381
Loc.
Albuquerque, NM
Wyflyer... it's a stainless steam table pan that is covered in undercoating and lined with DynaMat covering a 3.25" hole for a set of component Alpine speakers in both kick panels. They are sealed with a gasket and bolted down to the kicker so they're sealed from crud getting kicked up from the front tires.

There isn't much room to put in speakers and I didn't want to cut extra holes in the doors... so I'm mounting them here in the kickers.

The speakers are very low profile so as to miss the E-brake pedal on the drivers side and they are small enough to not interfere with the cowl vent on the passenger's side.

Had to make some space out of essentially wasted space.
 

Attachments

  • IMG_0134.jpg
    IMG_0134.jpg
    157 KB · Views: 291
  • IMG_0112.jpg
    IMG_0112.jpg
    112.5 KB · Views: 193
  • IMG_0005wr.jpg
    IMG_0005wr.jpg
    217.1 KB · Views: 238
  • IMG_0007wr.jpg
    IMG_0007wr.jpg
    201.8 KB · Views: 197
  • IMG_0058wr.jpg
    IMG_0058wr.jpg
    240 KB · Views: 382

KANE

Sr. Member
Joined
Feb 15, 2007
Messages
489
Loc.
Pembroke, MA.
Wow!!! I just read your whole thread and it looks Awesome! I'm real curious about the console and speaker boxes. I've been beating my brains trying to figure out the right way to do my console.....I was thinking about the console in my 04 f-150 but I think it would be too wide - You've nailed it and inspired me to get off my ass and make it happen!!

Great build and Thanks for sharing alot of innovative ideas!

Mike
 
OP
OP
GraficO

GraficO

Bronco Guru
Joined
Oct 2, 2007
Messages
1,381
Loc.
Albuquerque, NM
you are more than welcome Mike. As soon as I heal from the weekend I'll get back on the console and start posting more photos. I'm about 80% done with the shell. I need to put a couple more layers of glass in a couple places and then I can skim it and get it finished and ready to assemble.
 
OP
OP
GraficO

GraficO

Bronco Guru
Joined
Oct 2, 2007
Messages
1,381
Loc.
Albuquerque, NM
small update. The back seat is in and I got some more done on the console and the wiring under the dash. Many thanX to Newell for coming over and helping today!
 
OP
OP
GraficO

GraficO

Bronco Guru
Joined
Oct 2, 2007
Messages
1,381
Loc.
Albuquerque, NM
OK... FINALLY a photo update ;)

Here is the console with the plug removed and ready to start finishing. Very stout.

Also the split-roll-up rear seats are in.

Little dusty from sanding fiberglass...
 

Attachments

  • IMG_0037_WR.jpg
    IMG_0037_WR.jpg
    144.6 KB · Views: 296
  • IMG_0036_WR.jpg
    IMG_0036_WR.jpg
    134.7 KB · Views: 326
  • IMG_0035_WR.jpg
    IMG_0035_WR.jpg
    151 KB · Views: 283
  • IMG_0034_WR.jpg
    IMG_0034_WR.jpg
    104.8 KB · Views: 202
  • IMG_0033_WR.jpg
    IMG_0033_WR.jpg
    96.5 KB · Views: 241
  • IMG_0032_WR.jpg
    IMG_0032_WR.jpg
    99.8 KB · Views: 179
  • IMG_0031_wr.jpg
    IMG_0031_wr.jpg
    139.6 KB · Views: 202
  • IMG_0030_WR.jpg
    IMG_0030_WR.jpg
    159.3 KB · Views: 234
OP
OP
GraficO

GraficO

Bronco Guru
Joined
Oct 2, 2007
Messages
1,381
Loc.
Albuquerque, NM
and just for reference sakes... these were the preliminary drawings for the console and dash... so you have an idea of where I'm going with it.;D
 

Attachments

  • Bronco_dash_326edit.jpg
    Bronco_dash_326edit.jpg
    61.3 KB · Views: 194
  • ABB_centerside.jpg
    ABB_centerside.jpg
    42.1 KB · Views: 172
  • ABB_center_top01.jpg
    ABB_center_top01.jpg
    44.8 KB · Views: 180
OP
OP
GraficO

GraficO

Bronco Guru
Joined
Oct 2, 2007
Messages
1,381
Loc.
Albuquerque, NM
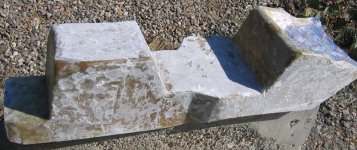
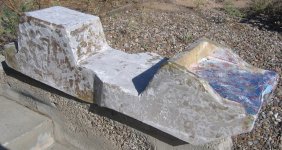
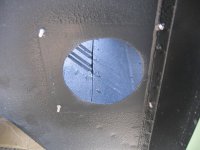
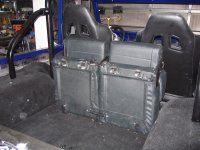
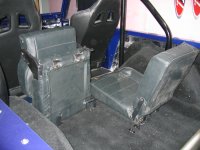
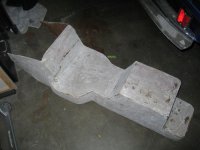
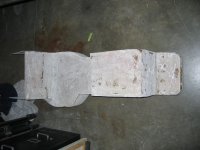
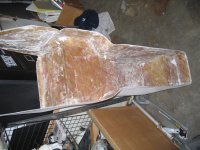
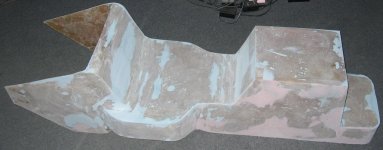
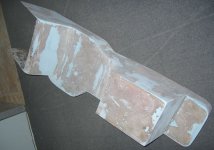
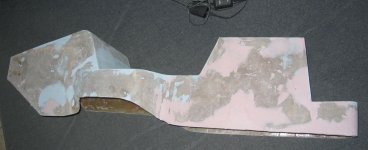
So... I took a day for myself to celebrate being 40. All I wanted was to get a big chunk of the console done... so I got it sanded out and skimcoated.;D

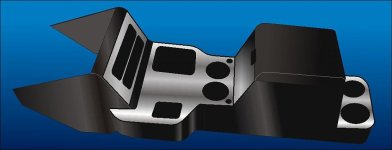
tis now ready for high-build primer. Included a 3D drawing of what it should look like soon.

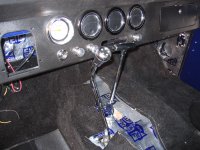
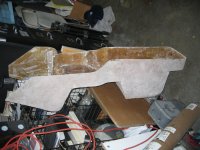
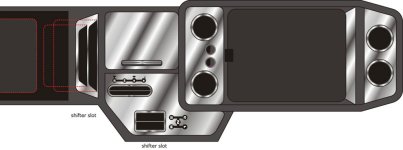
I've decided that I'm going to cover the sides with black vinyl and then have the tops and front panels made in stainless to match the doors. The big round holes are for drink holders and the two smaller ones are for my control switches for the heated seats. The two oblong rectangles will be for the Flip face DVD and the center speaker for the 5.1 surround.:eek: The smaller hole will be for the 3 spd floor shifter.

Tomorrow... POR 15 and more of that damn Metal Ready... but I have industrial gloves and protection from acid this time.
 

Attachments

  • 3D_console_sample01.jpg
    3D_console_sample01.jpg
    34.5 KB · Views: 280
  • IMG_7210_WR.jpg
    IMG_7210_WR.jpg
    81.6 KB · Views: 113
  • IMG_7211_WR.jpg
    IMG_7211_WR.jpg
    157.9 KB · Views: 93
  • IMG_7212_WR.jpg
    IMG_7212_WR.jpg
    80.4 KB · Views: 84
  • IMG_7213_WR.jpg
    IMG_7213_WR.jpg
    83.1 KB · Views: 87
Top