• Just a reminder that you won't be able to start new posts or reply to existings posts in the Archive forum.

    This is where all the old posts go so they can still be used for reference and searched.
  • Welcome to ClassicBroncos! - You are currently viewing the forums as a GUEST. To take advantage of all the site features, please take a moment to register. It's fast, simple and absolutely free. So please join our community today!
    If you have problems registering or can't log into your account, please contact Admin.

68 custom in NM: Build Thread *** Lot's O' Photos***

Fishbone

Sr. Member
Joined
Nov 5, 2007
Messages
534
Loc.
Northern, Illinois
I just dropped mine off for paint last week, and I'm already pretty excited.

You gotta be like a kid on Christmas morning.;D Looks great!
 

WyleCoyote

Bronco Guru
Joined
May 2, 2002
Messages
1,739
One of the possible names I have for mine is "Dirty Smurf". But I haven't decided on a final paint yet, so that may not work for me.
 
OP
OP
GraficO

GraficO

Bronco Guru
Joined
Oct 2, 2007
Messages
1,381
Loc.
Albuquerque, NM
well... the bike's name is "Sheila"... but pronounced with an Australian accent ;)

I may have to just go with 'Swoop'... matches the license plate... but that isn't a female name... like boat names should be.

My fiance' already calls her "the other woman" hee hee ;)
 
OP
OP
GraficO

GraficO

Bronco Guru
Joined
Oct 2, 2007
Messages
1,381
Loc.
Albuquerque, NM
thing about the right side of the garage is that there is a 6' mechanics pit there... so I will shortly be rearranging my tools, parts and bench to the other side so I can use the pit!
 
OP
OP
GraficO

GraficO

Bronco Guru
Joined
Oct 2, 2007
Messages
1,381
Loc.
Albuquerque, NM
Fish... lemme tell ya. When you get yours back... you'll be up till 2:30am rubbing it with a diaper and planning your next move like I did last night ;)
 
OP
OP
GraficO

GraficO

Bronco Guru
Joined
Oct 2, 2007
Messages
1,381
Loc.
Albuquerque, NM
actually did some work today on the beastie. ;)

Got one of the forms made for the left rear sub box enclosure and got all the parts cut out for the right one.

Working with foam is pretty fun... you'll see what I mean in a few. Pictures added.
 

Attachments

  • IMG_0022.jpg
    IMG_0022.jpg
    168.7 KB · Views: 333
  • IMG_0036.jpg
    IMG_0036.jpg
    100.7 KB · Views: 488
  • IMG_0034.jpg
    IMG_0034.jpg
    152.3 KB · Views: 284
  • IMG_0033.jpg
    IMG_0033.jpg
    136.8 KB · Views: 358
  • IMG_0027.jpg
    IMG_0027.jpg
    86 KB · Views: 457
  • IMG_0024.jpg
    IMG_0024.jpg
    65.7 KB · Views: 259
  • IMG_0023.jpg
    IMG_0023.jpg
    120.8 KB · Views: 280
Last edited:
OP
OP
GraficO

GraficO

Bronco Guru
Joined
Oct 2, 2007
Messages
1,381
Loc.
Albuquerque, NM
ok... got the basic shape of the left insert ready. The beautiful thing about fiberglassing these things is that you cna get the basic form pretty rough. Once you get it glassed it's easy to add filler here and there to get the majority of the details in there.

I still need to put in the hole for the speaker.

After this, I will cover the whole plug with aluminum foil, put the MDF ring on it, and then stretch my spandex over it to refine the contours.

From there it will be time to get messy and start laying on the fiberglass.

Once it's cured, I'll start sanding and adding the putty to make it exact and to get all the edges just right.

Then when it's pretty much done I'll cut the box in half, remove the foam form and screw in a piece of flat 2" aluminum all the way around the inside of the box leaving a tab for the other side to screw onto. It will get a good coating of sealant, undercoating and a bit of spray foam insulation before the halves get put together.

The speakers I'm using only require .69 cu/ft of sealed air in the compartment, so I'll add spray foam in the corners as necessary to take up the space.

all for now...
 

Attachments

  • IMG_0042.jpg
    IMG_0042.jpg
    66.7 KB · Views: 506
OP
OP
GraficO

GraficO

Bronco Guru
Joined
Oct 2, 2007
Messages
1,381
Loc.
Albuquerque, NM
the dash is fabbed and is shipping back to me. Here's some photos before it shipped.

The dash will need to have filler put on and some minor re-surfacing... all in all Nick is DA MAN!;D
 

Attachments

  • DSC04576.JPG
    DSC04576.JPG
    60.3 KB · Views: 258
  • DSC04577.JPG
    DSC04577.JPG
    59.6 KB · Views: 277
OP
OP
GraficO

GraficO

Bronco Guru
Joined
Oct 2, 2007
Messages
1,381
Loc.
Albuquerque, NM
in case you missed the billet knob thread... here are the billet knobs I made out of cheapO cast ones I got off of ebay (see the "poor man's lathe" thread)
 

Attachments

  • IMG_0109.jpg
    IMG_0109.jpg
    152.5 KB · Views: 136
  • IMG_0111.jpg
    IMG_0111.jpg
    134.4 KB · Views: 191
Last edited:
OP
OP
GraficO

GraficO

Bronco Guru
Joined
Oct 2, 2007
Messages
1,381
Loc.
Albuquerque, NM
progress today:

Started figuring out where the seats will go and building the template so I can start cutting out the foam form of the center console.

I got the left speakerbox covered in foil tape so I can start doing the fiberglassing this week.
 

Attachments

  • IMG_0055.jpg
    IMG_0055.jpg
    169.6 KB · Views: 405
  • IMG_0054.jpg
    IMG_0054.jpg
    167.3 KB · Views: 320
  • IMG_0053.jpg
    IMG_0053.jpg
    124.4 KB · Views: 281
  • IMG_0052.jpg
    IMG_0052.jpg
    98.6 KB · Views: 239
  • IMG_0051.jpg
    IMG_0051.jpg
    137.5 KB · Views: 266
  • IMG_0050.jpg
    IMG_0050.jpg
    118.9 KB · Views: 315
  • IMG_0049.jpg
    IMG_0049.jpg
    211.5 KB · Views: 450
  • IMG_0047.jpg
    IMG_0047.jpg
    131.2 KB · Views: 298
  • IMG_0056.jpg
    IMG_0056.jpg
    178.2 KB · Views: 316
  • IMG_0058.jpg
    IMG_0058.jpg
    89.1 KB · Views: 367

ctay

Newbie
Joined
Sep 5, 2006
Messages
46
Really looking nice man! If you need an extra wrench in the 'burque let me know! I'm on the west side and it looks like you are on the east side but a little driving never hurt anyone..
 

Devin

Bronco Kineticist
Joined
Apr 29, 2004
Messages
3,956
Really nice work!

I just noticed that your garage is pink??? :-X :-X :eek: :eek:

Are you friends with Tito? ;D ;D ;D
 
OP
OP
GraficO

GraficO

Bronco Guru
Joined
Oct 2, 2007
Messages
1,381
Loc.
Albuquerque, NM
my office is on the other side of the pink insulation wall... the previous owner of the house never finished the walls in the garage... so that's yet another project I need to finish after the Bronco is runnin!

Same material essentially...

The jury is still out on that Tito fella ;) 
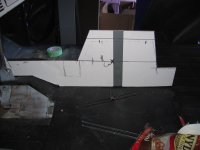
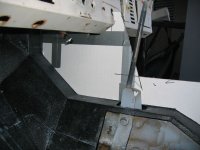
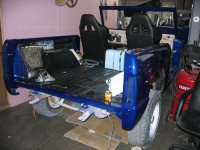
Have to admit... it's pretty damn cool to build your wife a custom Bronco and have the balls to drive a pink one! I think he's OK in my book. The Stretch with the army olive and the flat black emblems makes up for the "man factor"...
 
OP
OP
GraficO

GraficO

Bronco Guru
Joined
Oct 2, 2007
Messages
1,381
Loc.
Albuquerque, NM
didn't get any work on the Bronco done today.

I was at the dropzone doing tandem skydives all day... I'm pooped!
 
OP
OP
GraficO

GraficO

Bronco Guru
Joined
Oct 2, 2007
Messages
1,381
Loc.
Albuquerque, NM
Get crackin you've got less than 4 months to get that thing runnin for the RMR. I EXPECT to see you there;D. Just kidden. Looks good so far.

YESSIR! Right away sir!!! I can do it...;D

BTW... one of the stainless wing windows in my beastie came from you I believe ;)
 
OP
OP
GraficO

GraficO

Bronco Guru
Joined
Oct 2, 2007
Messages
1,381
Loc.
Albuquerque, NM
I love it when the little brown truck comes over!!! ;)

3.5" lift kit arrived today! Question still remains... will it fit in the garage with the lift and new tires?!?
 
Top