• Just a reminder that you won't be able to start new posts or reply to existings posts in the Archive forum.

    This is where all the old posts go so they can still be used for reference and searched.
  • Welcome to ClassicBroncos! - You are currently viewing the forums as a GUEST. To take advantage of all the site features, please take a moment to register. It's fast, simple and absolutely free. So please join our community today!
    If you have problems registering or can't log into your account, please contact Admin.

Another Bukin Suspension Mod

swyman

Jr. Member
Joined
Sep 28, 2009
Messages
137
Loc.
Blissfield
Just found this build and love it! I'm getting ready to start a long travel build myself. I never thought of tubing the rear, excellent job! What is the shock travel? Just curious as to what I can fit under the hood without having my ride height like a monster truck. What is your front suspension travel? Just curious as I am planning on going with full hydraulic steering for ease and will give me a lot more room for headers/turbo's. Is there a disadvantage to going full hydraulic? Planning on a 4 link front also. Any advice would be well recieved. Keep the pics coming!
 
OP
OP
Bukin 67

Bukin 67

Bronco Abuser
Joined
Jul 3, 2008
Messages
2,268
Thanks for the kind words:)

Swyman - From the bump to the extended straps, the front travel is about 12" and the rear is 18.5". I couldn't go any more on the front without changing the pinion/driveshaft.

We tubed the rear our for more down travel pre-running. It really only nets maybe 3" until 35" tires will hit the inner fender well. When I go to 37's I will have to totally modify that to keep what down travel I have.

The biggest advantage with full hydraulic steering is it will let you go with bigger tires on the rocks, but the disadvantage is if you lose power you lose your steering. I went with ram assist, which should work well with 37's.

The 3 link front I went with gives a smoother riding suspension (imo) than 4 link when pre-running. (Anyone else please chime in with other opinions - the more info the merrier!)

The plan on the build was to end up with a rig that I can still do some crawling with and have a better/faster ride while pre-running. Previously I had the leaf pack on the rear and hoops on the fronts with Rancho 9000's. Most of our runs are 500-700 miles and it actually did OK on the smaller woops and flat areas, but I always eneded up toward the end of the pack. I'm planning on running the NORRA Mexican 1000 in May if I can get the remaining mods complete by the end of March to enter.

 

swyman

Jr. Member
Joined
Sep 28, 2009
Messages
137
Loc.
Blissfield
What size and wall thickness tube did you use for your links? DOM or chromoly? The only rocks mine will see is the 300' down my gravel road to the corner. Building a dune cruiser, sick of getting the crap pounded out of me while tooling around out there. Would love to live out where you guys are, nonstop fun/challenging terrain! How we'll would a 3 link in the front work? Like if I went with a control arm from the bottom of each frame rail and bring them into 1 and attach to top of front axle or would I be better keeping them separate?
 
OP
OP
Bukin 67

Bukin 67

Bronco Abuser
Joined
Jul 3, 2008
Messages
2,268
We used all chromoly tubing throughout for the suspension and cage. The front radius arms are double wall .250 X 2", the trailing arm main tubes are double wall .250 X 1.75" then boxed.

This is the first 3 link Bronco I've driven, and it still needs testing. I'll post up how it does as I shake the bugs out, if any. I don't think I've ever seen a split upper link set up like you're describing. Mine is a single chromoly upper link using .250 double wall X 2". I also used serviceable Johnny joints on my link ends. The 3 link set up is better if you don't want to have to lift the rig so high to clear the oil pan, etc. like a 4 link set up, and you may run into those issues with that split set up.
 

Attachments

  • 3 Link Upper.jpg
    3 Link Upper.jpg
    104.1 KB · Views: 216
OP
OP
Bukin 67

Bukin 67

Bronco Abuser
Joined
Jul 3, 2008
Messages
2,268
I just took a couple of pics of the boxed in suspension side we have done. Instead of making templates for the cage and boxing in the whole area, I opted to go with a smaller box. This will keep water from getting in and running up into the driver's area which would have happened if I would have made panels that fit on the cage frame, leaving exposed floor area to the shock opening. I'm not crazy about the look. We put the flush fastener heads on the shock side, figuring all the debris that'll get thrown up there would be all over the springs if we had them reversed even though they would look a lot better if they were. I may still flip em.
 

Attachments

  • Boxed Rear Susp 1.jpg
    Boxed Rear Susp 1.jpg
    117.4 KB · Views: 228
  • Boxed Rear Susp 2.jpg
    Boxed Rear Susp 2.jpg
    105.9 KB · Views: 208

slowRoaner

Jr. Member
Joined
Jul 9, 2013
Messages
100
Loc.
Durango
Two thumbs up! i like it cause it still feels/looks like a bronco, but will still give the guys your trailing a run for their money. Also really like that you use it like most guys and still have a need for a highlift jack and arb compressor, and built it using the factory housing, and its not just a race truck i cant relate to.

Inspiration, inspiration, inspiration...

Awesome build
 

Letsgocrawling

Sr. Member
Joined
Aug 26, 2008
Messages
513
Loc.
Tucson Az.
Hi Bukin, we joined cbs about the same time, i guess bukin never got my attention---but did check out ur build tread this evening, great stuff, engineering and fab skills are bitchen i can relate. Will follow your hijinks for sure.
 
OP
OP
Bukin 67

Bukin 67

Bronco Abuser
Joined
Jul 3, 2008
Messages
2,268
Thanks slowRoaner. I have to say that using the hilift is a pain anymore because I would need to put a strap on to hold the suspension closed, so TMR (Temper-Mental Racing) makes a bolt on kit for a 2 ton floor jack with a quick release that im going to keep mounted in the back on the long runs. It will be installed next week and I'll post up some pics.

I love my ARB and would never change unless I switched to electric.


Hi Bukin, we joined cbs about the same time, i guess bukin never got my attention---but did check out ur build tread this evening, great stuff, engineering and fab skills are bitchen i can relate. Will follow your hijinks for sure.

thanks LGC. The 08 join dats is actually the second time I joined. The first time wqs in 02, but I never posted much and went about 2 or 3 years without signing in so the accounf went dormant. My pics were still on file, so Jon reactivated the account but couldn't back date it. Thats wht my gallery has older pics in it.
I checked out your garage and I was very impressed with you work. Your rig looks like a sleeper from the outside, then you get to the guts of it, and wow. Very nice.
 
OP
OP
Bukin 67

Bukin 67

Bronco Abuser
Joined
Jul 3, 2008
Messages
2,268
I installed the bi-pass shocks this weekend. It handles really nice on the street now. I took up to about 70 on the freeway and she's straight as an arrow.

After the TDS run 2 weeks ago I found out he front coilover springs are too heavily rated, and the front end wouldn't articulate as needed due to this. I may go down 50lbs on each. This is part of the battle between pre-runner and crawler. You can't have everything.:)
 

Attachments

  • IMG_0001.jpg
    IMG_0001.jpg
    125.9 KB · Views: 219
  • IMG958815.jpg
    IMG958815.jpg
    107.8 KB · Views: 214
  • IMG_20140309_154045_660.jpg
    IMG_20140309_154045_660.jpg
    93.1 KB · Views: 206
  • IMG_6197.jpg
    IMG_6197.jpg
    88.2 KB · Views: 220
OP
OP
Bukin 67

Bukin 67

Bronco Abuser
Joined
Jul 3, 2008
Messages
2,268
Thanks SS. I'm real happy with the end look and performance so far. We'll be testing and tuning the suspension soon for the NORRA 1000.
I ended up mounting the ARB compressor in front of the old aux tank cavity, under driver side. That cross member you had suggested was a great idea, but it doesn't exist anymore.

Sent from my DROID RAZR HD using Tapatalk 4
 

slowRoaner

Jr. Member
Joined
Jul 9, 2013
Messages
100
Loc.
Durango
The flex looks good, but i could see where a little softer up front would help. Also see what you mean about the hi-lift! They are already sketchy, and extending them all the way like that makes them more so, good call on the bottle jack.

Did you end up stretching the front 2"?

Also do you think you will eventually run sway bars or is it stable enough at high offroad speeds to go without? Asking cause im trying to find the balance between rockcrawling flex and highway stability myself.

How does it compare to your leaf and long arm setup you had on before?

Thanks and good job!
 
OP
OP
Bukin 67

Bukin 67

Bronco Abuser
Joined
Jul 3, 2008
Messages
2,268
Thanks slow. I didn't end up stretching the front at all. We did stretch the rear about 1-1/2" - 2".

I am looking at a rear sway bar from a couple of manufacturers. Curry is one I am familiar with, and rather than fabricating one ourselves from scratch, this will be out ticket I think.
It was obviously very springy on and off road with just the coilovers. It was sketchy (and actually dangerous) to go over 45-50. If you had to make a maneuver at even that speed it could have turned ugly quick. With the bi-pass shocks on there It drives, feels, and has the stability similar to what I had on the street before this modification. Off road is a different story. I will definitely need the sway bar set up for added stability especially for pre-running. I will make the sway bar removable for crawling.

I actually opted for a 2 ton aluminum floor jack rather than a bottle. It tucks in nicely on pass side rear with a custom made holder that's permanently attached. It's a pretty cool set-up. I'll post pics later.
 
OP
OP
Bukin 67

Bukin 67

Bronco Abuser
Joined
Jul 3, 2008
Messages
2,268
Here are some pics of the 2-ton aluminum floor jack mounted in place.

With TMR's kit, you simply remove the jack's wheels and attach Temper-Mental Racing's (TMR) aluminum skid on the bottom, then the whole unit is inserted into TMR's holder, which we tabbed and permanently mounted in place.

The jack comes out in seconds with the quick-release pin you can see at the top rear. I also threw a ratchet strap around the whole thing when I was wheeling because the jack itself does rattle some but that took care of it.

I still bring the hi-lift with me and use this jack's handle for it.

edit: I also wanted to note that there's a place for a lock as well on the back end.
 

Attachments

  • IMG_20140312_174702_215.jpg
    IMG_20140312_174702_215.jpg
    76.4 KB · Views: 194
  • IMG_20140312_174615_294.jpg
    IMG_20140312_174615_294.jpg
    101.5 KB · Views: 201
  • IMG_20140312_174532_745.jpg
    IMG_20140312_174532_745.jpg
    115.8 KB · Views: 534
Last edited:

Colorado75Bronc

Full Member
Joined
Jan 27, 2009
Messages
335
Loc.
Colorado Springs
That looks freaking awesome! I'm wanting to design something similar to this for my rear suspension, but I can't find much for tech articles on setting up a trailing arm style link suspension or 4 link with the coil overs mounted to the lower links, how much different is it from a typical double triangulated. 4 link? What effect does mounting the c/o's to the lower links have on setup?. Would you mind sharing some info on this setup or pointing me in the right direction to find some? Thank you and congrats looks like it performs very well!
 
OP
OP
Bukin 67

Bukin 67

Bronco Abuser
Joined
Jul 3, 2008
Messages
2,268
That looks freaking awesome! I'm wanting to design something similar to this for my rear suspension, but I can't find much for tech articles on setting up a trailing arm style link suspension or 4 link with the coil overs mounted to the lower links, how much different is it from a typical double triangulated. 4 link? What effect does mounting the c/o's to the lower links have on setup?. Would you mind sharing some info on this setup or pointing me in the right direction to find some? Thank you and congrats looks like it performs very well!

Thanks Co. I'm still testing, having just recently mounted the bi-pass shocks. I want to point these ?s to my tech guy to make sure I give you accurate info, unless someone on here can chime in, please do.

It will take a day in the desert to dial it in to it's peak potential. Family stuff is getting in the way lol.:)
 
OP
OP
Bukin 67

Bukin 67

Bronco Abuser
Joined
Jul 3, 2008
Messages
2,268
I've been cleaning and painting the cage with POR 15 rust preventative. This stuff is awesome. The key to the whole process is cleaning and prep. It's glossy black finish ain't bad either. I will probably put a coat of hammered black over it though.

What I've prepped and painted so far has taken about 3-4 hours.
 

Attachments

  • IMG_20140312_185609_917.jpg
    IMG_20140312_185609_917.jpg
    117.8 KB · Views: 123
  • IMG_20140315_111547_519.jpg
    IMG_20140315_111547_519.jpg
    141.4 KB · Views: 141
  • IMG_20140315_122826_284.jpg
    IMG_20140315_122826_284.jpg
    124.8 KB · Views: 131
  • IMG_20140315_122816_825.jpg
    IMG_20140315_122816_825.jpg
    115.1 KB · Views: 134
OP
OP
Bukin 67

Bukin 67

Bronco Abuser
Joined
Jul 3, 2008
Messages
2,268
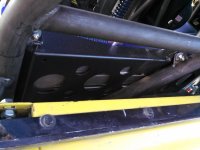
This is where I ended up mounting the ARB compressor under the driver's side floor. It's well protected, but I will be adding rock skis along the outer tube for added protection. I still haven't contacted ARB yet to find out what I need to add a snorkel to the ARB air intake just in case, for those water crossings.

The C-4 cooler is tucked up nicely into the old aux tank cavity, and there's a fan on top of it.
 

Attachments

  • IMG_20140312_192953_032.jpg
    IMG_20140312_192953_032.jpg
    114.5 KB · Views: 123
  • IMG_20140312_193009_715.jpg
    IMG_20140312_193009_715.jpg
    103.7 KB · Views: 124
Top