OP
OP
- Joined
- Mar 28, 2012
- Messages
- 3,546
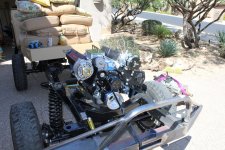
You mean this one!


Yup. Saw it on that picture of Nick's Mr. Roboto build. I couldn't stand the stock shifter. You need to get the picture on your website and note that it's for an EB too. I think it's listed under the 78-79 Bronco section
http://www.dufftuff.com/NV3550_Manual_Shifter_Lever_Adapter_p/2141.htm
http://www.dufftuff.com/DUFFY_Adjustable_Manual_Chrome_Shifter_Lever_p/2140.htm
")