


Community
Buy / Sell


Bronco Tech
3 Arm Wiper Setup
Fix Motor Mount
Roll Cage Braces
Throttle Body 65mm
Wheel Alignment
Heat Riser Replacement
Vent Window Repair
Center Console Mount
Straighten Bumper
Ford 6R80 6 spd
More Tech...
Fix Motor Mount
Roll Cage Braces
Throttle Body 65mm
Wheel Alignment
Heat Riser Replacement
Vent Window Repair
Center Console Mount
Straighten Bumper
Ford 6R80 6 spd
More Tech...

-
Welcome to ClassicBroncos! - You are currently viewing the forums as a GUEST. To take advantage of all the site features, please take a moment to register. It's fast, simple and absolutely free. So please join our community today!If you have problems registering or can't log into your account, please contact Admin.
You are using an out of date browser. It may not display this or other websites correctly.
You should upgrade or use an alternative browser.
You should upgrade or use an alternative browser.
Build Impulse...Almost Start time...
- Thread starter Izzy
- Start date
Izzy, your truck is looking good. When are you starting the tear down of the '76 engine?
JDJ
Soon, there is just a couple of more things I need to do to the 69 to have it ready for winter and then I can take the 76 out. I also wanted to clean up the garage a bit so that as I take the stuff off the engine, I can label and store it all without losing anything.
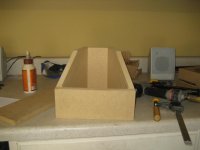
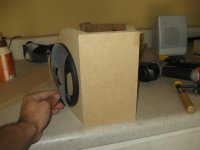
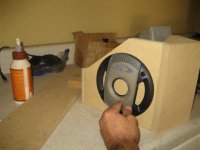
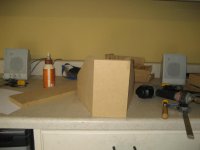
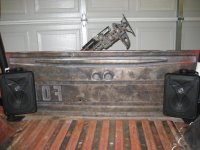
Started making a speaker box for front speakers today. Still have to make the top and bottom but I like how it is coming out.
Attachments
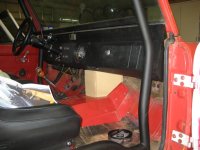
Finished up the speakers and radio install today. This is the first time in 2 years that I have had tunes in a Bronco and I'm kicking myself for waiting so long!!!
The rear speakers are mounted temporary. I have some clamps on the way that will mount them permanently. The wires will get cleaned up when I install the dynomat and carpet which is next on the list.
Also, a huge thanks to Tom for helping me patch weld up several holes that I had in the floor. That now allows me to do the dynomat install next.
Attachments
Nightstick
Bronco guy
- Joined
- Feb 6, 2010
- Messages
- 2,929
Looks good man!
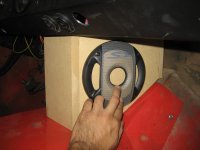
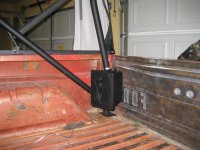
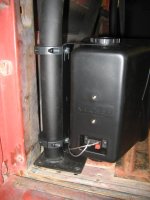
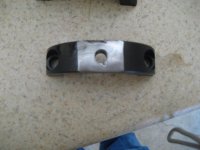
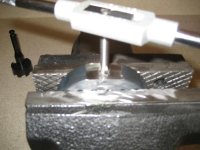
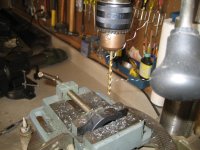
Got my clamps in and started fabing. Now this type of fab work is nothing compared to what some of you other guys do but for me, it's a nice rookie job to get the juices flowing. I had fun with this little job too.
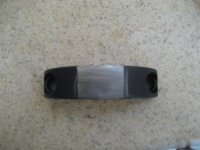
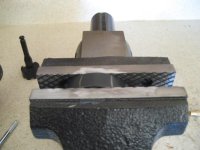
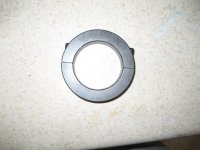
I started with some standard round clamps from McMaster Carr. I then grinded down one side to give me a flat service to work with and to provide stability for the speaker brackets. I then drilled a hole in the middle of the flat part and tapped for a 5/16 bolt.
I am really happy with how this turned out and the speakers are solid with no movement.
Thanks go to Nick for the idea and tips. Appreciate it.
Attachments

I was planning to Dynamat first, and then tape down the wires just like you stated. I can then carpet over that.
I got those sync'd wipers. That hurt the pocket book!!!
Question, what is the best prep for the floor before applying the dynamat?
I got those sync'd wipers. That hurt the pocket book!!!
Question, what is the best prep for the floor before applying the dynamat?
Heus33
Bronco Guru
- Joined
- Jun 1, 2005
- Messages
- 7,477
I was planning to Dynamat first, and then tape down the wires just like you stated. I can then carpet over that.
I got those sync'd wipers. That hurt the pocket book!!!
Question, what is the best prep for the floor before applying the dynamat?
I'd just wipe it down with something like acetone. If you dont have that, just clean it really good with some dish soap and water. Get as much dirt/dust/grime up so it can stick.
It helps if you apply it when its warm out too.
My gosh, you are milking this project! ;D
Great work, brutha...
I'm In Breck picking up the RC so I can wheel it @ Bronco Daze next month.
Great work, brutha...
I'm In Breck picking up the RC so I can wheel it @ Bronco Daze next month.
I'd just wipe it down with something like acetone. If you dont have that, just clean it really good with some dish soap and water. Get as much dirt/dust/grime up so it can stick.
It helps if you apply it when its warm out too.
Ok cool, I assume I should sand down any surface rust though right?
I've heard both that it can be applied to paint and also that it should be sanded.
My gosh, you are milking this project! ;D
Great work, brutha...
I'm In Breck picking up the RC so I can wheel it @ Bronco Daze next month.
Man you got it tough coach.
") At the airport on the way back from Portland myself but I have some crazy lay overs and no earlier flights to take. Sitting in airports suck...
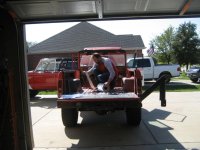
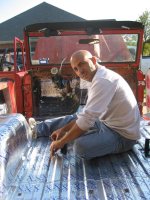
At the airport on the way back from Portland myself but I have some crazy lay overs and no earlier flights to take. Sitting in airports suck...Huge day today and got ALOT done. First of all, a huge thanks to Rob who spent all day helping me get this stuff done. No way I could have done it without you.
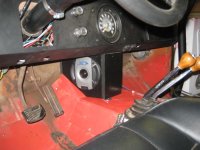
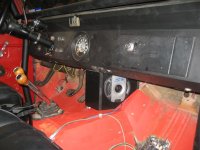
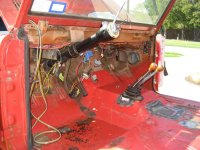
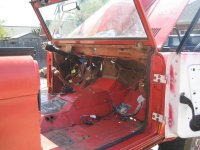
Started off by completely stripping everything out of the Bronco including the dash.
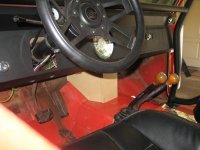
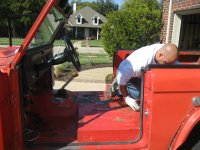
I then mounted up some new wipers and ran new wiring through the windshield. Solder all connections and heat shrinked everything for that clean look.
I then tackled looking form germlins in the wiring behind the dash. I was not confident about some of the connections so I cut and soldered them too.
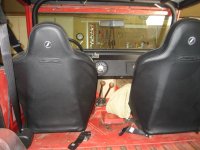
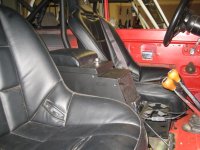
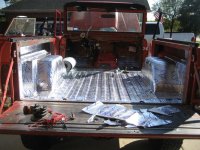
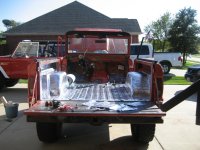
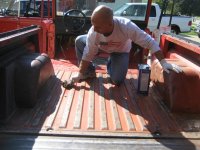
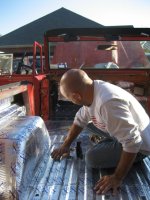
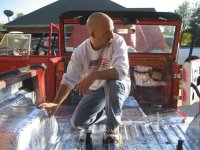
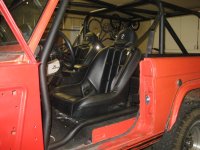
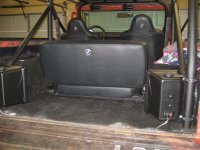
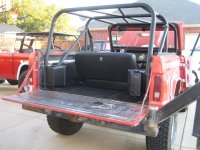
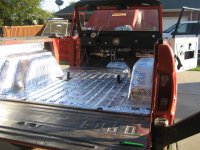
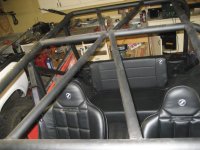
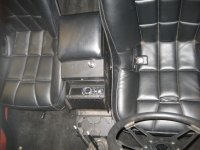
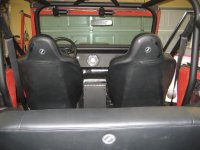
We then sanded and cleaned the floor and started laying the Rattrap (Dynamat off brand). This stuff is awesome and goes down nice and strong. I'm really excited about getting this done. After the mat was down, we put in a carpet kit, installed the roll cage, seats front and back, seat belts, center console, re-ran the wires to the speakers under the carpet and put the dash back on.
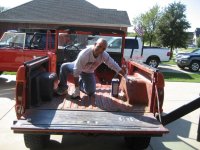
I took advantage of this time to fix a few nagging issues as well, things like moving wires around to hide them better and also re-installed some seat belts to fit better and finally got the back seat it.
Not sure if the pictures will give it justice but here they are start to finish.
Just have a few things to button up but am 95% done. Will finish the other 5% tomorrow.
I'm exhausted!!!
Started off by completely stripping everything out of the Bronco including the dash.
I then mounted up some new wipers and ran new wiring through the windshield. Solder all connections and heat shrinked everything for that clean look.
I then tackled looking form germlins in the wiring behind the dash. I was not confident about some of the connections so I cut and soldered them too.
We then sanded and cleaned the floor and started laying the Rattrap (Dynamat off brand). This stuff is awesome and goes down nice and strong. I'm really excited about getting this done. After the mat was down, we put in a carpet kit, installed the roll cage, seats front and back, seat belts, center console, re-ran the wires to the speakers under the carpet and put the dash back on.
I took advantage of this time to fix a few nagging issues as well, things like moving wires around to hide them better and also re-installed some seat belts to fit better and finally got the back seat it.
Not sure if the pictures will give it justice but here they are start to finish.
Just have a few things to button up but am 95% done. Will finish the other 5% tomorrow.
I'm exhausted!!!
Attachments
-
 IMG_5398.jpg137.4 KB · Views: 159
 -
 IMG_5397.jpg119.1 KB · Views: 162
 -
 IMG_5396.jpg118.4 KB · Views: 159
 -
 IMG_5395.jpg97.2 KB · Views: 151
 -
 IMG_5394.jpg100.9 KB · Views: 156
 -
 IMG_5393.jpg112.9 KB · Views: 152
 -
 IMG_5392.jpg108.5 KB · Views: 172
 -
 IMG_5391.jpg127.4 KB · Views: 175
 -
 IMG_5402.jpg129.6 KB · Views: 184
 -
 IMG_5401.jpg96.9 KB · Views: 162
 -
 IMG_5400.jpg128.1 KB · Views: 170
 -
 IMG_5399.jpg125.3 KB · Views: 158
More pics...
Attachments
-
 IMG_5411.jpg97.4 KB · Views: 147
 -
 IMG_5410.jpg110 KB · Views: 143
 -
 IMG_5409.jpg103.7 KB · Views: 151
 -
 IMG_5408.jpg101.4 KB · Views: 148
 -
 IMG_5407.jpg117.3 KB · Views: 148
 -
 IMG_5406.jpg96.3 KB · Views: 142
 -
 IMG_5405.jpg125.8 KB · Views: 134
 -
 IMG_5404.jpg133.6 KB · Views: 130
 -
 IMG_5412.jpg100.6 KB · Views: 133
 -
 IMG_5413.jpg105.5 KB · Views: 133
 -
 IMG_5414.jpg102.3 KB · Views: 139
 -
 IMG_5415.jpg92.5 KB · Views: 125
broncoitis
Bronco Guru
- Joined
- Jul 23, 2010
- Messages
- 4,449
Looks good Izzy! Nice job!
johnnybgood74
Bronco Guru
looking awesome izzy!!!! is that rat trap stuff pretty good? expensive?
SSDDBRONCO
Bronco Guru
Its looking good. Is that corbeau seat in the rear a fold and tumble?
Nightstick
Bronco guy
- Joined
- Feb 6, 2010
- Messages
- 2,929
Looks good buddy, you didn't mention Vin Diesel helped y'all out?
Man, it's looking great!! I'm really anxious to see that rear bumper hanging' on it! And you better haul your arss over here to take me for a spin when she's done! Lol.