• Welcome to ClassicBroncos! - You are currently viewing the forums as a GUEST. To take advantage of all the site features, please take a moment to register. It's fast, simple and absolutely free. So please join our community today!
    If you have problems registering or can't log into your account, please contact Admin.

Cooter's Explorer 5.0/4R70W Swap

OP
OP
Cooter_76

Cooter_76

Sr. Member
Joined
May 18, 2004
Messages
863
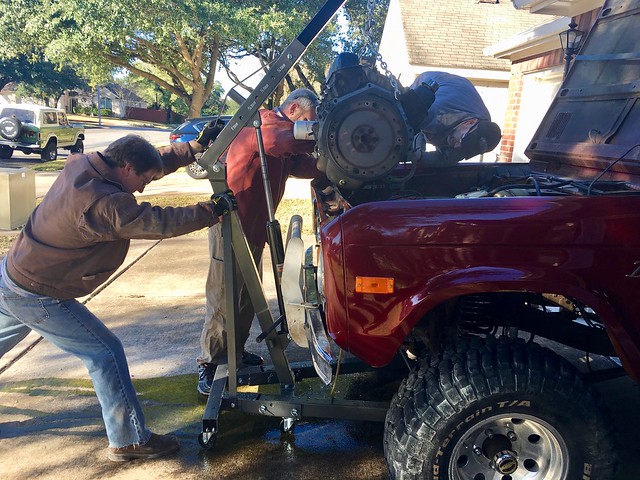
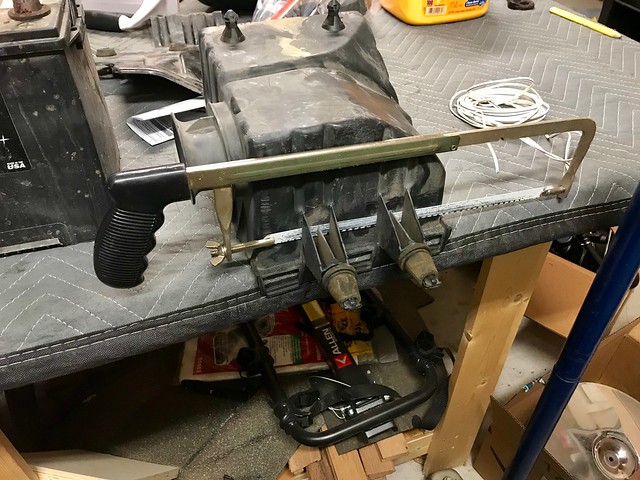
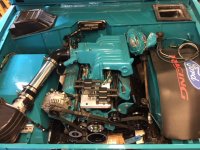
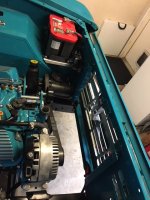
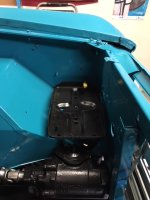
Had a semi-successful trip to the pick-n-pull today. Grabbed a heater tube assembly off an '01(?) Explorer. Luckily someone else had already removed the upper intake. This assembly is a bit different than my original. The nipples are located closer to the front of the engine and the hoses that connected to the nipples went somewhere under the upper intake (as seen on an '01 Mountaineer elsewhere in the yard.) I assume I can just take a hose and loop it between these two points.
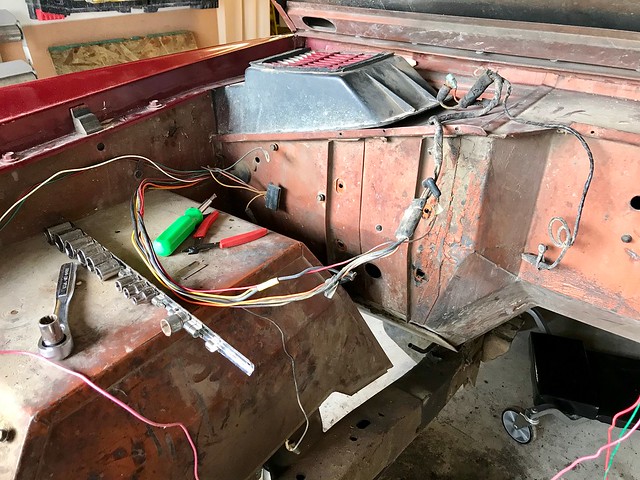
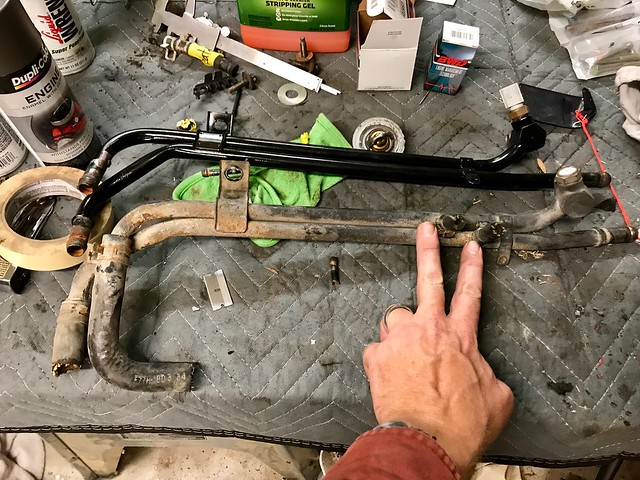
The tubes have a fair amount of corrosion. I wonder if I should just ditch this setup all together and run rubber lines from the front of the engine to the heater core? Maybe find some tees and create my own loop behind the engine? Curious if anyone else has done this.
46056400422_7be91fd2a2_z.jpg
 
OP
OP
Cooter_76

Cooter_76

Sr. Member
Joined
May 18, 2004
Messages
863
During my field trip, I also grabbed an air filter box off an '01 Mountaineer so I can build an intake similar to Bsquared's.
Pulled a PCM housing out of an '03 Escape. It was easy enough to remove the plastic cowl behind the hood to access the two screws that hold it in place.

31165556547_a1923e7268_z.jpg


32233587818_15c75e8da1_z.jpg
 

904Bronco

Contributor
Bronco Guru
Joined
Sep 28, 2004
Messages
6,006
Loc.
San Martin, CA
Yes you can loop 1/4" hose between... Recommend some silicon hose (Summit sells) with EFI clamps. Then you never have to think about it again...
 
OP
OP
Cooter_76

Cooter_76

Sr. Member
Joined
May 18, 2004
Messages
863
Received a care package from EFI Guy today. Can't wait to wrestle this octopus into the engine compartment!

46109727511_d04b025d85_z.jpg
 

bsquared

Contributor
Sr. Member
Joined
Dec 4, 2010
Messages
968
Hey Cooter,
Are you planning on relocating your battery to the driver's side to make room for that airbox on the passenger side? If so, I can send you some of this low profile aluminum strut that I used to mount both the airbox and the battery tray. Airbox tucked up real nice with it.

Here's a few pics in case it will help. Airbox struts are 8" long and battery tray struts are 10". I didn't get many pics of the battery box install, but you can get an idea from these pics. PM me your address if you want me to get some of this strut heading you way.

Those 1/4" cone nuts you see in the strut can be picked up at any Home Depot in the electrical section. Good luck with the harness!!!

Cheers, B2
 

Attachments

  • IMG_7222.jpg
    IMG_7222.jpg
    83.3 KB · Views: 381
  • Mounted.JPG
    Mounted.JPG
    101.6 KB · Views: 343
  • BoxOnTable.JPG
    BoxOnTable.JPG
    112.7 KB · Views: 333
  • SnoutBottomView.JPG
    SnoutBottomView.JPG
    77.9 KB · Views: 326
  • Intake2.jpg
    Intake2.jpg
    141.8 KB · Views: 416
  • IMG_7385.JPG
    IMG_7385.JPG
    124.4 KB · Views: 335
  • DSBattTray.JPG
    DSBattTray.JPG
    91.7 KB · Views: 330
OP
OP
Cooter_76

Cooter_76

Sr. Member
Joined
May 18, 2004
Messages
863
Hey Cooter,

Are you planning on relocating your battery to the driver's side to make room for that airbox on the passenger side? If so, I can send you some of this low profile aluminum strut that I used to mount both the airbox and the battery tray. Airbox tucked up real nice with it.


Here's a few pics in case it will help. Airbox struts are 8" long and battery tray struts are 10". I didn't get many pics of the battery box install, but you can get an idea from these pics. PM me your address if you want me to get some of this strut heading you way.


Those 1/4" cone nuts you see in the strut can be picked up at any Home Depot in the electrical section. Good luck with the harness!!!


Cheers, B2


That’s a very generous offer! I’ll send you my address. Thanks for the detailed pics also!


Sent from my iPhone using Tapatalk
 

bsquared

Contributor
Sr. Member
Joined
Dec 4, 2010
Messages
968
Now worries Mark! I'll get them heading your way asap! B2
 
OP
OP
Cooter_76

Cooter_76

Sr. Member
Joined
May 18, 2004
Messages
863
Now that the holidays are over, it's time to get back to work on this project.
- Yesterday I ordered the 4R70W-to-Dana 20 adapter and some new twin sticks from WH.
- Planning to use the Lokar shift linkage from Duff with my existing column shifter. Also seriously considering their new 2-into-1 exhaust kit & headers.
- "While I'm at it" I'm going to send my gauge cluster off to Classy Gauges to have it refurbished and add a volt meter.
- In the meantime I'll be pulling the old drive train out in whatever spare time I can muster.
 

904Bronco

Contributor
Bronco Guru
Joined
Sep 28, 2004
Messages
6,006
Loc.
San Martin, CA
Now that the holidays are over, it's time to get back to work on this project.
- Yesterday I ordered the 4R70W-to-Dana 20 adapter and some new twin sticks from WH.
- Planning to use the Lokar shift linkage from Duff with my existing column shifter. Also seriously considering their new 2-into-1 exhaust kit & headers.
- "While I'm at it" I'm going to send my gauge cluster off to Classy Gauges to have it refurbished and add a volt meter.
- In the meantime I'll be pulling the old drive train out in whatever spare time I can muster.


When you talk to Kevin at Classy Gauges, look at the check engine and overdrive off light addition. ;)
 
OP
OP
Cooter_76

Cooter_76

Sr. Member
Joined
May 18, 2004
Messages
863
I'm working on cleaning-up the engine compartment. I assume I'll no longer need any of the wires that went to the alternator, starter solenoid or voltage regulator. Is it just a matter of tracing these back to the firewall and snipping them?
46874624791_ae78c6d814_z.jpg


Will I need any of these wires that come out of the firewall near the gas pedal?
46874624751_4f4c41e437_z.jpg
 

904Bronco

Contributor
Bronco Guru
Joined
Sep 28, 2004
Messages
6,006
Loc.
San Martin, CA
I'm working on cleaning-up the engine compartment. I assume I'll no longer need any of the wires that went to the alternator, starter solenoid or voltage regulator. Is it just a matter of tracing these back to the firewall and snipping them?


Will I need any of these wires that come out of the firewall near the gas pedal?

You need the green/red stripe wire for the field on the Alt.
You also need the red/blue stripe starter relay wire. Garry's harness has one, but it is so that the ECU can see that the starter is activated.


The red three connector is for your gauges, oil/coolant. Garry usually has those in his harness, unless you told him not too?

The black square connector is for the Transmission back up lights and neutral safety switch.

I am not a fan of just looping off wires connectors... better to leave the connectors or put shrink tubing on the ends
 
OP
OP
Cooter_76

Cooter_76

Sr. Member
Joined
May 18, 2004
Messages
863
I cut a hole in the firewall to mount the Escape PCM box today. I think it fits pretty well. I bought some nut clips to secure it, but am going to have to modify them a bit. Hopefully they'll work. For reference, the opening is about 1" below the top of the firewall.

46868248992_51060370f3_z.jpg


46006137645_970bd3276f_z.jpg


46868249022_0a6a9a923d_z.jpg
 
OP
OP
Cooter_76

Cooter_76

Sr. Member
Joined
May 18, 2004
Messages
863
The red three connector is for your gauges, oil/coolant. Garry usually has those in his harness, unless you told him not too?

I just looked through the harness that Garry sent back to me. His harness does have connectors for the gauges, so I can remove this connector as well as the wires associated with it on the interior side of the firewall, correct?

The black square connector is for the Transmission back up lights and neutral safety switch.
This is all in the new harness too, I believe. So I should be able to remove these wires as well?

Thanks for the info!
 
OP
OP
Cooter_76

Cooter_76

Sr. Member
Joined
May 18, 2004
Messages
863
Taking a page from bsquared's book, I cut the mounting tabs off the 2001 Explorer airbox that I'd pulled from the junk yard, then removed the MAF from the '96 intake tube and mounted it to the box. I need to move my DIY headlight relays to gain some clearance, but I think it'll work nicely.

33053832958_b4ec193384_z.jpg


46929392831_07750b5502_z.jpg


33053832948_d66aca0a1c_z.jpg
 
Top