• Welcome to ClassicBroncos! - You are currently viewing the forums as a GUEST. To take advantage of all the site features, please take a moment to register. It's fast, simple and absolutely free. So please join our community today!
    If you have problems registering or can't log into your account, please contact Admin.

Dana 44 disc front for 76-77

OP
OP
Crawdad

Crawdad

Bronco Guru
Joined
Feb 16, 2011
Messages
3,635
That's how mine were from the factory too.
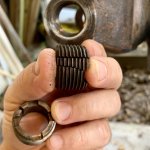
The new ones came with snap-rings however, and in one case (as with yours it sounds like) I was actually able to get one installed. But not the other.
Because it didn't have one to begin with, I never worried about it. But since one did fit, I felt it would not be a problem to use it.

By the way, when you got your first set of joints and the one pair didn't match the other, were the wrong ones any longer by any chance? Meaning do you think the snap-rings would have fit them if they'd been installed?
Or was the issue with the stud part, not the socket part? Sorry, I don't remember all the details. Just that they were going to send you some new ones.

Paul
JBG asked the right questions and they determined I needed the taller silver ones. The kit didn’t come with new camber nuts so hopefully I can save the old ones.
 

migs

Sponsor/Vendor
Bronco Guru
Joined
Nov 12, 2011
Messages
1,321
Had this track bar riser fabbed up by Migs that I’ve had for a couple of years now. It’s about time to weld it in position. Gotta remove some old undercoat/ paint so I gotta get the sandblasted out of hiding and get this area cleaned up.

Everything's looking great!
Do you know for sure where the riser needs to be before welding it on? I made it so it can slide up and down to find the best position to match the track bar to the drag link. Typically you would want to do this with the bronco at ride height and the steering linkage installed.
I know it will be a while before you have the body and all the weight on it, so you could still get it close using the frame and front axle assembly. I did mine by estimating what I'd have for ride height.
set your frame up level, install the front axle/radius arm assembly without the springs and jack it up to where you believe it'll be based on measurement between it and the frame.
install the steering box, knuckles and all steering linkage... You don't need to fully seat it all, just snug it up good. From this point, after adjusting it all, you can now position the riser bracket to best match the track bar angle to the drag link.
Sorry for being long winded and if you've already figured out what to do with it, but I just wanted to throw this out there just in case and possibly help prevent any headaches down the road.
 
OP
OP
Crawdad

Crawdad

Bronco Guru
Joined
Feb 16, 2011
Messages
3,635
Everything's looking great!
Do you know for sure where the riser needs to be before welding it on? I made it so it can slide up and down to find the best position to match the track bar to the drag link. Typically you would want to do this with the bronco at ride height and the steering linkage installed.
I know it will be a while before you have the body and all the weight on it, so you could still get it close using the frame and front axle assembly. I did mine by estimating what I'd have for ride height.
set your frame up level, install the front axle/radius arm assembly without the springs and jack it up to where you believe it'll be based on measurement between it and the frame.
install the steering box, knuckles and all steering linkage... You don't need to fully seat it all, just snug it up good. From this point, after adjusting it all, you can now position the riser bracket to best match the track bar angle to the drag link.
Sorry for being long winded and if you've already figured out what to do with it, but I just wanted to throw this out there just in case and possibly help prevent any headaches down the road.

You know I was just thinking about that same issue when I was outside mocking it up. I was going to PM you and ask where would be a good spot. Now reading the above a may just wait until I have everything underneath. My powdercoat guy said he would coat the axle housing for $100, but I may spend $60 to sandblast it clean and epoxy/ enamel paint it after. That way I can go back later on and paint over the newly welded bracket. I appreciate the advice B!
 
OP
OP
Crawdad

Crawdad

Bronco Guru
Joined
Feb 16, 2011
Messages
3,635
I figured I would do a lil update to this thread. Last July thru Nov I spent some time across the pond in Kuwait. Talk about a sh!thole! My first day there was near 130 degrees. And the dust storms were atrocious. I was able to buy a few bronco parts by taking advantage of the Black Friday discounts. Big thanks to all those vendors! I bought a good bit of D44 parts such as new axle shafts, adjustable track bar, and other various brake parts.

The problem is I can’t get much done until I get Migs track-Bar riser installed. My only issue with his riser is that it has to be welded on. Unless I waited till the very end of my build (which was prolly the intent by Migs) I had to come up with another option. I also don’t know what motor I truly want to put in my 77. Changing out front end weight (302 to a 351) and different length coils could throw out the proper angle of the track-bar. I wanted a way to make the adjustments if I changed my mind. I tossed around many ideas and even lost some sleep thinking about it. In the end I wanted an adjustable track-bar riser. I’m not sure if this was a stupid idea (please tell me if I am!) and this in no way what Migs intended his product to be. “Perfection is the enemy of progress” is what I like to say. In the end I have about 1.5” of adjustments. Now I can go ahead and get the axle housing sandblasted and ready for paint. Once painted I will rebuild the inside and re-install under the frame.
 

Attachments

  • 2C327106-84AC-48F5-8491-D981F500A587.jpg
    2C327106-84AC-48F5-8491-D981F500A587.jpg
    132.4 KB · Views: 37
  • 11D905B3-9A0A-4D77-95AA-D1066CCEBE45.jpg
    11D905B3-9A0A-4D77-95AA-D1066CCEBE45.jpg
    92.6 KB · Views: 36
  • 7963DFA0-4AFA-46FB-B563-5AB1762617CE.jpg
    7963DFA0-4AFA-46FB-B563-5AB1762617CE.jpg
    198.2 KB · Views: 36
  • 345008C9-9631-4D66-B085-8D6089848B53.jpg
    345008C9-9631-4D66-B085-8D6089848B53.jpg
    154 KB · Views: 34
  • 95859D33-15A6-4BE5-8FB9-D0A6E4B4462B.jpg
    95859D33-15A6-4BE5-8FB9-D0A6E4B4462B.jpg
    134.4 KB · Views: 37
  • FBB6953A-56CB-44C2-A65A-9EAA81400086.jpg
    FBB6953A-56CB-44C2-A65A-9EAA81400086.jpg
    190.8 KB · Views: 35
  • E81AC589-50FB-4538-A832-1B7E6DA8EBF7.jpg
    E81AC589-50FB-4538-A832-1B7E6DA8EBF7.jpg
    84.7 KB · Views: 35
  • B9A371DA-953A-44AF-8CB5-A35FAA8BDCF5.jpg
    B9A371DA-953A-44AF-8CB5-A35FAA8BDCF5.jpg
    118.1 KB · Views: 34

74 Bronco Billy

Contributor
Sr. Member
Joined
Jul 4, 2016
Messages
775
I installed my WH TB riser before I had the body on, sans engine, etc. I put my whole front end suspension together as best I could, and then looked at where the different suspension components were in relation to one another.

I first used ratchet straps to cinch down my axles to the approximate axle to frame height that Paul recommended for my WH 3.5" SL. If you know what springs you are using, call the vendor and find out where the frame rides respective to the axle when used with those springs.

I next looked at the geometry of the different bars, specifically keeping the drag link as parallel as possible to the track bar, and keeping them as close to the same length as well. This will let those tubes go thru their respective arcs of motion in the same range of arc, if that makes sense.

This will allow you to put the TB riser where it needs to be, and the bolt should be mounted in the same vertical plane as the original bolt was, so that the lower end of the track bar does not move forward or backward in its position relative to the axle before it is welded in place. This keeps the axle in the same position while your suspension compresses and extends thru its range of motion.

Check out my pictures, I had to deal with my project going TRO, machining my own knuckles for High Steer Arms, and adding a RAM assist to the tie rod. But the geometry should be similar on yours at the end. THe last pic shows my mock up with a TB drop kit and the 3rd pic shows my final result. I did not have the suspension compressed enough in the beginning, and I found later I did not need the TB drop kit for my 3.5" SL. But look how parallel the TB and drag link are. That is what you want to mimic. Mine will be different from yours because of I have a inside the frame PS box that is really long, and I had to bend my Pitman arm (might need a bit more angle, but its getting there).

I hope this helps, and thank you for serving our country.
 

Attachments

  • TRO Last 2.jpg
    TRO Last 2.jpg
    113.8 KB · Views: 21
  • TB riser mock up 3.jpg
    TB riser mock up 3.jpg
    101.1 KB · Views: 20
  • TB riser from WH mock up.jpg
    TB riser from WH mock up.jpg
    65.2 KB · Views: 20
  • Fab Pitman Arm Uncompressed.jpg
    Fab Pitman Arm Uncompressed.jpg
    115.3 KB · Views: 23
OP
OP
Crawdad

Crawdad

Bronco Guru
Joined
Feb 16, 2011
Messages
3,635
I installed my WH TB riser before I had the body on, sans engine, etc. I put my whole front end suspension together as best I could, and then looked at where the different suspension components were in relation to one another.

I first used ratchet straps to cinch down my axles to the approximate axle to frame height that Paul recommended for my WH 3.5" SL. If you know what springs you are using, call the vendor and find out where the frame rides respective to the axle when used with those springs.

I next looked at the geometry of the different bars, specifically keeping the drag link as parallel as possible to the track bar, and keeping them as close to the same length as well. This will let those tubes go thru their respective arcs of motion in the same range of arc, if that makes sense.

This will allow you to put the TB riser where it needs to be, and the bolt should be mounted in the same vertical plane as the original bolt was, so that the lower end of the track bar does not move forward or backward in its position relative to the axle before it is welded in place. This keeps the axle in the same position while your suspension compresses and extends thru its range of motion.

Check out my pictures, I had to deal with my project going TRO, machining my own knuckles for High Steer Arms, and adding a RAM assist to the tie rod. But the geometry should be similar on yours at the end. THe last pic shows my mock up with a TB drop kit and the 3rd pic shows my final result. I did not have the suspension compressed enough in the beginning, and I found later I did not need the TB drop kit for my 3.5" SL. But look how parallel the TB and drag link are. That is what you want to mimic. Mine will be different from yours because of I have a inside the frame PS box that is really long, and I had to bend my Pitman arm (might need a bit more angle, but its getting there).

I hope this helps, and thank you for serving our country.

Thx Billy,
I never realized the number of factors that affect the geometry of a track bar. It is really something that needs to be tackled towards the end of a project. I can do what you did using ratchet straps and get to the proper height but you know as well as I do things change such as new springs, heavier motor, bumper with winch, etc. The bracket I have fabbed up should allow me to have 1.5” of adjustability. And if I want to I can tack weld a few spots for peace of mind. At the moment I need this axle done over the next few weeks. I need to move the drivetrain to storage for a lil bit. I really appreciate your feedback! Matt
 
OP
OP
Crawdad

Crawdad

Bronco Guru
Joined
Feb 16, 2011
Messages
3,635
I was going to reuse these once out but the big man upstairs has other plans for me.
 

Attachments

  • 942DE527-D7D8-4133-89C7-BC83AE661654.jpg
    942DE527-D7D8-4133-89C7-BC83AE661654.jpg
    97.4 KB · Views: 33

DirtDonk

Contributor
Bronco Guru
Joined
Nov 3, 2003
Messages
47,787
That'll buff right out!
A little polishing compound and JB Weld and you're on your way. Where to, we may never know... But you'd be on your way somewhere!

Good catch. Glad it didn't get put in place. Adjusting it might have been a practice in finickiness.

Paul
 
OP
OP
Crawdad

Crawdad

Bronco Guru
Joined
Feb 16, 2011
Messages
3,635
D44 powdercoated

Got it back from Stuyck Powder Coating and man I’m happy. Cost was only $75 and they took care of all the important holes and threads.

I think it’s time to pass this project on to our local guy in the South Carolina lowcountry. BlazinChuck has agreed to put this axle back together for me for a price I couldn’t turn down. Hopefully I have lost all the pieces I’ve purchased over the last two years. I’m looking forward to him helping me out.
 

Attachments

  • 48A543FC-CC44-47B5-B10A-D3A71EEEAF89.jpg
    48A543FC-CC44-47B5-B10A-D3A71EEEAF89.jpg
    164.5 KB · Views: 15
  • 1CDA0B1E-439C-4DA5-987D-42F4F66FD4C3.jpg
    1CDA0B1E-439C-4DA5-987D-42F4F66FD4C3.jpg
    168.5 KB · Views: 15
  • EDF9DC09-615A-487C-92DD-17E2F70945BD.jpeg
    EDF9DC09-615A-487C-92DD-17E2F70945BD.jpeg
    214.5 KB · Views: 14
OP
OP
Crawdad

Crawdad

Bronco Guru
Joined
Feb 16, 2011
Messages
3,635
Anyone got any good advice on some good, QUIET and affordable R&P set for a D44? Motive, US Standard, etc.? I hate to put back in the 3.50 stock gears when my rear has a 4.10. Ant good advice is appreciated.
Matt
 
Top