• Welcome to ClassicBroncos! - You are currently viewing the forums as a GUEST. To take advantage of all the site features, please take a moment to register. It's fast, simple and absolutely free. So please join our community today!
    If you have problems registering or can't log into your account, please contact Admin.

Fireball's '76 build thread - "Piece by Piece" - PAINTED, ASSEMBLED & ON THE ROAD!

OP
OP
Fireball05

Fireball05

Bronco Guru
Joined
Oct 7, 2012
Messages
1,822
Purists, please avert your eyes!

Might catch some flak for this one, but oh well. I've been admiring the lines of Pa72Bronc's fiberglass tub, and have seen Mike from Broncodesigns work at both SuperCel and Carlisle. One of the things I like is the smooth lines, and one of the reasons in the deleted seam b/w the rocker and the rear quarter. So, I decided to do the same!

See attached photos of the action: Strip, clean, weld, grind, metal2metal, sand, filler...
 

Attachments

  • IMG_2823.jpg
    IMG_2823.jpg
    67.8 KB · Views: 106
  • IMG_2825.jpg
    IMG_2825.jpg
    59.5 KB · Views: 123
  • IMG_2826.jpg
    IMG_2826.jpg
    55.9 KB · Views: 117
  • IMG_2834.jpg
    IMG_2834.jpg
    107.6 KB · Views: 116
  • IMG_2843.jpg
    IMG_2843.jpg
    58.2 KB · Views: 127
OP
OP
Fireball05

Fireball05

Bronco Guru
Joined
Oct 7, 2012
Messages
1,822
A few more photos from the body shop...

I finished stripping the doors and windshield frame today. Not sure how many wire wheels and stripping discs I went through but it took awhile! Was able to get everything cleaned out and ready.

The only surprise was some rust at the bottom corners of the windshield frame behind where the seal will go. It isn't terrible, I cleaned the area with the wire wheel, used the spotblaster and will use the metal2metal filler and call it a day.

I cleaned up a bunch of factory booger welds on the inside of the door frames, amazing how ugly that stuff was! Paint and body guy did all the metal filler and rough body work, tomorrow we will tape it up and spray with etch primer.
 

Attachments

  • IMG_2855.jpg
    IMG_2855.jpg
    102.4 KB · Views: 118
  • IMG_2856.jpg
    IMG_2856.jpg
    99.8 KB · Views: 102
  • IMG_2850.jpg
    IMG_2850.jpg
    77.8 KB · Views: 117
  • IMG_2849.jpg
    IMG_2849.jpg
    62.3 KB · Views: 120
  • IMG_2852.jpg
    IMG_2852.jpg
    80.4 KB · Views: 115
  • IMG_2846.jpg
    IMG_2846.jpg
    104.5 KB · Views: 117
  • IMG_0477.jpg
    IMG_0477.jpg
    89.1 KB · Views: 106
OP
OP
Fireball05

Fireball05

Bronco Guru
Joined
Oct 7, 2012
Messages
1,822
And, the paint color is....

Estate Green Metallic. A Ford color used on Explorers and Expeditions and perhaps some other models. We thought long and hard about this, and picking out the paint color is about the only thing my wife has been interested in during the build, so I went with her wishes for a dark green color. I really wanted to find a green that was originally on a Bronco that we really liked, but just couldn't Boxwood green is pretty, but is fairly common. The other greens are just a bit too bright.


Hella H4 euro lights, new chrome grille surround, headlight rings, 66-68 amber TS lenses, and riv-nuts and buttonhead SS screws for all visible fasteners. Quick shout out to Nick's Trix for the cool ideas...got to look at his latest build at SuperCel, they use riv-nuts and the Hella lights, looks awesome.


And the tailgate, with a wimbledon white stripe. Saw this on a few other builds and really like how it looked. To the keen observer, yes there is a dent right where the spare tire latch bracket goes. Body man suggested not to try and fill it and smooth it because 1) it'll be mostly covered by the bracket and the spare and 2) it would likely just crack anyway


Close up shot:
 

Blue Bastard

Bronco Guru
Joined
May 14, 2012
Messages
2,161
Fireball's '76 build thread - "Piece by Piece" - GETTING PAINTED!

Can't wait to see it in its new color. Looks like a good choice!


Blue

Sent from my iPhone using Tapatalk 2
 

WheelHorse

Bronco Guru
Joined
Nov 22, 2004
Messages
2,492
How do you like working with that metal to metal stuff?

I may need to get some of that as some light filler, seeing that I don't have a gun that could spray a good filler primer.
 

TPTFPS68

Full Member
Joined
Apr 23, 2005
Messages
405
Loc.
Mexico, Mo
How do you like working with that metal to metal stuff?

I may need to get some of that as some light filler, seeing that I don't have a gun that could spray a good filler primer.

metal to metal is a very hard sanding metal based product to go over welded areas to help seal and serve as a barrier. If you just need something for imperfections, and you don't think it will prime out with a good urethane primer, get some glaze from an automotive store. It is like spot putty but with hardner. It is used for slight imperfections, pinholes in body filler, etc. JMO!
 

AZ73

Contributor
Bronco Guru
Joined
Mar 28, 2012
Messages
3,610
Damn nice color! And you're getting ahead of me. I used metal to metal for specific spots that needed compression strength (like around the mirror holes), but as it's difficult to feather well, I used it to about 1/16th of flush, then finished it with a regular sandable filler that doesn't absorb moisture and is easier to feather.
 

AZ73

Contributor
Bronco Guru
Joined
Mar 28, 2012
Messages
3,610
BTW, did you paint the entire grill green, then layer over the white, or the reverse? or just paint them separately?
 
OP
OP
Fireball05

Fireball05

Bronco Guru
Joined
Oct 7, 2012
Messages
1,822
Thanks for the compliments guys! Remember, critiques and criticisms are welcome as well - this is my first attempt at an old vehicle restoration, so I can use all the help I can get :)

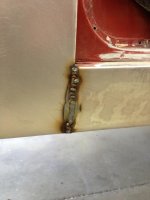
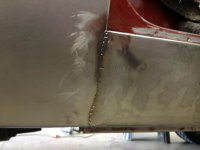
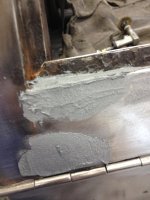
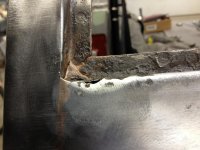
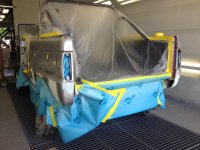
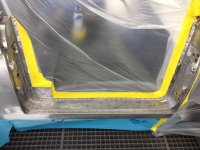
Regarding metal to metal, I am not actually doing any of the body work. I'm just there to do all the grunt work - stripping and sanding and tape and prep. The paint/body guy is doing all that. He actually read from the label to me about how it is easy to sand and called it a complete crock of shit! He only used it on limited areas (the windshield rust holes, a small amount on the pock mocks on the rear quarters, over the welded seam, etc) and I also think he sanded it before it had a chance to fully cure/harden.

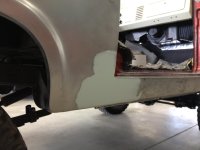
Then he used regular filler on all the bad areas. You can see that in one of the last photos I posted above, it's more of a yellow/tan color. He's hoping that after priming we'll only need to use a light glaze for any block sanding. So most of the heavy work was done early. Allen or others with more experience, feel free to chime in if this is not the proper way. Remember I'm doing this on a budget and working within the paint guy's time parameters/etc.

I had the doors, hinges and bolts all sandblasted and etch primed. Also the door latch mechanism and striker blast bead blasted and ready for zinc plating. Anyone have any luck with the zinc paint from Eastwood? That would be cheaper and easier than sending it to the plater.

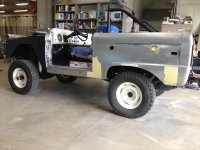
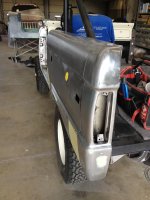
Posted a few more photos from today. Sad to say the Bronco won't be making it to the Roundup, but I will be, so hopefully that is enough to keep Tasker happy! Also you can rest easy knowing that my wife and I won't be vying hard for your blind fold driving contest title! Just tonight, in roughly 5 seconds or less, she was able to skillfully guide me to remove the piece of lettuce I had stuck b/w my teeth! Surely this uncanny synchronization would've led to a spectacular result for us :)
 

Attachments

  • IMG_2889.jpg
    IMG_2889.jpg
    85 KB · Views: 86
  • IMG_2885.jpg
    IMG_2885.jpg
    93.8 KB · Views: 78
  • IMG_2883.jpg
    IMG_2883.jpg
    101.9 KB · Views: 80
  • IMG_2877.jpg
    IMG_2877.jpg
    89.6 KB · Views: 93
  • IMG_2876.jpg
    IMG_2876.jpg
    82 KB · Views: 95
  • IMG_2873.jpg
    IMG_2873.jpg
    91 KB · Views: 91
  • IMG_2872.jpg
    IMG_2872.jpg
    74.5 KB · Views: 86
  • IMG_2890.jpg
    IMG_2890.jpg
    97 KB · Views: 88
Top