• Welcome to ClassicBroncos! - You are currently viewing the forums as a GUEST. To take advantage of all the site features, please take a moment to register. It's fast, simple and absolutely free. So please join our community today!
    If you have problems registering or can't log into your account, please contact Admin.

LORE Bronco restore

DirtDonk

Contributor
Bronco Guru
Joined
Nov 3, 2003
Messages
48,743
I'm not sure if you'll gain enough by taking the time and effort to map out the harness, to make it worth your time. My recommendation is to NOT do it then, unless there is some aspect that is critical to know for your needs.

Because all the wires are marked along their entire length, their function is not the question I'm guessing. But more of where exactly they splice into one another, or where they go to the fuse panel maybe?
Luckily there is rarely a problem with them, so not knowing all the gory details may not lose you anything.

And it's only "loosely" based on factory wiring. Their fuse panel holds more fuses, and they have a few extra power wires here and there. They actually work very well.
Unfortunately even that "loosely based" part won't do you any good since they are not based in any way whatsoever on a '70 or older Bronco. Only on the '71 and later models.
And of course almost none of the colors match factory Ford, so if you needed to keep that aspect for any reason, Painless or custom is your only recourse.

We've always kind of wondered about the lack of diagrams, but none of the manufacturers that I know of do either. Each one of the "big three" (Painless, Centech and American Autowire) have their own unique way of telling the story, but none are like a factory diagram. Maybe they figured that most people can't read a diagram anyway, so came up with their own? I can't even get through an AAW instruction sheet without my head hurting, but most of our customers who've bought one say that it's the easiest method of diagramming they've seen! Go figure...

How closely do you want this to match factory wiring (if at all)?
The big difference is the change from a single pass-through with grommet, a firewall mounted fuse panel with the two rectangular firewall connectors behind it, to the later style with glovebox mounted fuse panel and three (and later, four) pass-through harness branches with grommets.
All of the Bronco-specific harnesses are based at least loosely on the '71 and later wire routing.

For the EFI stuff though, since it's usually stand-alone and all you need are switched 12v, constant 12v, ground and some sensor signals, the main harness does not really have any effect on an EFI installation.

Hope it still fits your needs, but if un-wrapped and route-your-own are preferred, then the Painless and American Autowire, or some other setup are more un-finished than the Centech. Let's you see which wires go where (for the most part) and if you want to re-route some it's as simple as cutting a few zip ties.

Paul
 

fordfan

Bronco Guru
Joined
Sep 13, 2009
Messages
3,524
I'm enjoying your build thread and appreciate the pictures and time you are taking in sharing it with us.

As for the wiring, I have used several different brands of harnesses and I have been very dissatisfied with all of them! Most of my builds lean more toward originality instead of custom and this may be part of the problem. Most of the harness are really just wiring and a fuse terminal and you have to build your own harness! That's why there's not a schematic or good directions!! Why can someone make a wiring harness that is an exact duplicate of the original with the same connectors, same color coded wire, and just have provision to add a circuit or two for extra options.

Also, you are using your ultrasonic machine with great results; can you post up a photo or two of it? Thanks!
 

sprdv1

Contributor
REBEL
Joined
Mar 8, 2007
Messages
81,964
X2.... Enjoy following along w/the progress

I'm enjoying your build thread and appreciate the pictures and time you are taking in sharing it with us.

As for the wiring, I have used several different brands of harnesses and I have been very dissatisfied with all of them! Most of my builds lean more toward originality instead of custom and this may be part of the problem. Most of the harness are really just wiring and a fuse terminal and you have to build your own harness! That's why there's not a schematic or good directions!! Why can someone make a wiring harness that is an exact duplicate of the original with the same connectors, same color coded wire, and just have provision to add a circuit or two for extra options.

Also, you are using your ultrasonic machine with great results; can you post up a photo or two of it? Thanks!
 
OP
OP
halogrinder

halogrinder

Jr. Member
Joined
Jul 15, 2017
Messages
131
Loc.
Houston
(condensed wiring talk)

Paul

I'm a BMW master tech, and have a lot of wiring background because of it. Having worked on Euro cars for 20 years now, a proper wiring diagram is the key to success to any wiring issue or layout.
If you REALLY want to go off the deep end, You can start looking into motor sport wiring- and that's where it separates the men from the boys with talent and their wallet :D

I can point you to some motorsport wiring education that is free or very cheap for learning legit wiring techniques- but its expensive and tedious (besides the talent) of being able to do it correctly.

I know wiring is like this to most people
95225428_3290032727696324_2716854470154649600_n.jpg


While I don't need to use Raychem boots, DR25, Epoxy, and kevlar strung concentric wound wiring harnesses using TEFZEL wire-
I still want to have a clean harness that is easily identifiable and fixable, if there comes an issue down the road.
Remember, I don't own this truck- it's my Dad's and he's 2K miles away. When it's done and I'm confident it's ready to leave, I'm shipping it back to him.
If there's an electrical problem, its going to some shop where a tech will have to sort out whats going on, on a truck that doesn't have a schematic.

Nope. Not going to happen.
I'll be building a harness schematic similar to how BMW does it-
It'll be in a binder, and segregated into sections-
  • Fuse chart
  • Power Distribution
  • Ground distribution
  • Brake system
  • Light switch
  • Hazard/turn
  • Headlights
  • Off road lights
  • Park/tail/marker lights
  • Rear marker/licence lights
  • Wipers (If I decide to put them in)
  • Fuel tanks and pumps
  • Charging and starting
  • Fuel injection
  • Instrument cluster

The "american" way of doing wiring harnesses (like what you see on an original schematic) is IMO terribly executed and difficult to follow.

I'll need to lay it out, write down what I see, and draw it out.
This isn't new to me, I've built several engine harnesses for BMWs and other things. I support two GP2 cars and a retired Williams F1 car (in fact will be messing with this this labor day weekend at MSR Houston). I made a BMW N54 engine run on all BMW electronics outside of the vehicle about 7 years ago- something that's never been done other than at the factory. I like wiring :D

I just can't fathom how a wiring harness company wouldn't have a schematic available that doesn't look like doodles from some 16 year old art student.

Also, you are using your ultrasonic machine with great results; can you post up a photo or two of it? Thanks!

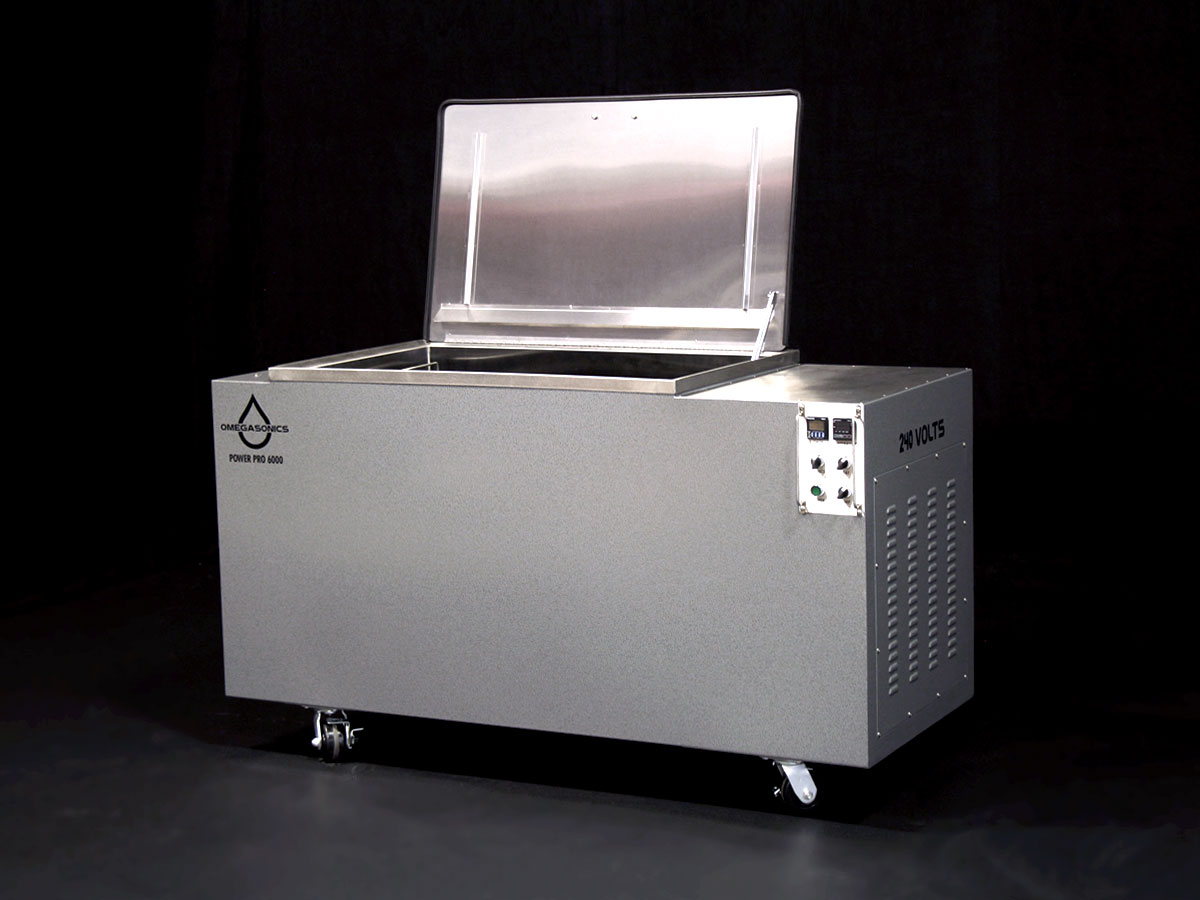
Sure- it's an Omegasonics 80 gallon US machine. It'll literally melt your bones if you put your hands in it ;D;D

I don't have a good picture posted somewhere since this place requires you to host pictures elsewhere rather than upload them here... so here's a stock photo.
Omegasonics-Aerospace-Defense-Power-Pro-6000-OMG-5040-Industrial-Washer-Ultrasonic-Cleaner2.jpg


X2.... Enjoy following along w/the progress
Thanks
Nice to have all that room to work and the right equipment too
Yes, at the expense of owning a shop, it is nice :D
 

toddz69

Sponsor/Vendor
Bronco Guru
Joined
Nov 28, 2001
Messages
10,425
Looking forward to seeing how you do your wiring as well. Take lots of pics and post here, please! :)

The shortcomings of the aftermarket harnesses have long been a sore spot for me as well. I'm still running the stock harness in my truck but have added a lot of stuff over the years and try to do it cleanly in the fine motorsports tradition.

Todd Z.
 

DirtDonk

Contributor
Bronco Guru
Joined
Nov 3, 2003
Messages
48,743
Why can('t?) someone make a wiring harness that is an exact duplicate of the original with the same connectors, same color coded wire, and just have provision to add a circuit or two for extra options.

American Autowire has an entire segment of the company (probably the main segment?) that does in fact make factory duplicate harnesses for restoration purposes. I would think by now they've seen how many people are re-wiring Broncos, and the value of the vehicles going up almost every day, maybe they are working on something.
Or are just waiting for someone to step up and order a few up!

I bet they make reproduction harnesses for vehicles that have a lot fewer restorations going on than Broncos. They could do worse I'm sure.

Paul
 

syndicate1

Contributor
Full Member
Joined
Feb 14, 2015
Messages
446
Powder coat came out pretty nice on this stuff. I'm an idiot, and didn't flap disc the factory weld spatter down before powdercoating it :/

20200825_122918-jpg.3109506

20200825_122924-jpg.3109507
20200825_122929-jpg.3109508

20200825_165149-jpg.3109509

20200825_122904-jpg.3109505


I popped open the Centech wiring harness I got for it, and a few things come to mind-
One, this electrical taped bullshit is not going to fly.
Two, this incorrectly sized looming isn't going to fly.
Three, the instructions are marginal, at best- and that's being nice.
Four, there is no wiring harness schematic that comes with the kit.
Five, I emailed Centech asking if they had a legitimate wiring schematic for their harness and was told no, that is based on a factory harness (sort of).

This is disturbing to me.
I'm not putting a harness in that I can't diagnose or understand where everything goes- besides the fact that I'll be adding fuel injection, an additional fuel pump for the Aux tank to pump into the main, the main fuel pump, and lights.
So........ I guess I'll be laying this out, recording what's been written on the wires themselves, and making my own schematic to put in a binder.

Frankly this pisses me off that I have to do this.
20200826_140207-jpg.3109510


Body shop painted a test panel for me
I LOVE my ultrasonic machine- it pulled this paint off the door latches.
I was able to save the door latches by ultrasonic cleaning them- it stripped all the paint off and made the original silver zinc coating look great!

20200828_154206-jpg.3109511


Using more science to remove yuck from hardware and fasteners.

20200826_154752-jpg.3109512


The frame looks great! Keep the pics coming.

As far as the wiring harness sounds like the typical complaints about Centech. Maybe consider the Painless wiring harness that is made specific for EB’s. Great instructions & diagrams, loom and ease of installation.


Sent from my iPhone using Tapatalk
 
OP
OP
halogrinder

halogrinder

Jr. Member
Joined
Jul 15, 2017
Messages
131
Loc.
Houston
I have the original harness. It's not beyond me to actually map it out legitimately and make a legit schematic (at the expense of my limited time)- these are all hand drawn and take quite amount of effort/re-do's to make it look correct.

Another thing to mention though when doing concourse restoration work (which I'm not- its more resto-mod) is the original tape and looming that was used. A lot of it is a fabric type tape.
 

Jedhead

Full Member
Joined
Feb 12, 2008
Messages
273
Can't open a lot of photos from 8/3/2020 forward, is it just me? Hate to miss he good stuff
 
OP
OP
halogrinder

halogrinder

Jr. Member
Joined
Jul 15, 2017
Messages
131
Loc.
Houston
Ok. I'm done. Seam sealing sucks. I'm glad I'm done with it.
It's currently sitting at LineX waiting to be sprayed from the bottom

20200828_160602-jpg.3109534

20200831_171847-jpg.3109535

20200831_171900-jpg.3109536

20200831_171911-jpg.3109537

20200831_171837-jpg.3109539

20200831_171916-jpg.3109538
 
OP
OP
halogrinder

halogrinder

Jr. Member
Joined
Jul 15, 2017
Messages
131
Loc.
Houston
So I had the wheels PMI'ed (#positive #metal #identification) to see exactly #what the wheels were made of. My pops always said they were "mag wheels" and I've seen them referred to as such multiple times online. Well, a few things were Interesting.
1. The PMI inspector was confused🤔 . I mean, this dude does this for a living, and didn't know what was going on with the metallurgy he was seeing on his device. "This stuff is Greek to me. What the heck is going on" 🤣🤣
2. There was very low amounts of magnesium or relative metal compounds similar to magnesium during any of the readings. The cleaned areas don't react to water, and non magnetic.
3. The wheel kept showing #rhodium in large amounts..... He brought the results to his engineer who confirmed. 🤔
4. We used a grinder mounted scuff pad and got a REAL clean area on the lip of the wheel. Notice how it shines? Still showed rhodium, no aluminum readings....
5.so we got a little aggressive and tried to get thru the rhodium to measure the substrate.... Nope.
So, apparently this stuff is a few mils deep into the wheel.....
So, all in all it was interesting. I think they are aluminum wheels and have some odd rhodium coating which is used in the jewelry industry to make it shine.

Any thoughts to my findings?

I'm hoping/excited to see how they polish up

20200917_144650-jpg.3109845

20200917_144702-jpg.3109844

20200917_144643-jpg.3109843


Pulled the centech harness out to see how it lays out. Somewhat troubling that they won't/don't supply a wiring diagram for their own harness....
So, I wrote down all the terminal ends and guess I'll be making one myself. Pulling the alternator wire to the fuse panel and going directly to the battery, second fuel tank wiring, adding fuel pump(s), off-road lights and a few other things.
It would definitely make my life easier if I didn't have to make a blind road map but I kind of enjoy drawing out diagrams anyways. Call it a sickness 🤣🤣


20200910_145832-jpg.3109846

20200910_161925-jpg.3109847


Oh, hey would you look at that! holley performance gives you a wiring diagram of their products!
I especially like the "do's and dont's" of wiring in the back of the book 🤣🤣🤣
20200915_162730-jpg.3109851


Threw a Lubelocker gasket in on the 9inch so I could assemble it.
Got my Plating back, some things will have to get redone. this is just some of it.

20200917_144515-jpg.3109848


These were "fun" installing without chipping the paint

20200909_160916-jpg.3109849


I need this bracket that welds onto the window frames- anyone have one or a lead?

20200911_172900-jpg.3109850


Buttoned up the 9 inch this afternoon :D

20200917_144524-jpg.3109853


20200917_144828-jpg.3109852


The wheels barrrrrrrrrrrely clear lol
The outer pads drag the rotor a little bit. no combination of shims included in the disc brake kit changes it favorably.
I may have to take the outer pad out, give it a little brrrrrrrrrrt and put it back in. We'll see.
What I WILL tell you, is its a pain in the ass moving this thing on the wheels because of the limited slip in it now lol
The bolts in the front shock mounts are just there so I don't lose them. they go in the back to space the shock away from the caliper.
Had I known this I would've probably just cut the shock mount off and moved it over before powder coating.

20200917_153253-jpg.3109854


Gathering my parts together for the engine. I had the original Intake manifold powder coated. Goofing off, I googled the part number.... sfjd-9425 f
So everything I've read shows it's a Shelby / Cobra intake. While it looks identical, my Intake doesn't have the "Shelby" casted into it (although it's got the flat spot where it would've been)

🤔🤔🤔
Anyone have any Insight?

23993-jpeg.3109855
 

BajaBronco

Contributor
Bronco Guru
Joined
Apr 30, 2003
Messages
3,974
That intake is one that found it's way to alot of Ford sponsored racers back in the day. I believe it was also for sale over the counter. I have seen the SFJD number like you have but they aren't as common as the c9 prefix. This intake mold was used for Shelby, Ford, Cobra, etc cast intakes.
 

sprdv1

Contributor
REBEL
Joined
Mar 8, 2007
Messages
81,964
long as they polish up, do it..

Have fun w/that wiring too Always a blast :-X:-X

So I had the wheels PMI'ed (#positive #metal #identification) to see exactly #what the wheels were made of. My pops always said they were "mag wheels" and I've seen them referred to as such multiple times online. Well, a few things were Interesting.
1. The PMI inspector was confused�� . I mean, this dude does this for a living, and didn't know what was going on with the metallurgy he was seeing on his device. "This stuff is Greek to me. What the heck is going on" ����
2. There was very low amounts of magnesium or relative metal compounds similar to magnesium during any of the readings. The cleaned areas don't react to water, and non magnetic.
3. The wheel kept showing #rhodium in large amounts..... He brought the results to his engineer who confirmed. ��
4. We used a grinder mounted scuff pad and got a REAL clean area on the lip of the wheel. Notice how it shines? Still showed rhodium, no aluminum readings....
5.so we got a little aggressive and tried to get thru the rhodium to measure the substrate.... Nope.
So, apparently this stuff is a few mils deep into the wheel.....
So, all in all it was interesting. I think they are aluminum wheels and have some odd rhodium coating which is used in the jewelry industry to make it shine.
 
OP
OP
halogrinder

halogrinder

Jr. Member
Joined
Jul 15, 2017
Messages
131
Loc.
Houston
been busy.
So, the plating on my Ubolts still suck- so they are going out with another batch of stuff to be replated once again- then I can put the axle under the truck.
I threw the leafsprings on the truck for some forward momentum and not be idle.
Here's some random body shop photo dumps.
We're using a high build primer (the buff color) over the epoxy primer.
Then, block out and see what we got- then either glaze, or repeat the high fill primer and block out again.

photo-38-jpg.3110030

photo-57-jpg.3110036

photo-60-jpg.3110037

photo-65-jpg.3110038


The grill needs some love. Still working with it to see if it's going to be salvagable or we're going to buy a new one. Warped, cracked, rippled, dented and improperly blasted from that rotten sandblaster guy (don't use fast blast in Pasadena Texas!)

photo-28-jpg.3110035


photo-44-jpg.3110039


photo-43-jpg.3110040


Picked up the tub from LineX of Houston, and they freakin knocked it out of the park!
WOW! Looks amazing.
Tub is now at the body shop, too.

20200923_083631-jpg.3110041

20200923_113510-jpg.3110042

20200923_113519-jpg.3110043
 
OP
OP
halogrinder

halogrinder

Jr. Member
Joined
Jul 15, 2017
Messages
131
Loc.
Houston
Got the front gears the way I wanted. Installed the inner and outer axle seals, and started assembling the front axle.
20200925_165821-jpg.3110148

20200925_165830-jpg.3110149

20200925_170633-jpg.3110150


Knuckles installed, king pin bearings and dampeners in. Preload I got them about 10-11 ft/lbs of turning torque.

img_20200928_181211-jpg.3110151


Painted the axleshafts with POR15-
20200929_122718-jpg.3110152

20200929_134003-jpg.3110153

20200929_134927-jpg.3110155

20200929_152458-jpg.3110156

20200929_160506-jpg.3110157


Lemme tell you about POR15 lol
That stuff goes A LONG WAY lolol
Holy crap. I can't believe how far and what coverage it has.
I used POR15 degreaser. I'm impressed with that- feels like its acidic. I diluted it about 1:4 or so.
I used it on a BMW at the shop that had an exhaust leak (diesel) and had soot EVERYWHERE.
It just melted the soot off vs purple power.
So, its worth getting.
Then, used the POR etching fluid. You keep it wet for 15-20 minutes. Then, wash it with water and fully dry it.

So I put a coat of POR15 on the engine block after doing the prep I described above.
Then, put a coat of POR engine enamel on top of it.
I'm VERY impressed how this stuff levels out.
Again, the coverage is bananas. I have 3 quarts of a gallon left over of the black...... after painting the forklift, hubs, rotor hats, trailer deck, fenders, railings, and other odd things lol!
Sheesh.
I have 7/8 or so of the pint left over of the blue enamel paint. Sheesh!

20200924_142804-jpg.3110158

20200924_171631-jpg.3110159

20200924_171725-jpg.3110160
 

JeffG

Contributor
Sr. Member
Joined
May 7, 2004
Messages
512
Loc.
San Antonio, TX
I have never tried the Por15 Degreaser. I need to order some of that stuff if it works that good. Project is looking good.
 
OP
OP
halogrinder

halogrinder

Jr. Member
Joined
Jul 15, 2017
Messages
131
Loc.
Houston
So, I was looking into shock selection planning.....
Bilstein 4600 series
Bilstein 5100 series
Fox smoothy
King smoothy.

Pros and cons-
4600 looks most "period correct" I think..... but ill have to get the truck together, then flex it out with the forlift to measure for shocks. May not be able to find a 4600 series shock since its kind of designed for stock applications.
5100 series has tons of options, so length I dont think will be an issue. Shock valving from what I can see is stiffer by default- so 8 of them may make it ride poorly.
Fox can be valved and pressurized if I need to adjust them- hopefully I don't/won't have to go through that.
King, same thing.
 
Top