• Welcome to ClassicBroncos! - You are currently viewing the forums as a GUEST. To take advantage of all the site features, please take a moment to register. It's fast, simple and absolutely free. So please join our community today!
    If you have problems registering or can't log into your account, please contact Admin.

migs Bronco Barn - a chronicle of what's happening at the new place

OP
OP
migs

migs

Sponsor/Vendor
Bronco Guru
Joined
Nov 12, 2011
Messages
1,386
Thanks, but couldn’t look any worse that when we started.


Might be a little delay as I have the front of my daily driver exploded all over the floor at the moment….

IMG_5810.jpeg
 
OP
OP
migs

migs

Sponsor/Vendor
Bronco Guru
Joined
Nov 12, 2011
Messages
1,386
Good luck with the daily. I'm sure glad I don't live where the metal termites are king, some of that is rough looking.
Thanks. Been trying to convince the family we should move south…

And the fact that I have to make custom patch pieces for a 2011 expedition must mean it’s a classic now….right??:D:rolleyes:

IMG_5852.jpeg IMG_5853.jpeg
 
OP
OP
migs

migs

Sponsor/Vendor
Bronco Guru
Joined
Nov 12, 2011
Messages
1,386
Some updates... got the "RELIC" back together with a bunch of new parts, hopefully maybe last me a couple more years before rusting out again:rolleyes:

IMG_5800.jpg IMG_5871.jpg IMG_5872.jpg IMG_5890.jpg IMG_5983.jpg
 
OP
OP
migs

migs

Sponsor/Vendor
Bronco Guru
Joined
Nov 12, 2011
Messages
1,386
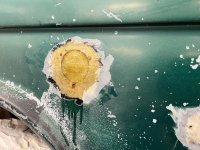
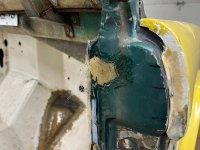
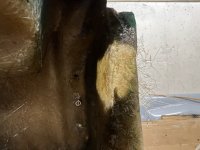
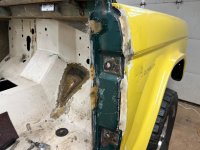
And then back to some more fiberglass work. I sanded down those previous spots I had glassed up a while back and prepped a few more spots to do. discovered a stress crack under the windshield frame area on the upper passenger side hinge post.

IMG_6068.jpg IMG_6069.jpg IMG_6070.jpg IMG_6071.jpg IMG_6072.jpg IMG_6073.jpg IMG_6074.jpg
 
OP
OP
migs

migs

Sponsor/Vendor
Bronco Guru
Joined
Nov 12, 2011
Messages
1,386
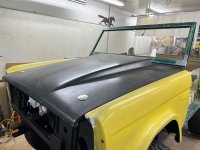
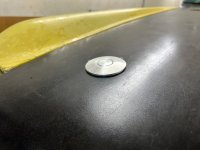
Added some more sticky itchy cloth, and also bolted the hood back up. Those slick push button hoop pin latches work well but I discovered that the hood will need some form of bumpers to apply slight upward tension on them. otherwise the hood will rattle from the slop up and down and the buttons are difficult to push and don't work as they should, they need that opposite tension against them to function properly.

IMG_6075.jpg IMG_6076(1).jpg IMG_6077.jpg IMG_6078.jpg IMG_6079.jpg IMG_6080.jpg IMG_6081.jpg
 
OP
OP
migs

migs

Sponsor/Vendor
Bronco Guru
Joined
Nov 12, 2011
Messages
1,386
Looks great so far!
Thanks, your build thread was helpful for ideas and inspiration on working with the old glass tub. I was even tempted at one point to fuse the fenders and door inserts to the tub.:cool:

Started sanding the body, less lime more lemon.... Less mellow more yellow? Well, the curtain wall and exhaust fan in the door is working great, even with blasting the dust all over the place in there with the air gun, don't even have to cover the nice stuff on the other side.

IMG_6112.jpg IMG_6113.jpg IMG_6114.jpg IMG_6115.jpg IMG_6116.jpg IMG_6117.jpg IMG_6118.jpg IMG_6119.jpg
 
OP
OP
migs

migs

Sponsor/Vendor
Bronco Guru
Joined
Nov 12, 2011
Messages
1,386
Started fitting the door inserts. Not perfect, but not too bad considering the not so great tub dimensions and a good bit of warpage in the rocker. Always fun fitting aftermarket parts to really old aftermarket parts 😁

IMG_6149.jpg IMG_6150.jpg IMG_6151.jpg IMG_6152.jpg IMG_6153.jpg
 

904Bronco

Contributor
Bronco Guru
Joined
Sep 28, 2004
Messages
6,023
Loc.
San Martin, CA
Started fitting the door inserts. Not perfect, but not too bad considering the not so great tub dimensions and a good bit of warpage in the rocker. Always fun fitting aftermarket parts to really old aftermarket parts 😁
Never a dull moment... ;)

Nice work Migs...
 

tasker

Contributor
all knowing of nothing
Joined
Jun 2, 2006
Messages
21,120
Loc.
NH
OP
OP
migs

migs

Sponsor/Vendor
Bronco Guru
Joined
Nov 12, 2011
Messages
1,386
Thanks. Big milestone today, all the body panels are now fitted and final mounted....and way more solidly than I ever thought they would be considering what we're dealing with. First I adjusted the fenders a little and bolted the grill on. Then went back to sanding the remaining green off the tub. After blowing ten pounds of dust away I worked on fitting and mounting the passenger side door insert, this side fit a bit better than the drivers side. I did go back to the driver's side insert and reworked it a bit more to get it to fit a little better. Once those were in I test fit the inner insert panel pieces... not too bad, a little massaging and reworking and they'll mount up nicely.

So that's it for today's escapades, time to start on the bodywork next. But for now here's a whole bunch of pictures 😁

IMG_6154.jpg IMG_6155.jpg IMG_6156.jpg IMG_6157.jpg IMG_6158.jpg IMG_6159.jpg IMG_6160.jpg IMG_6161.jpg
 
Top