• Just a reminder that you won't be able to start new posts or reply to existings posts in the Archive forum.

    This is where all the old posts go so they can still be used for reference and searched.
  • Welcome to ClassicBroncos! - You are currently viewing the forums as a GUEST. To take advantage of all the site features, please take a moment to register. It's fast, simple and absolutely free. So please join our community today!
    If you have problems registering or can't log into your account, please contact Admin.

More work on my 67

A4x4Junky

Full Member
Joined
Jan 9, 2007
Messages
550
Loc.
South Jersey
I dont know, maybe Im just a glutton for punishment. Possibly a masochist?

Either way I decided to redo my Bronco...only a little more this time. I did a lot of foundation work in another post: http://classicbroncos.com/forums/showthread.php?t=96136
but am still not happy with the current state of my truck. I took the "easy" way out on a number of things in that build and have decided to work on those areas.

On the list:

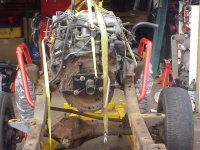
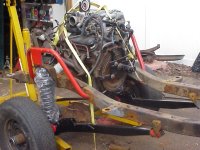
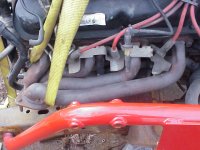
1. Swap in 351 Lightning motor in place of 170. I have already purchased the engine and will be converting to Mustang mass air setup. I picked up the harnesses, computer, relays, sensors, and mass air meter a while back.
2. Swap in the BC23 gallon tank I picked up a while back. I still have to buy the fuel pump. Once in place Ill have to run the feed and return fuel lines.
3. I want an overdrive transmission, but dont have the money for it right now. Instead I will put in a V-8 version of the 3-speed trans with the V-8 intermediate housing. Not what I want, but that will give me something to do later too ;D
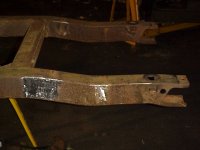
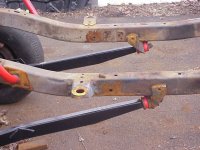
4. Extend the wheelbase. I got mixed responses when I asked the benefits of extended wheelbases a while back, but have decided to do it. No one gave any negatives besides the amount of work necessary to make this happen. This is only time and this is my hobby...so might as well have some fun. Love the challenge of doing things I havent done before. I have decided (as of now, but subject to change) to move the front forward 2" and the rear back 4".
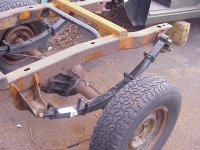
5. Swap in a Dana 44 with 3.50s instead of the Dana 30 with 4.56s. This D44 also has disc brakes instead of the drum brakes on the 30. I also have the matching big bearing 9" to go with it so my ratios will be the same. Since I dont have the overdrive and only run 29ish inch tires I will be happy with the opportunity to run on the highway for once.
6. I now have both a J-shift and T-shift t-case...not sure which will go back in the truck.
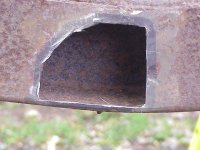
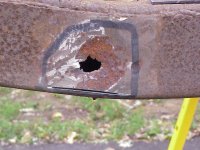
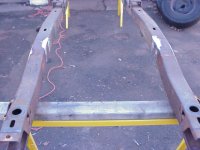
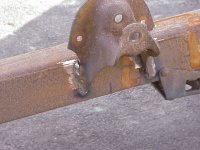
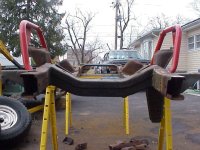
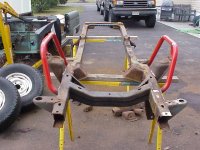
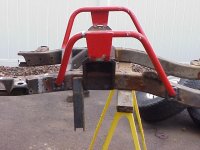
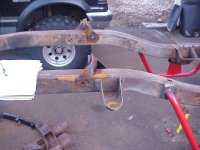
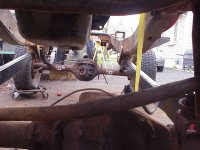
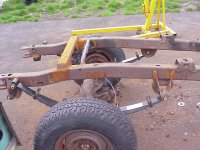
7. Pull the body off the frame. Sandblast and treat the frame and axles prior to reassembly. Finish the bodywork from the other post. The interior doesnt look bad, but the underbody could use some love.
8. I now have the pieces for power brakes, so will add that as well as new brake lines over the whole vehicle.
9. I have a complete power steering setup I will install. Gonna have to figure out brackets, pullyes, etc, but will finally be able to steer.

Once I get it to this point, I will start a new list. ;D

Thoughts, ideas, and criticism welcome for any and all parts of this. Better to have you convince me to change my mind now. :p

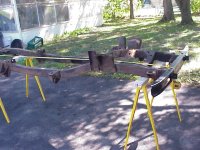
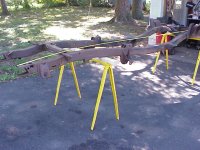
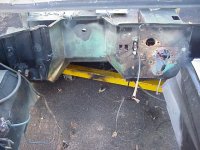
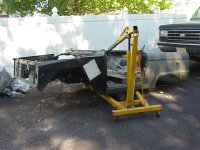
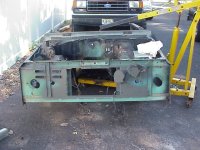
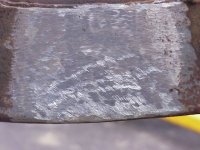
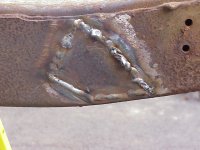
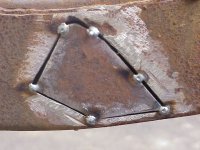
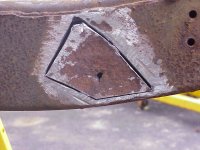
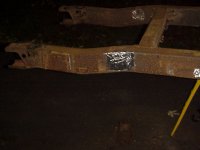
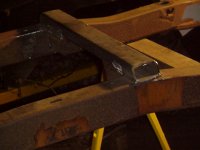
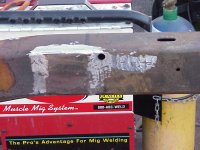
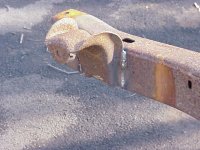
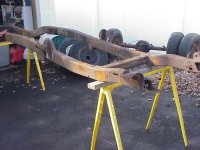
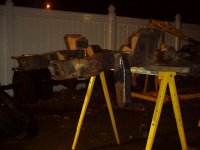
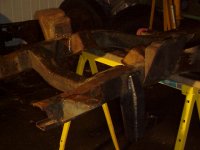
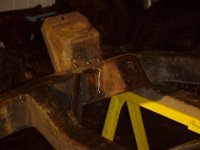
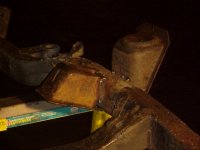
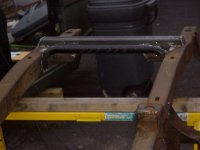
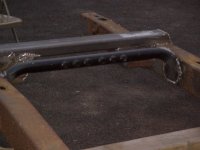
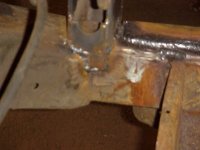
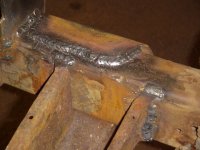
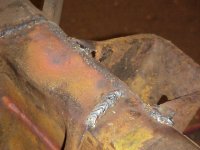
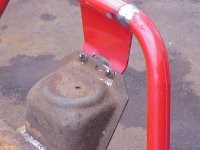
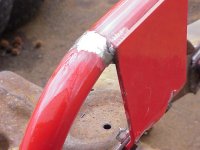
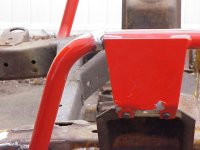
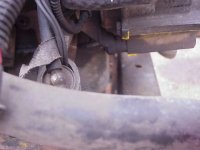
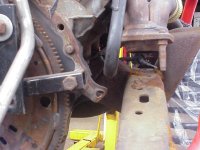
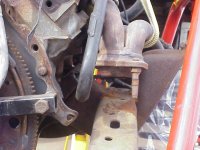
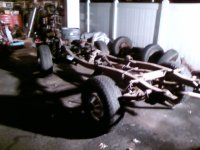
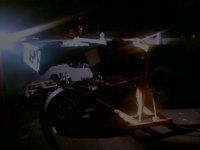
Been working on this in my spare time. Got the interior, dash, steering column, wiring harnesses, engine, windshield, doors, top, fenders, hood...and everything else that bolts to the body removed and got the body off the frame tonight. Went a lot easier than I expected. Forgive the photos...crappy phone and even worse lighting.

Anthony
 

Attachments

  • attachment1.jpg
    attachment1.jpg
    49.8 KB · Views: 114
  • attachment2.jpg
    attachment2.jpg
    71.5 KB · Views: 129
  • attachment3.jpg
    attachment3.jpg
    35.2 KB · Views: 100
Last edited:
OP
OP
A4x4Junky

A4x4Junky

Full Member
Joined
Jan 9, 2007
Messages
550
Loc.
South Jersey
Looks like some good progress!

Appreciate the encouragement, but so far from done :cry:

Plan to continue stripping the frame tonight. Figure if I can get the trans, t-case, shocks, driveshafts, brake and fuel lines, exhaust, and steering box off tonight it will be a good night. Time permitting I will start working on front and rear springs, but I get the feeling I will have to burn the bushings out to get them off.

Anthony
 
OP
OP
A4x4Junky

A4x4Junky

Full Member
Joined
Jan 9, 2007
Messages
550
Loc.
South Jersey
Got a lot done tonight. Had some help and was able to completely strip the frame. Axles, trans, t-case, all wiring, fuel lines, shocks, springs, and on and on are off.

Next stop is rotisserie. Anyone close to Jersey have one they are willing to lend out? ;D

Took the necessary measurements tonight and will see where I can get the materials for a reasonable cost. Just a shame to build this and use it once.

Anthony
 
OP
OP
A4x4Junky

A4x4Junky

Full Member
Joined
Jan 9, 2007
Messages
550
Loc.
South Jersey
Spent some time on the frame tonight. Mostly measuring. Since the frame is not flat across, how do you typically determine the correct locations for the spring hangers? I did my best to level the frame and drew a line. Once the hangers are removed I should be able to measure along that line and then weld. If there is an easier/better way, please let me know.

I did manage to remove the 6 cyl motor stands from the frame. Little bit of cutting and a whole lot of grinding.

Anthony
 

Attachments

  • Frame2.JPG
    Frame2.JPG
    83.5 KB · Views: 104
  • Frame1.JPG
    Frame1.JPG
    80.3 KB · Views: 111
  • Firewall.JPG
    Firewall.JPG
    73.7 KB · Views: 93
  • Tub Driver Side.JPG
    Tub Driver Side.JPG
    66.5 KB · Views: 143
  • Tub Front.JPG
    Tub Front.JPG
    74.8 KB · Views: 101
OP
OP
A4x4Junky

A4x4Junky

Full Member
Joined
Jan 9, 2007
Messages
550
Loc.
South Jersey
Not moving as quickly as I would like, but making progress. Have the rear leaf hangers all off, cleaned up and ready to rehang. I have the old bumpstops and brackets removed and frame cleaned up.

I have the old rear shock mounts removed. I was suprised to find holes under there. Must have been a nasty place for moisture to attack because the rest of the frame isnt in bad shape at all. No where near as heavily scaled as the 76 chasis I picked up for parts. Cut out some patch metal tonight and will try to get those areas fixed next time I work on it.

Started cutting off the front shock mounts and the coil buckets.

This seems like a small list, but I suspect anyone that has done this before will vouch for the fact that it is a hell of a lot more work than you would expect.

Anthony
 
OP
OP
A4x4Junky

A4x4Junky

Full Member
Joined
Jan 9, 2007
Messages
550
Loc.
South Jersey
Got some more done tonight. Started working on the little bit of rot I found under the shock towers. Driver side had a dime sized hole, but thin metal an inch or so around that. Passenger side had a quarter sized hole, but metal around that was thin too. I had never done this kind of repair, so was nervous...but was easier than I expected.
Pics are
1. Hole in Driver side
2. Driver side rot cut out
3. Driver side patch tacked into place
4. Driver side welded in
5. Driver side complete
6. Driver side from further away
Should be strong enough to last a while.
Same process for passenger side:
1. Rot
2. Cut out
3. Patch in place
4. Weld in patch
5. Frame fixed
6. From further away

I also removed the coil buckets, front shock mounts, and radius arm mounts.

Next up I will pull the track bar dropdown and finish grinding off old weld. Then its time to start building a rear crossmember.

Anthony
 

Attachments

  • Passenger Frame Rot Cutout.JPG
    Passenger Frame Rot Cutout.JPG
    62.1 KB · Views: 46
  • Passenger Frame Rot.JPG
    Passenger Frame Rot.JPG
    68.3 KB · Views: 60
  • Driver Frame Rear.JPG
    Driver Frame Rear.JPG
    42.1 KB · Views: 41
  • Driver Frame Rot Fixed.JPG
    Driver Frame Rot Fixed.JPG
    62.9 KB · Views: 56
  • Driver Frame Rot Patched.JPG
    Driver Frame Rot Patched.JPG
    56.8 KB · Views: 60
  • Driver Frame Rot Stitched In.JPG
    Driver Frame Rot Stitched In.JPG
    68.7 KB · Views: 50
  • Driver Frame Rot Cutout.JPG
    Driver Frame Rot Cutout.JPG
    64.3 KB · Views: 40
  • Driver Frame Rot.JPG
    Driver Frame Rot.JPG
    63.1 KB · Views: 64
  • Passenger Frame Rear.JPG
    Passenger Frame Rear.JPG
    37.6 KB · Views: 45
  • Passenger Frame Rot Fixed.JPG
    Passenger Frame Rot Fixed.JPG
    68.2 KB · Views: 79
  • Passenger Frame Rot Welded In.JPG
    Passenger Frame Rot Welded In.JPG
    62.4 KB · Views: 61
  • Passenger Frame Rot Fix in Place.JPG
    Passenger Frame Rot Fix in Place.JPG
    75 KB · Views: 42
OP
OP
A4x4Junky

A4x4Junky

Full Member
Joined
Jan 9, 2007
Messages
550
Loc.
South Jersey
Been far too long, but had a few circumstances come up that took too much time and money. Now that a few things in life are resolved I can begin working on the truck again.

Got a bunch of parts in, so looking forward to making progress as quickly as work will allow.

Got the leaf spring hangers welded up. Not overly difficult. Just had to commit to a location and weld.

From there I moved to the rear crossmember. I welded some metal across the frame to stop it from twisting, then removed the crossmember. I stole some ideas from Crawlin68. I saw his build thread and loved what he did with his crossmember, so I did some variation of it. To keep the gas tank and crossmsmber out of the way of the diff, I moved it back a few inches and also created a notch of about 4". This will give me more clearance than I expect I will ever need. Horrible pics, but Im not done yet either. Will have more fun tomorrow weather permitting.

Anthony
 

Attachments

  • X-Member Fabbed 2.JPG
    X-Member Fabbed 2.JPG
    40.5 KB · Views: 59
  • X-Member Removed 3.JPG
    X-Member Removed 3.JPG
    53.3 KB · Views: 52
  • X-Member Removed.JPG
    X-Member Removed.JPG
    64.4 KB · Views: 60
  • Leaf Spring Hanger Welded 3.JPG
    Leaf Spring Hanger Welded 3.JPG
    66 KB · Views: 57
  • Leaf Spring Hanger Welded 2.JPG
    Leaf Spring Hanger Welded 2.JPG
    59.2 KB · Views: 59
  • Frame During Reassembly.JPG
    Frame During Reassembly.JPG
    63.4 KB · Views: 50
OP
OP
A4x4Junky

A4x4Junky

Full Member
Joined
Jan 9, 2007
Messages
550
Loc.
South Jersey
Spent a bunch of time working on the project today. Rather pleased with progress.

Finished the crossmember. If I had spent more time grinding welds I could have made it a bit prettier, but I can live with it. I was pleased with how absolutely solid it turned out.

Got the rear shock hoop in place. This took far too much thought process for me. Should be simple, but I overcomplicated it and turned it into a 2 hour "where should I weld this" discussion. I think I have it right, and if not I am sure I dont need to talk about it any more tonight :p

I got the motor stands tacked into place. It is amazing how much you forget after just a couple months. I took damned good notes...or at least I thought so when I was taking them. Fast forward 3 months and the whole thing makes a lot less sense. Had to measure and remeasure ... but I think it is right. Guess Ill find out if the motor doesnt fit %)

Tacked both coil buckets into place. This was actually one of the easier pieces to get into place correctly.

Finally got the trac bar bracket all welded into place. This is one heavy piece of metal. Ajustable from stock to 5.5" lift I think. Ill cut off however much I dont need.

Tomorrow night, weather permitting, Ill get the coil buckets and motor stands fully welded and time permitting tackle the front shock hoops.

Anthony
 

Attachments

  • Frame Drivers Side View.JPG
    Frame Drivers Side View.JPG
    45.5 KB · Views: 42
  • Front Welded in.JPG
    Front Welded in.JPG
    45.2 KB · Views: 36
  • Motor mount and coil bucket 2.JPG
    Motor mount and coil bucket 2.JPG
    42.1 KB · Views: 42
  • Motor mount and Coil Bucket.JPG
    Motor mount and Coil Bucket.JPG
    42.1 KB · Views: 43
  • Crossmember and Shock Hoop Finished.JPG
    Crossmember and Shock Hoop Finished.JPG
    48.7 KB · Views: 78
  • Crossmember and Shock Hoop2.JPG
    Crossmember and Shock Hoop2.JPG
    48 KB · Views: 74
  • Crossmember and Shock Hoop.JPG
    Crossmember and Shock Hoop.JPG
    38.1 KB · Views: 54
  • Shock Hoop.JPG
    Shock Hoop.JPG
    42.8 KB · Views: 66
Last edited:
OP
OP
A4x4Junky

A4x4Junky

Full Member
Joined
Jan 9, 2007
Messages
550
Loc.
South Jersey
Cobralee - Thanks! Im eager to get more done. Seems so slow moving.

Only had 2 hours tonight, but got some more done. Finished welding the top of the coil buckets as well as the top and sides of the motor mount stands.

When I pulled the radius arm brackets off the frame I was not gentle. I assumed that the new radius arms would come with new brackets. I was wrong and straightening mine out made a lot more sense than spending 100ish dollars on new. In the rock, paper, scissors game of metalworking...fire and large hammer always beat metal ;D ;D
Got them back into shape and saved the money.

Fabricated up a little frame support for the area where the power steeing box mounts. Nothing fancy, but should do the job. Got that welded into place.

Only pieces left to put together would be the radius arm brackets and front shock hoops.

I dont have the radius arms yet, so I dont know where to mount the brackets. If anyone has the directions or measurements for BroncoBobs radius arms and can post em up I can get that done a bit sooner.

My bigger issue is my front wheel wells. I moved the front axle forward 2 inches. I plan to run 3.5" suspension lift and 2" body lift with 35"ish tires. I assume that I will run into clearance issues with my inner wheel wells. I have done some searches and come up with a few ideas on how to resolve this...but havent found out for sure how much of a modification I will need.

Once that is determined I can figure out if I will have to modify my front shock hoop prior to installing it. If I have to open the wheel wells significantly, I can forgo the extra work. If modifying the wheel wells isnt necessary then I will have to cut down the shock hoop to clear the inner fender.

Ok, now Im dizzy :mad:

Anthony
 
OP
OP
A4x4Junky

A4x4Junky

Full Member
Joined
Jan 9, 2007
Messages
550
Loc.
South Jersey
Spent a couple hours on it again tonight. Working on finishing up the welds on the underside of the frame. Things like the coil buckets, motor mount stands, trac bar bracket, power steering brace, etc.

Slow going, but making progress. Hoping to have all welding done on frame this weekend. That and strip my 9 and 44.
 

Attachments

  • Trac Bar Bracket Modification.JPG
    Trac Bar Bracket Modification.JPG
    39.4 KB · Views: 57
  • Coil Bucket Under 4.JPG
    Coil Bucket Under 4.JPG
    56.5 KB · Views: 68
  • Coil Bucket Under 3.JPG
    Coil Bucket Under 3.JPG
    54.1 KB · Views: 54
OP
OP
A4x4Junky

A4x4Junky

Full Member
Joined
Jan 9, 2007
Messages
550
Loc.
South Jersey
Had a couple hours to burn today. Began by cutting off some weld on the bottom of my driver side coil bucket. I welded it in the wrong spot :mad:
Got that moved and rewelded.

Started work on my front shock hoops. Picked these up from a member here and they used to be nice and pretty with red powercoating...some of that didnt quite make it.
I moved the front axle forward 2 inches and didnt realize that in doing so the front leg of the shock hoop would be directly on the power steering gear box. I was considering selling the hoop and running the F250 style shock mounts...but common sense was talked out of me and I instead decided to modify the hoop. Wasnt too bad really. Cut out the offending 2.25 inches and reweld. Powercoating is toast so I will just paint this when I do the rest of the frame.

Doesnt seem like a lot of work, but the time just manages to fly by. To get the frame ready for sandblasting I still have to weld on the gas tank mounting tabs, radius arm mounts, and repair a few thin body mount perches. Not too bad, but I am looking forward to staring at something besides a frame for once.

I did get my front and rear springs today along with new u-bolts, spring bolts, and spring bushings. 3.5" Deaver springs front and rear. Hoping they do well both on and offroad.

Anthony
 

Attachments

  • Driver Shock Hoop Inside.JPG
    Driver Shock Hoop Inside.JPG
    48.1 KB · Views: 57
  • Front Frame Low.JPG
    Front Frame Low.JPG
    78.9 KB · Views: 33
  • Front Frame.JPG
    Front Frame.JPG
    77.4 KB · Views: 45
  • Shock Hoop Mod2.JPG
    Shock Hoop Mod2.JPG
    48.3 KB · Views: 45
  • Shock Hoop Mod.JPG
    Shock Hoop Mod.JPG
    46.8 KB · Views: 45
  • Driver Shock Hoop.JPG
    Driver Shock Hoop.JPG
    58.1 KB · Views: 79
OP
OP
A4x4Junky

A4x4Junky

Full Member
Joined
Jan 9, 2007
Messages
550
Loc.
South Jersey
Spent a lot of time working on it today, but didnt get a lot done. Got the gas tank mounting points welded on.

Larger issue I noticed today is that I might have to relocate my 2 front body mounts...so will have to look into that a bit more.

Anyone relocated the front mounts wanna share their wisdom?

Working on installing my radius arm brackets, but am not sure which way it goes. Is the ... um ... donut thingy supposed to be on the front of the bracket or on the back side of the bracket?

Anthony
 

Attachments

  • MVC-884F.JPG
    MVC-884F.JPG
    56.8 KB · Views: 58
  • MVC-883F.JPG
    MVC-883F.JPG
    55.4 KB · Views: 50
Last edited:
OP
OP
A4x4Junky

A4x4Junky

Full Member
Joined
Jan 9, 2007
Messages
550
Loc.
South Jersey
Been far to busy/lazy lately, but spent the better part of this morning working on the truck...well, at least truck parts. Got a bunch of parts mocked up to test fitment. Some things went better than expected, other things not quite as well.

Got the radius arms temporarily mounted to the Dana44 and then to the radius arm mounts. Wanted to be sure that everything lined up the way it should. No issues with this at all. Put the springs in with no retainers, just wanted to be sure the springs stood up straight. I suspected all would be fine and it was. Got the track bar into place and put a bolt through that and I actually had a front end again...at least for a little while.

Got the rear springs loosely into place (no bushings) so I could figure out the correct placement for rear shock mounting tab. Cleaned that area and now those are welded into place.

Picked up the engine and set that into place on the frame. Been a long time since I have seen that. Not too horrible...but did have some issues. I was afraid of the clearance between the oil pan and diff...seems ok to me, though I will have to doublecheck this later on when I have more weight on the front end. I was also not sure how well the oil pan would clear the front crossmember. My buddy said all would be fine...engine is in stock V8 location...but it still worried me. He was right...there is 3/4 to 1 inch of clearance.

Only real issue I found was the passenger side exhaust...I was hoping I could get away with using these factory manifold/header things...but the passenger side points directly at the frame...guess its time to do a search to see what others have done to remedy this. Ideas welcome.

Since I moved the front body mounts forward 3" and the rear springs and gas tank back 4" I wont be able to get the stock bumpers back on. Searched a bunch of threads and pulled a bunch of information together. Found a lot I liked and stole/borrowed a bunch of ideas from others. Decided mounting the style bumper I will end up making myself would be easier by closing the fishmouths on the ends of the frame. Cut out some metal and got those all boxed in and ground clean.

Pulled all the parts back off and have the frame back on sawhorses...was nice while it lasted. Now that I am sure everything is where I wanted it, I finished welding up the radius arm mounts. Then I test-fitted the advance adapters trans mount for 3550 swap. Had to grind off Fords factory booger-welds (not that mine are better) to get that to slide down the frame. That fits.

Ordered my POR15 today and plan to sandblast the frame, front and rear axles and a bunch of little parts next weekend. Paint em up all pretty-like and should be ready to start working on something besides a frame.

Anthony
 

Attachments

  • Oil Pan to Xmember Clearance.JPG
    Oil Pan to Xmember Clearance.JPG
    37.8 KB · Views: 44
  • Oil Pan to Diff Clearance 2.JPG
    Oil Pan to Diff Clearance 2.JPG
    62.2 KB · Views: 44
  • Oil Pan to Diff Clearance.JPG
    Oil Pan to Diff Clearance.JPG
    70.5 KB · Views: 51
  • Engine Mock Rear.JPG
    Engine Mock Rear.JPG
    78 KB · Views: 57
  • Engine Mock.JPG
    Engine Mock.JPG
    71.3 KB · Views: 85
  • Rear Springs Mock Passenger.JPG
    Rear Springs Mock Passenger.JPG
    77.3 KB · Views: 55
  • Rear Springs Mock Driver.JPG
    Rear Springs Mock Driver.JPG
    81.5 KB · Views: 69
  • Radius Arms Mock.JPG
    Radius Arms Mock.JPG
    71.3 KB · Views: 66
  • Driver Exhaust.JPG
    Driver Exhaust.JPG
    71.3 KB · Views: 53
  • Pass Exhaust Problem.JPG
    Pass Exhaust Problem.JPG
    58.5 KB · Views: 55
  • Passenger Exhaust Problem2.JPG
    Passenger Exhaust Problem2.JPG
    64 KB · Views: 44
  • Passenger Exhaust.JPG
    Passenger Exhaust.JPG
    68.2 KB · Views: 58
OP
OP
A4x4Junky

A4x4Junky

Full Member
Joined
Jan 9, 2007
Messages
550
Loc.
South Jersey
Finally got the rest of the welding done on the frame. Everything should be good to go at this point. Time to clean up the frame for paint. I used my crappy compressor last time I sandblasted and it was horrible...so I rented a much more powerful one this time. That was much nicer...however sandblasting still sucks. Got the goggles, ear protection, and respirator on...going to town. Have a few hours in and still not done. Dont want to have to rent the compressor for another day.

Im trying to save money wherever I can...and a second day of rental might negate any possible savings over paying someone else to do the work for me. Think Ill just ask the boss to let me take a personal day tomorrow and see if I cant get it done.

Anthony
 

ztoolman44

Jr. Member
Joined
Jan 8, 2005
Messages
304
Loc.
Farmington, Utah
Looking great. Its exciting to see others going through the same process. I got to visit my chassis today at the blaster and it got me motivated again. Keep up the good work and the updates.
 
OP
OP
A4x4Junky

A4x4Junky

Full Member
Joined
Jan 9, 2007
Messages
550
Loc.
South Jersey
Thanks ztoolman. Good luck with yours as well.

I will never sandblast a frame again. What I expected wouldnt take me very long took me a few hours the other night and all day yesterday. Ended up having to rent the compressor for 2 days instead of 1...and really hated my life yesterday.

Frame is done now, but never did get to the axles. Compressor returned now, so I guess Ill finish the axles with the small compressor.

Next time...without a doubt... I will pay someone to do this for me. The possible savings just arent worth it.

On the plus side...at least the frame is almost ready for POR15.

Anthony
 

NYLES

Bronco Guru
Joined
Aug 13, 2004
Messages
9,846
Did all mine with baby compressor took a week! if you blasted it I would not POR it.....Id use self eching expoy paint...ends up looking much better. No brush marks runs what not.

I see your in Jersey ....hmm road salt....yeap epoxy paint!
 
Top