• Just a reminder that you won't be able to start new posts or reply to existings posts in the Archive forum.

    This is where all the old posts go so they can still be used for reference and searched.
  • Welcome to ClassicBroncos! - You are currently viewing the forums as a GUEST. To take advantage of all the site features, please take a moment to register. It's fast, simple and absolutely free. So please join our community today!
    If you have problems registering or can't log into your account, please contact Admin.

More work on my 67

OP
OP
A4x4Junky

A4x4Junky

Full Member
Joined
Jan 9, 2007
Messages
550
Loc.
South Jersey
Didnt have long today, but wanted to get the rear suspension in place.

Didnt have too many problems with the rear, so decided to throw the trac bar in place...only the bushing wouldnt fit. Same deal as with the shackles. There was a thin metal bushing that had to come out. Wouldnt tap out with hammer, so torched this out as well.

92+2+4=96.

I didnt think that was true, but it looks to be. 92" original wheelbase. 2" forward on front axle. 4" back on rear axle...and my wheelbase is...96 :mad:

Not sure why...thinking that with weight on it this could change some...but imagine my suprise when I measured it out and it didnt come out to the 98" I expected.

Anthony
 

Attachments

  • Front.JPG
    Front.JPG
    90.5 KB · Views: 28
  • 96 Inch.JPG
    96 Inch.JPG
    47.1 KB · Views: 30
  • Rear Diff Placement.JPG
    Rear Diff Placement.JPG
    90.7 KB · Views: 29
  • Pass Side Rear 2.JPG
    Pass Side Rear 2.JPG
    95.6 KB · Views: 36
  • Pass Side Rear.JPG
    Pass Side Rear.JPG
    94 KB · Views: 38
  • Pass Side.JPG
    Pass Side.JPG
    94.9 KB · Views: 32
OP
OP
A4x4Junky

A4x4Junky

Full Member
Joined
Jan 9, 2007
Messages
550
Loc.
South Jersey
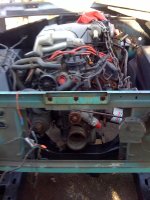
After far too long I decided to get off of my butt and get some work done.

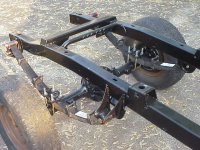
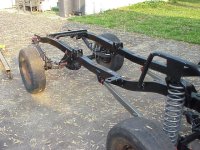
Took the transfer case apart to modify the shift rails. If all works as advertised I should have the ability to run high and low with either front or rear independantly. Wasnt too hard, tho I was nervous about taking off too much material and messing things up. Got that put back together and started working with the Advanced Adapters 3550 conversion pieces.

I must say, those directions sucked. There was no mention of a couple pieces in the kit and there was no mention of one seal that needed to be there. Im just glad that I saw these before following the directions. Anyone else have issues with how these were written up?

Either way, that is back together and the transfer case side of the 3550 conversion is in place.

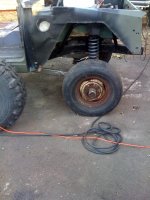
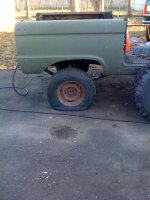
Gotta do a little garage cleaning, then I can work on the body modifications I plan to do. I plan to temporarily put the engine, trans, and t-case in place. Once that is done I can lower the body onto the frame and decide from there what will change.

Anthony
 
OP
OP
A4x4Junky

A4x4Junky

Full Member
Joined
Jan 9, 2007
Messages
550
Loc.
South Jersey
Temporarily mocked up the engine, trans and t-case on the frame. Ran into a couple issues with fitment between the t-case and the new trans crossmember. May still need to dimple the crossmember a touch for a little more clearance.
Once the drivetrain was in place I lifted the body and set that into place. Overall not too bad, but real tight on the factory lightning engine headers. Im not sure if that was because of the 2" body lift or not. I would be lying to say that Im not a little nervous about paying the money for the BC headers only to find they dont clear the inner fender well.

The body sat outside uncovered for the last year. Leaves piled up and rain sat there. I now have a bit more rust to deal with than if I had taken care of it before.

Cut out part of the driver rear wheel well. I need to elongate this anyway give clearance for my tires now that I moved the rear axle back 4". Wasnt hard to cut out and created a window for me to get to some of the rust. I decided to not waste my time cleaning up all the metal for now. Once I have the replacement parts I can make the final cuts, then clean it all up.

With the wheel well cut out I now see lots of rust on the inner part of the quarter panel. How should I address this? Im thinking about breaking out the sandblaster again and removing the vast majority of it...the POR15 the whole inside to help stop the rust. Any other thoughts?

Will order the metal I need for the rear wheel tubs and rust repair as well as the front inner fenders.
 

Attachments

  • passenger front wheel placement.jpg
    passenger front wheel placement.jpg
    74.7 KB · Views: 49
  • passenger rear wheel placement 3.jpg
    passenger rear wheel placement 3.jpg
    69.9 KB · Views: 46
  • Driver rear wheel tub cut out 3.jpg
    Driver rear wheel tub cut out 3.jpg
    88.1 KB · Views: 37
  • Driver rear wheel tub cut out 2.jpg
    Driver rear wheel tub cut out 2.jpg
    61.8 KB · Views: 31
  • Driver rear wheel tub cut out.jpg
    Driver rear wheel tub cut out.jpg
    73.7 KB · Views: 40
  • Driver rear wheel tub 3.jpg
    Driver rear wheel tub 3.jpg
    67.8 KB · Views: 29
  • Driver rear wheel tub 2.jpg
    Driver rear wheel tub 2.jpg
    72.3 KB · Views: 32
  • Driver rear wheel tub.jpg
    Driver rear wheel tub.jpg
    83.6 KB · Views: 37
  • Engine in place.jpg
    Engine in place.jpg
    72.3 KB · Views: 45

OX1

Bronco Guru
Joined
Aug 26, 2003
Messages
3,470
Lookin good!!!!! Ever use any of that rad support I gave ya??
 
OP
OP
A4x4Junky

A4x4Junky

Full Member
Joined
Jan 9, 2007
Messages
550
Loc.
South Jersey
Lookin good!!!!! Ever use any of that rad support I gave ya??

I am getting closer to using that. Until I decide how much room I need for fan and radiator I dont want to cut up either the one on the truck or the one I got from you. I think I am going to have to pick up a radiator so I can get an accurate measurement. The fan to radiator clearance looks like it will end up about 1/2 inch. Once I am sure how much room I need, I will work in the v8 rad support or at least part of it.

Anthony
 
Top