• Just a reminder that you won't be able to start new posts or reply to existings posts in the Archive forum.

    This is where all the old posts go so they can still be used for reference and searched.
  • Welcome to ClassicBroncos! - You are currently viewing the forums as a GUEST. To take advantage of all the site features, please take a moment to register. It's fast, simple and absolutely free. So please join our community today!
    If you have problems registering or can't log into your account, please contact Admin.

New Project for Tito - Explorer Radiator Mocked up, Hydro mocked up, aligning doors..

Green or Blue, what say you?

  • Med Green Glow Poly

    Votes: 65 58.0%
  • Reef Blue

    Votes: 47 42.0%

  • Total voters
    112

72_EB

66to77
Joined
Feb 4, 2003
Messages
4,962
A lot. Trust me. I just did an upper about a month ago. Fitment of the new Dynacorn was pretty good, but getting the old one was a pain. Didn't help it was like 200 degrees out when I did mine. %)

How much more work would it be to remove the upper at this point?
Thanks,

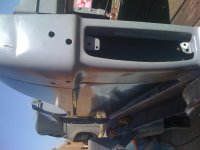
Looking good, Tito. Looks like you should have enough meat on that upper bone to weld to. :)
 
OP
OP
Tito

Tito

CB Fire Starter
Joined
Jan 29, 2006
Messages
10,781
Loc.
Bakersfield, CA
Thanks, the inner and upper are in real good shape. This seems to be a case of excessive mud or beach sand not washed out of the inner fender area. It just sat and rotted down. The bulk of the tub is really nice but the lower quarters had to go to do it right. If you looked at the tub from the inside or even the outside you would have never guessed the issues but when you stuck your head under and looked up you saw the mess.

Another tip...don't use the air chisel at night. I started working the driver side and proceeded to put the chisel right through the inner quarter. Woops! Oh well just another hole to fill :-X
 

Past_Miner

Contributor
Bronco Guru
Joined
Oct 22, 2003
Messages
1,021
Looking good. Your timing is perfect, I have to replace two of these (just as soon as they are off of backorder :mad:). It's always much easier when someone else shows us how to get it done.
 

Explorer

Bronco Guru
Joined
Mar 2, 2008
Messages
4,390
Loc.
Raphine, Virginia
Nice work. I've done three of them and my only real complaint is that the roll/curve in the top does not match the door and tailight. I've never figured out a way to fix that. I replaced the top two inches on another one and did a better job of matching it using a cheap bead roller. Hoping DynaCorn makes a better panel.
 
OP
OP
Tito

Tito

CB Fire Starter
Joined
Jan 29, 2006
Messages
10,781
Loc.
Bakersfield, CA
Well got everything all cleaned up and some holes drilled to plug weld through the inside. I can say for sure there is no way you could install this with adhesive unless you were using a lot of screws as well. Its going to take some encouragement to go in place.

Few things about the replacement panel...top lip is not like stock and half as long as it should be, only really goes about halfway across that upper flange so there is no "stop"
to know that it is in the right spot, all eyeball. Panel also seems to want to be "sprung" as the upper flange is not at the right angle to the inner quarter. Form seems to be pertty good on it to match the body lines but I need to get it up a little higher still to get the bottom edge to match the rocker...not sure if that will happen, all replacement panels I ever see seem to be too long and go below the rocker.

Game plan....
Going to get the quarter fitted at the upper seam first, put some self tappers in to suck it up to right spot then screw in the front and back flanges, then weld it up. Going to have to wait for a second hand to help me be sure the seam is right while I screw it in from down below since it ends up floating in there.
 

72_EB

66to77
Joined
Feb 4, 2003
Messages
4,962
Nonsense. You can do on your own, man. Grab yourself an 5/16 hex extension for your self tappers. I used like a 8 inch extension and was able to drill up into the upper while holding the lower panel tight against the inside lip with my right hand. Drilled lefty. I think I started in the middle so it didn't bow out. You'll have to remove your wheel and tire which I'm sure you've already done. Then remove one at a time and plug weld from up top. Kind of tedious, but you can do it. ;D

Going to have to wait for a second hand to help me be sure the seam is right while I screw it in from down below since it ends up floating in there.
 

72_EB

66to77
Joined
Feb 4, 2003
Messages
4,962
If it's not fitting tight against the inner lip, check the striker post where the lower goes in. Part of the factory brazing may need to be removed for proper fitting of your new lower. There is like a little notch in the factory post where the top of the lower panel slips in. Ford then brazed it here. I had to snip a little off the Dynacorn lower to fit in here properly. Also, the fold that wraps around the striker post had to be ground down slightly to fit the replacement lower as well. Have fun!
 

72_EB

66to77
Joined
Feb 4, 2003
Messages
4,962
Here's where I'm talking about.
 

Attachments

  • lower detail.jpg
    lower detail.jpg
    79 KB · Views: 98
OP
OP
Tito

Tito

CB Fire Starter
Joined
Jan 29, 2006
Messages
10,781
Loc.
Bakersfield, CA
Haha, yeah well its sitting on my trailer with no frame. I squeezed my fat ass under the tub on the trailer with my head in the wheel well (almost got stuck). Problem was that the fender doesnt go all the way in to the inner edge, thats too far it seems. I might roll the tub on its top maybe then I can access it real easy, get it all screwed in on both sides and weld it when I flip it back over.
 
OP
OP
Tito

Tito

CB Fire Starter
Joined
Jan 29, 2006
Messages
10,781
Loc.
Bakersfield, CA
If it's not fitting tight against the inner lip, check the striker post where the lower goes in. Part of the factory brazing may need to be removed for proper fitting of your new lower. There is like a little notch in the factory post where the top of the lower panel slips in. Ford then brazed it here. I had to snip a little off the Dynacorn lower to fit in here properly. Also, the fold that wraps around the striker post had to be ground down slightly to fit the replacement lower as well. Have fun!

Yup, I notched that on the striker to fit up in there, figured I would seam seal it or weld it up afterwards.

Is it supposed to fit all the way back? seems like too far in when I have it there.
 

72_EB

66to77
Joined
Feb 4, 2003
Messages
4,962
I've had a couple close calls with the old noggin stuck between the tire and wheel well (usually up front though). That's funny stuff. You'll be fine. Just don't drill 'em all the way into the trailer, man. ;D
 
OP
OP
Tito

Tito

CB Fire Starter
Joined
Jan 29, 2006
Messages
10,781
Loc.
Bakersfield, CA
Alright, feel a little better about it this morning. Flipped the tub over last night so I can get a better feel for it and access the under panel. Used some self tappers and fit is much better, I think I can live with it. Body lines are really close.
 

Attachments

  • photo(47).jpg
    photo(47).jpg
    57.3 KB · Views: 79
  • photo(48).jpg
    photo(48).jpg
    45.4 KB · Views: 76
  • photo(49).jpg
    photo(49).jpg
    63.6 KB · Views: 84
OP
OP
Tito

Tito

CB Fire Starter
Joined
Jan 29, 2006
Messages
10,781
Loc.
Bakersfield, CA
Alright, got the other quarter on for a temp fit.

That pass side quarter did not have the lip it was supposed to have. The driver side was a full upper flange to fit onto the inner/upper quarter but my pass was half sized WTH?

A few tips....all subject to final welding and re-fitment of doors....

I found it easiest to set the quarter in place on the upper flange that mates with the upper quarter, not inserting the sides yet and screwing this in.

It will help to get it
1. flush,
2. give room to get a drill in there easier,
3. the quarters want to be sprung out.

After that is screwed on simply slipping in 1 side at a time and screwing it in is easy. I had trouble getting the body lines right without doing this.

Once again I am a little anxious to see the door gaps and body lines with the doors on. Very happy this morning with how everything has turned out so far.

Thats what I got done during nap #1 for my baby girl!
 

Attachments

  • photo(51).jpg
    photo(51).jpg
    93.3 KB · Views: 67
  • photo(50).jpg
    photo(50).jpg
    95.3 KB · Views: 68
OP
OP
Tito

Tito

CB Fire Starter
Joined
Jan 29, 2006
Messages
10,781
Loc.
Bakersfield, CA
Thanks, I am happy with the fit. The welding part will be pretty quick and painless I think. I want to wait till I flip it back over for the welding though I think....then back on its lid to bedline the bottom...

WOOHOO, sooo close to mating this back up with the completed chassis. And since the front and rear fenders are all brand new it wont take much body work at all to get this done and soon on the road.
 

Ohio Bronco 21

Bronco Guru
Joined
Dec 5, 2006
Messages
4,194
Loc.
Cleveland
Good work Tito. I still have to get my quarter. Should start it after the boys football season (no time).
My quarter is already actually torn (not rusted) from the bottom portion of the tail light bucket and bottom of the striker.
 

Attachments

  • 009.jpg
    009.jpg
    101.6 KB · Views: 49
Top