• Welcome to ClassicBroncos! - You are currently viewing the forums as a GUEST. To take advantage of all the site features, please take a moment to register. It's fast, simple and absolutely free. So please join our community today!
    If you have problems registering or can't log into your account, please contact Admin.

NV3550 Hydraulic Clutch Installation

Dbteak

Sr. Member
Joined
May 23, 2006
Messages
438
Driving around town and off road and using the clutch a lot is killing my hip so I decided to convert my standard clutch linkage to a hydraulic set up. The stock clutch has always had a heavy pedal. I am running a 4bt with the standard ford cast iron bell housing, AA conversion plate and a NV3550 transmission.

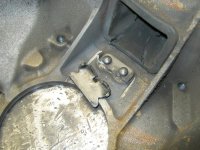
I started by pulling everything out and found that the tab on the bellhousing broke off at some point. That probably contributed to the heavy clutch but I have had the clutch out since the build so I don't know when it broke.

The clutch now is smooth as butter and about a quarter of the effort to operate the clutch.
 

Attachments

  • IMG_0428.jpg
    IMG_0428.jpg
    140.6 KB · Views: 225
Last edited:
OP
OP
Dbteak

Dbteak

Sr. Member
Joined
May 23, 2006
Messages
438
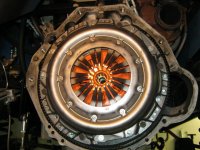
Decided to get the flywheel resurfaced and installed a new pressure plate and clutch disc.
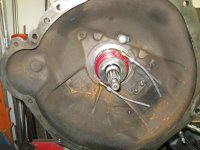
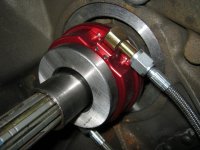
I decided to use a Mcleod 1400-30 since I am already using one of their hydraulic throwout bearing in my mustang with no issues. Looking at their specs and taking measurements they said I could not use this bearing because the measurement from the bell housing to the clutch fingers were less than 3". I was like 2.8". It works fine. I and not quite sure what that measurement means because I had to use the spacer and unscrew the bearing out about 3/4 to get the correct measurements.
 

Attachments

  • IMG_0432.jpg
    IMG_0432.jpg
    116.2 KB · Views: 197
  • IMG_0429.jpg
    IMG_0429.jpg
    106.6 KB · Views: 226
  • IMG_0430.jpg
    IMG_0430.jpg
    99.3 KB · Views: 229
OP
OP
Dbteak

Dbteak

Sr. Member
Joined
May 23, 2006
Messages
438
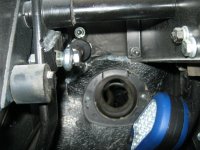
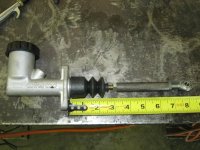
Now to the master cylinder. I used a Wilwood master cylinder with the integral reservoir for the space savings. The part number is 260-6579. It is a .7" diameter bore because that is what Summit had in stock. Looking back I would have used the .75" bore. I drilled the 1 3/8" hole so I lined up a little inward of the clutch pedal. Once installed a strait shot to the clutch pedal I needed a hole about an 1 1/2 down from the center line of the pivot point. That put the hole about center of the piece that is welded on for the stock linkage. Well that did not give enough fluid to actuate the bearing far enough to disengage the clutch.
 

Attachments

  • IMG_0437.jpg
    IMG_0437.jpg
    75.6 KB · Views: 235
  • IMG_0439.jpg
    IMG_0439.jpg
    108.9 KB · Views: 241
  • IMG_0434.jpg
    IMG_0434.jpg
    74.1 KB · Views: 223
  • IMG_0433.jpg
    IMG_0433.jpg
    123.2 KB · Views: 228
OP
OP
Dbteak

Dbteak

Sr. Member
Joined
May 23, 2006
Messages
438
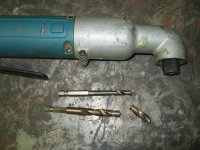
Drilling holes with the pedal assembly installed took a little ingenuity. I used a Mikita angle drill driver and cut down the drill bits so that the overall lenth was not over 4". I also needed to remove the steering column.
 

Attachments

  • IMG_0435.jpg
    IMG_0435.jpg
    116.4 KB · Views: 96
OP
OP
Dbteak

Dbteak

Sr. Member
Joined
May 23, 2006
Messages
438
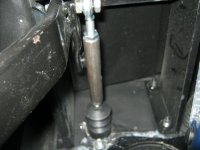
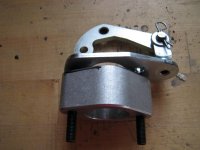
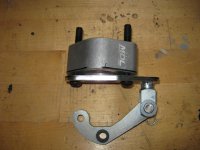
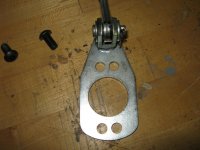
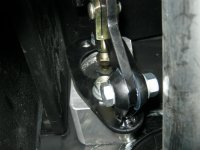
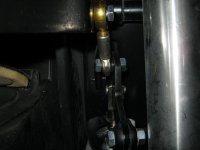
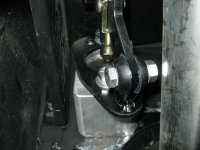
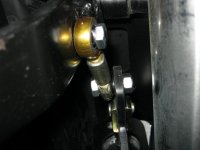
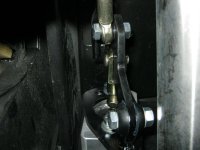
So the original plan did not work and lowering the rod attachment another inch would cause the rod in the master cylinder to bind because of the increased angle. I also could not tilt the master cylinder back because then I could not get the lid off of the master cylinder. So I bought a contraption from Modern Driveline so I could reverse engeneer it make it work for a bronco. I drilled another hole about an inch lower than the other hole and mounted everything and it work perfect. I plan on using the contraption for my mustang since mu mustang also has a heavy clutch pedal.
I started with a 2"x2" aluminum block that I drilled with a 1 3/8" hole and then build a base with the same size hole and bolt pattern as the master cylinder. The base has offset holes so it moves the arm off a little. The base is 3/16" and the arm is 1/4. All the hardware I bought from McMaster-Carr. I forgot to take picture of my homemade linkage but the arm is pretty much strait because the way the mustang attaches is from a high angle and the bronco is pretty much strait on. The pictures are the bought linkage.
 

Attachments

  • IMG_0445.jpg
    IMG_0445.jpg
    73.1 KB · Views: 158
  • IMG_0444.jpg
    IMG_0444.jpg
    89.1 KB · Views: 160
OP
OP
Dbteak

Dbteak

Sr. Member
Joined
May 23, 2006
Messages
438
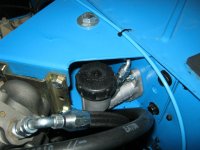
The line from the master cylinder is AN-4 teflon braided steel. The master cylinder is 3/8" inverted flare I assume for 3/16" brake line. I used a brake caliper adapter to go from the master cylinder to the AN-4 line and the bearing already was ready for the AN-4 line.

Here are some more pictures.
 

Attachments

  • IMG_0454.jpg
    IMG_0454.jpg
    105.5 KB · Views: 269
  • IMG_0455.jpg
    IMG_0455.jpg
    86.5 KB · Views: 331
  • IMG_0449.jpg
    IMG_0449.jpg
    81.1 KB · Views: 293
  • IMG_0450.jpg
    IMG_0450.jpg
    81.4 KB · Views: 282
  • IMG_0451.jpg
    IMG_0451.jpg
    65.5 KB · Views: 261
  • IMG_0452.jpg
    IMG_0452.jpg
    91.2 KB · Views: 264
  • IMG_0453.jpg
    IMG_0453.jpg
    58.6 KB · Views: 280

bk005

Full Member
Joined
Nov 20, 2011
Messages
366
Loc.
San Antonio
Necessity is the mother of all invention. Great job, cleanest hyd clutch I've seen on here.
 
Top