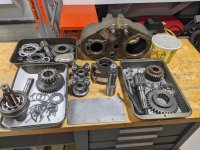
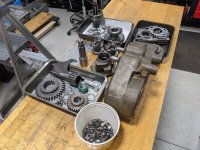
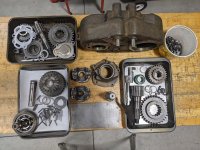
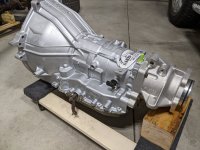
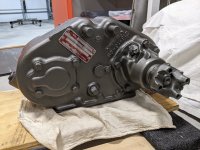
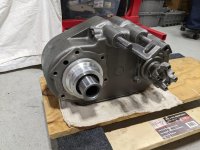
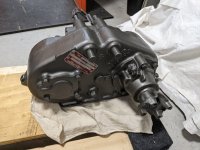
Finished cleaning up the transfer case parts tonight. Re-assembly begins tomorrow night. Still on the fence for paint color. Thinking blue like the engine block. What do you all think?
Community
Message Forum
Photo Gallery
Event Calendar
Book Reviews
Bronco Wallpaper
Bronco FAQ
Link Back to CB!
Photo Gallery
Event Calendar
Book Reviews
Bronco Wallpaper
Bronco FAQ
Link Back to CB!

Buy / Sell


Bronco Tech
3 Arm Wiper Setup
Fix Motor Mount
Roll Cage Braces
Throttle Body 65mm
Wheel Alignment
Heat Riser Replacement
Vent Window Repair
Center Console Mount
Straighten Bumper
Ford 6R80 6 spd
More Tech...
Fix Motor Mount
Roll Cage Braces
Throttle Body 65mm
Wheel Alignment
Heat Riser Replacement
Vent Window Repair
Center Console Mount
Straighten Bumper
Ford 6R80 6 spd
More Tech...

Install the app
-
Welcome to ClassicBroncos! - You are currently viewing the forums as a GUEST. To take advantage of all the site features, please take a moment to register. It's fast, simple and absolutely free. So please join our community today!If you have problems registering or can't log into your account, please contact Admin.
You are using an out of date browser. It may not display this or other websites correctly.
You should upgrade or use an alternative browser.
You should upgrade or use an alternative browser.
Project: 76, Orange Special Decor
- Thread starter gnsteam
- Start date
- Joined
- Nov 3, 2003
- Messages
- 48,743
I think it’s OK if you like a lot of color under there. Personally I think it’s too much blue. Especially if the transmission is as well. What color is that gonna be?
My favorite is a cast-iron gray color, or similar. I painted mine black years ago and like that as well, but the cast-iron color is really cool.
My favorite is a cast-iron gray color, or similar. I painted mine black years ago and like that as well, but the cast-iron color is really cool.
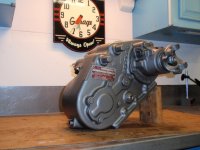
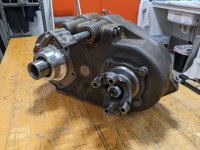
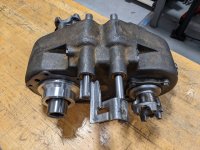
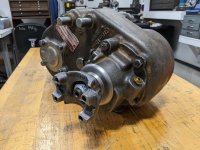
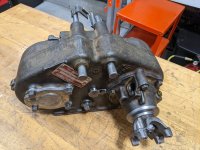
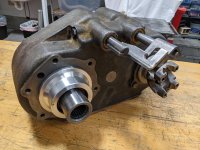
Tonight I finished the rebuild of the Dana 20. Complete with the new input shaft for the 4R70w transmission. For being my first attempt at this, I have to say it wan’t that difficult. I just watched a few videos and took my time. Once the weather warms up, I will be shooting it with some cast iron gray paint.
Attachments
-
 FB60BA38-B610-4311-BCD4-0B5B40B6E3DA.jpeg238.2 KB · Views: 28
 -
 3814A4FF-526B-446E-9FF1-0B2EC5D86A9C.jpeg270.4 KB · Views: 30
 -
 CFAE379A-51CF-432F-B2BA-F500C7AD3546.jpeg238 KB · Views: 29
 -
 B8A92F78-0352-4E5F-B4CA-CE3024CF6950.jpeg238.8 KB · Views: 27
 -
 DE8D23E8-1B1B-4084-A265-7C532138A96E.jpeg251.3 KB · Views: 30
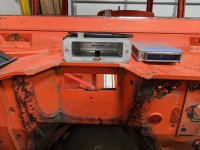
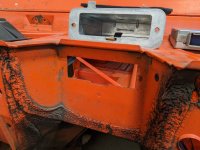
My project over the weekend was painting the Dana 20, cast iron gray. This evening I cut the hole in the firewall for the Explorer ECM. I’m using the mounting box from a 2002 Escape. Still need to drill the fastener holes.
Attachments
-
 BB4365BB-480A-4E50-BCD8-1B7F73A98A9B.jpeg194.1 KB · Views: 53
 -
 F1E68038-4306-4408-800F-8AADD707D623.jpeg207.5 KB · Views: 52
 -
 2F9624EE-F405-4362-8D0B-6FBC239B6BEF.jpeg116.9 KB · Views: 57
 -
 CB4E600C-3296-401F-8EF6-A02BFB63960C.jpeg210.6 KB · Views: 55
 -
 5A369481-7436-410C-88F8-C029DF7002A1.jpeg212.2 KB · Views: 52
 -
 E5A9CDC3-6CF9-4584-B436-5F8D3D54E7A6.jpeg223.4 KB · Views: 58
- Joined
- Jul 15, 2006
- Messages
- 3,429
Great to read up on all your progress! Can't wait to see the new paint! Probably done in time for the Ice Cream Cruise in Omaha?
Hi Marty, thanks for checking in. Sure would be nice to have it done by then. Trying to make a little progress daily.Great to read up on all your progress! Can't wait to see the new paint! Probably done in time for the Ice Cream Cruise in Omaha?
Hi Paul. It does look great. Thanks for the advice on the color choice.Color on the t-case worked out well it looks like from here. I like it.
Better than the blue you think?
Nice work, good color choice on the D20.
I am not brave enough to rebuild a t-case yet...
I am not brave enough to rebuild a t-case yet...
Looking good!
I found it to be pretty easy for my first and probably only time I will do one. I watched the videos by Jason and Joni Builds.Nice work, good color choice on the D20.
I am not brave enough to rebuild a t-case yet...
Thanks for the kind words.Looking good!
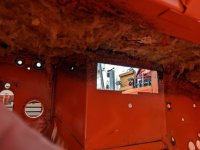
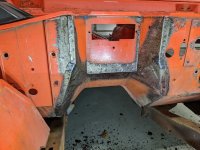
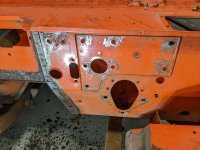
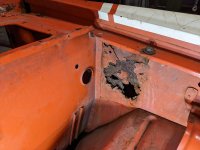
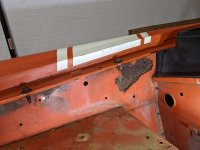
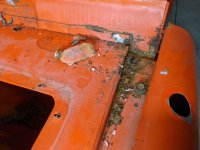
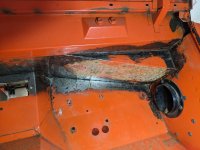
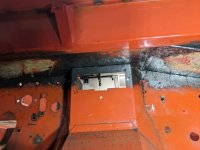
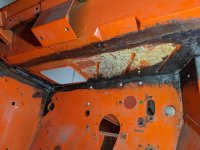
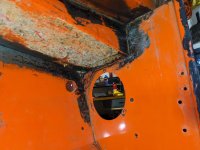
Not very exciting work but progress is progress. I spent the evening scraping the thick rubber like coating off the trans area of the firewall and under the dash. Also the glued on fiber insulation under the cowl. That glue is really tuff to scape off. I though I would share a couple close up pictures of the only rust on this Bronco. The inner fenders and a spot on the driver side cowl, where the seam sealer had come loose, allowing moisture to get under it. At least I hope this is the worst of the rust. Will see when the restoration shop media blasts everything.
Attachments
-
 863A97F4-2993-4718-831D-B4E214FB7424.jpeg237.5 KB · Views: 50
 -
 2CEDDEF8-D633-4DEC-9C40-AE6FDF933062.jpeg225.2 KB · Views: 52
 -
 BB64CB79-5546-47E8-9DCC-6EC0CA355240.jpeg174.2 KB · Views: 46
 -
 FD85B097-9C35-4300-B71D-0E491530E103.jpeg181.2 KB · Views: 46
 -
 1D95AAD4-1697-4406-A956-398BCF0D60E6.jpeg188.5 KB · Views: 42
 -
 B739B8F5-C5C5-42A7-AF28-2DB82D74BCE7.jpeg200.9 KB · Views: 42
 -
 13806B07-1A9E-4F4A-BB04-A86FF65F1B9F.jpeg135.2 KB · Views: 41
 -
 3B211757-2166-41A8-8C63-8D3E1D99A8A1.jpeg213.2 KB · Views: 51
Looking good. When will the restoration shop be ready to start on it?
Anytime really. They originally told me January, but they have lots of work and they are working on a buddies 68 Bronco. Which is ready for paint this week. So mine may be next in line when they finish my buddies.Looking good. When will the restoration shop be ready to start on it?
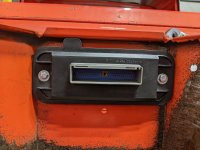
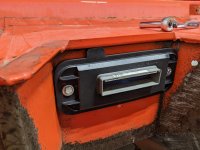
More work on the body tonight. I finished mounting the ECM (Escape) box into the firewall. Instead of using sheet metal screw to secure the box to the firewall. I fabricated threaded steel bar nuts. That are attached to the sheet metal with two 8-32 button head cap screws from the engine bay side. The button head are low enough to clear the back side of the box lip due to a boss on the back of the box lip at the mounting holes. The box is secured with 1/4-20 screws. When finished I will probably use chrome or stainless button head screw to dress it up. Mounting it this way made it very solid but I will fab up a bracket to secure the back of the box to the underside of the cowl. May be overkill but the box has a mounting point on the back box.
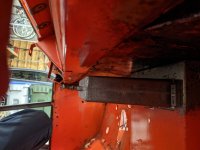
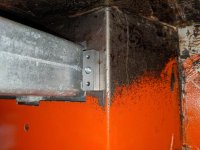
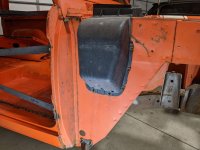
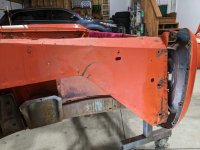
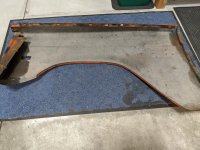
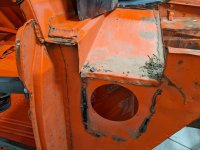
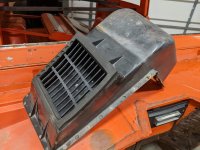
I also removed the passenger fender so I could remove the heater air intake box. I pretreated the fasteners with PB blaster several weeks ago. So I only had one stubborn bolt to drill out. The lower Phillips head bolt on the door side of the A pillar. As you can see the pillar looks great.
I also removed the passenger fender so I could remove the heater air intake box. I pretreated the fasteners with PB blaster several weeks ago. So I only had one stubborn bolt to drill out. The lower Phillips head bolt on the door side of the A pillar. As you can see the pillar looks great.
Attachments
-
 6E618EF1-6989-4604-806B-1A6A6568AA7C.jpeg205.3 KB · Views: 50
 -
 1D54B221-F1DC-4CD2-8F3E-54C6A2B340BC.jpeg161.2 KB · Views: 48
 -
 40F3342A-17A0-40CD-AA16-475EAB8A2A6D.jpeg134.7 KB · Views: 42
 -
 99E55DE0-D2FD-4309-9335-4D8749943994.jpeg219.6 KB · Views: 45
 -
 527CFFA5-A268-44C2-A5A7-BE1129F31A11.jpeg156.2 KB · Views: 45
 -
 661578EF-892B-4B4E-A06B-528B6A560151.jpeg172.5 KB · Views: 37
 -
 E9CF068A-B3D1-429E-A0CA-9A53D0254DBA.jpeg269.4 KB · Views: 38
 -
 131E0B7F-F181-428E-98ED-C2A615A1C2E7.jpeg172.9 KB · Views: 38
 -
 814E90B2-4D8C-477A-965F-4B794210CD5F.jpeg180.9 KB · Views: 39
 -
 DC6C632B-F0FA-450B-99D5-35A4A1EB7731.jpeg137.7 KB · Views: 53
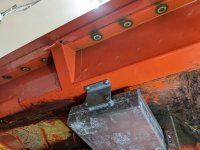
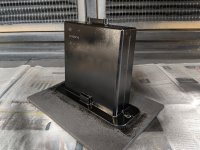
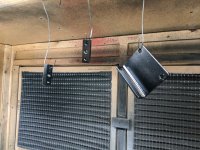
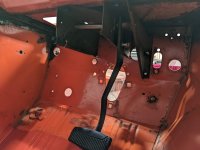
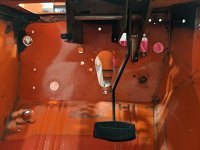
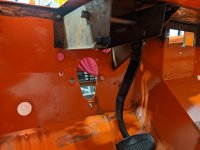
Yesterday, I fabricated a bracket for the back of the (Ford Escape) ECM box and gave everything a fresh coat of paint. Now ready for install after the body work is done.
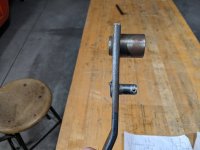
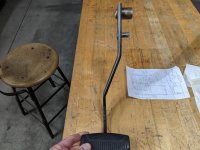
Then I spent some time under the dash with the brake pedal assembly. Working out the details for the Super Duty, hydro boost upgrade. I'm going to move the pedal actuation over to the left 6 inches. Like what member Spaggyroe is doing on his build.
https://classicbroncos.com/forums/threads/firewall-reinforcing-plate.311719/#post-3390745
I will be picking up material for the firewall plate and brake pedal modification once I work out the details. I am not having any luck finding a SD hydro boost unit at the U-Pull Its. So I ordered a re-manufactured Cardone unit, part number 52-7374. And a1985 Dodge Diplomat master cylinder, Cardone part number 13-1860.
Attachments
-
 PXL_20220327_194613499.MP.jpg149.9 KB · Views: 36
 -
 PXL_20220327_215352475.jpg246.2 KB · Views: 37
 -
 PXL_20220327_215446100.MP.jpg307.7 KB · Views: 35
 -
 PXL_20220327_215622520.jpg137.7 KB · Views: 33
 -
 PXL_20220327_215638426.jpg140.5 KB · Views: 32
 -
 PXL_20220327_215646983.MP.jpg125.8 KB · Views: 29
 -
 PXL_20220327_221758490.MP.jpg119.5 KB · Views: 31
 -
 PXL_20220327_221817203.jpg207.2 KB · Views: 38
wow that body is in really good shape!! I want it. Tell me again why you're taking it apart?
Similar threads
- Replies
- 609
- Views
- 173K
- Replies
- 0
- Views
- 145
- Locked
City: Bowling Green, Kentucky
Price: $16500
- Replies
- 2
- Views
- 632


