


Community
Message Forum
Photo Gallery
Event Calendar
Book Reviews
Bronco Wallpaper
Bronco FAQ
Link Back to CB!
Photo Gallery
Event Calendar
Book Reviews
Bronco Wallpaper
Bronco FAQ
Link Back to CB!

Buy / Sell


Bronco Tech
3 Arm Wiper Setup
Fix Motor Mount
Roll Cage Braces
Throttle Body 65mm
Wheel Alignment
Heat Riser Replacement
Vent Window Repair
Center Console Mount
Straighten Bumper
Ford 6R80 6 spd
More Tech...
Fix Motor Mount
Roll Cage Braces
Throttle Body 65mm
Wheel Alignment
Heat Riser Replacement
Vent Window Repair
Center Console Mount
Straighten Bumper
Ford 6R80 6 spd
More Tech...

Install the app
-
Welcome to ClassicBroncos! - You are currently viewing the forums as a GUEST. To take advantage of all the site features, please take a moment to register. It's fast, simple and absolutely free. So please join our community today!If you have problems registering or can't log into your account, please contact Admin.
You are using an out of date browser. It may not display this or other websites correctly.
You should upgrade or use an alternative browser.
You should upgrade or use an alternative browser.
Project "BOB - Big Orange Bronco" Wheeling pics addded
- Thread starter SC74
- Start date
 W!!!!
W!!!!
OP
OP
- Joined
- May 24, 2004
- Messages
- 3,413
Silverhorse
Bronco Guru
Looking good bro!
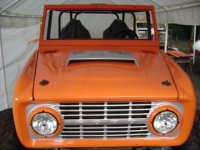
Hey Robert, give me a shout, I may have a set of "Ranger" letters to go on that "sweet looking grille"!!!
Did Keith mention the "Swamp Monster"???
See ya';D ;D ;D
Did Keith mention the "Swamp Monster"???
See ya';D ;D ;D
OP
OP
- Joined
- May 24, 2004
- Messages
- 3,413
Hey Robert, give me a shout, I may have a set of "Ranger" letters to go on that "sweet looking grille"!!!
Did Keith mention the "Swamp Monster"???
See ya';D ;D ;D
Emblems on the grill would be awesome ;D
I did see "Swamp Monster" and have had fun forwarding it on to others.
We got some work done it today but no pics. Lots of small misc but time consuming stuff done.
744x4
Sr. Member
The spraying of the paint was a little learning curve as the nozzle that came with the HF HVLP gun was a 1.4 and should be used for clear coat not paint so the paint had to be thinned down to get it to spray and not glob.The pressure had to be jacked up way past the indicated 43 PSI that was stamped on the gun.(100 psi) is what I ran it as so so much for the benifits of the HVLP part.I believe the proper nozzle is 1.8.The compressor is important also as it must push lots of air without making moisture.Mine is a 60 gallon IR that puts out 13 cfm @ 90 psi.Ben all the Kubota Orange paint you want can be had @ Tractor supply as I only used 1 qt for the truck after 4 passes on most panels.
BTW there is a difference in Kubota Orange and "New" Kubota Orange that makes itself known once side by side.
BTW there is a difference in Kubota Orange and "New" Kubota Orange that makes itself known once side by side.
Last edited:
744x4
Sr. Member
The letters wont work unless I drill lots of holes to make them work as it is not a Sport grill.It is another wierd one as it is a Explorer package but not a Sport or Ranger model so there arent any holes in the grill.This is the 3rd wierd one in a row and I am done trying to figure out WTF Ford was doing.
Are the batteries in the camera dead or are you being lazy????%) %)
OP
OP
- Joined
- May 24, 2004
- Messages
- 3,413
Are the batteries in the camera dead or are you being lazy????%) %)
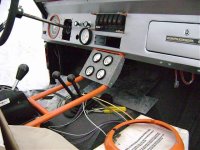
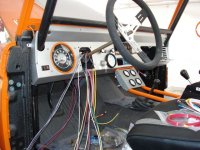
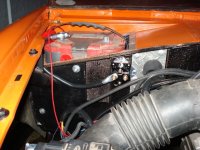
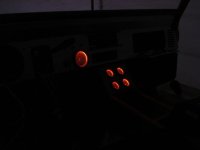
BOTH! j/k... here are a few pics of the beginning of the wiring. We plan on working on wiring all day Saturday but I'm sure that a few trips to the parts store and radio shack will slow us down.
Attachments

OP
OP
- Joined
- May 24, 2004
- Messages
- 3,413
OP
OP
- Joined
- May 24, 2004
- Messages
- 3,413
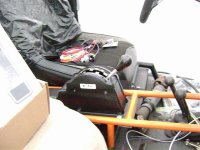
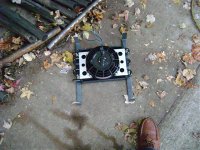
Here's a shot of the Derale cooler/fan combo that I'm going to use for tranny cooler. It will mount in front of the radiator on this bracket that connects to the tube support. We still have to do similar for the PS cooler - using a Superduty cooler for that.
Attachments
OP
OP
- Joined
- May 24, 2004
- Messages
- 3,413
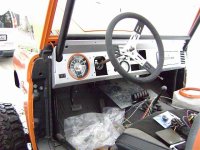
Got a lot of wiring done today. Took lots of pics but left my camera at Keith's house. It's very very clean so far - even fished the rear harness through the frame. Hoping to wrap it up most of the wiring tomorrow.
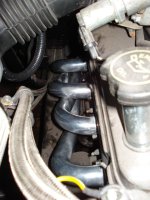
Also installed the WH ceramic shorty headers. These are NICE!!! Pics to come tomorrow when I get my camera.
Also installed the WH ceramic shorty headers. These are NICE!!! Pics to come tomorrow when I get my camera.
OP
OP
- Joined
- May 24, 2004
- Messages
- 3,413
Keith got a lot more wiring done today. Notice how I say "Keith" got the wiring done - he won't let me touch the wiring - I don't blame him. So I worked on other nic nacs like cutting and welding the steering column shaft and quick disconnect nut, painting odds and ends, working on the fuel lines and fuel cell, etc. The wiring is ALMOST done - another day and it'll be 100%.
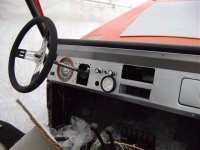
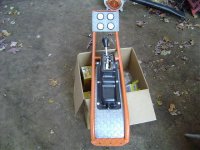
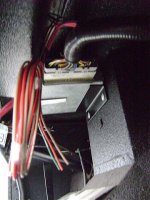
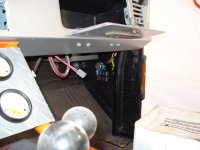
The RJM harness leaves the relays and fuse box in the engine compartment but we have no room to mount them in a place that will stay clean with the open front clip and no inner fenders. We're going to have to unwrap some of Ryan's loom and re-route some wires so that we can drill another hole in the firewall and install the relays and fuse panel in the glove box. That will take longer than finishing the harness, but they will out of harms way.
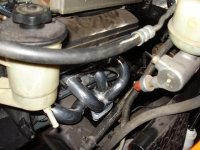
The old Master Cylinder hole made a good place to route wires through the fire wall so we made an aluminum cover with 4 separate grommets.
The RJM harness leaves the relays and fuse box in the engine compartment but we have no room to mount them in a place that will stay clean with the open front clip and no inner fenders. We're going to have to unwrap some of Ryan's loom and re-route some wires so that we can drill another hole in the firewall and install the relays and fuse panel in the glove box. That will take longer than finishing the harness, but they will out of harms way.
The old Master Cylinder hole made a good place to route wires through the fire wall so we made an aluminum cover with 4 separate grommets.
Attachments
OP
OP
- Joined
- May 24, 2004
- Messages
- 3,413
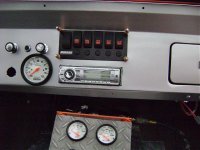
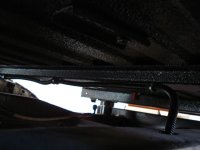
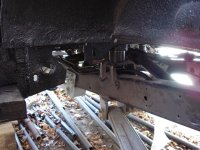
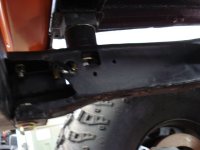
Here are a few shots of how we routed the wiring to the rear. It goes into the frame rail just past the middle body mount. We have a tee that comes out mid-way that crosses under the body to feed power to the fuel pumps and the fuel sending unit wiring. The rest of the rear harness stays in the frame rail and exits at the frame rail where the trailer light connector is. The balance of the harness will plug into that trailer connector when I install rear lights etc. I really like this part of the 4wheel Junky harness.
Attachments

Similar threads
- Replies
- 116
- Views
- 20K
- Replies
- 0
- Views
- 88
- Locked
City: Bowling Green, Kentucky
Price: $16500
- Replies
- 2
- Views
- 579
City: Milford
Price: $1
- Replies
- 0
- Views
- 250