• Welcome to ClassicBroncos! - You are currently viewing the forums as a GUEST. To take advantage of all the site features, please take a moment to register. It's fast, simple and absolutely free. So please join our community today!
    If you have problems registering or can't log into your account, please contact Admin.

Transfer Seat Part 2

OP
OP
rydog1130

rydog1130

Sponsor/Vendor
Bronco Guru
Joined
Jun 19, 2014
Messages
4,091
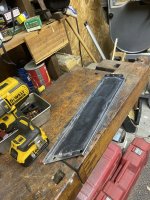
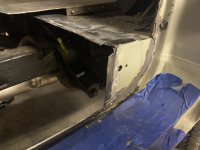
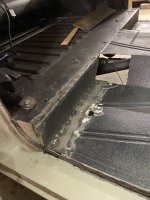
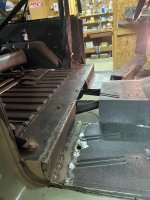
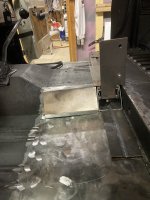
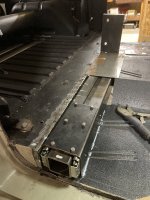
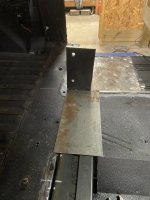
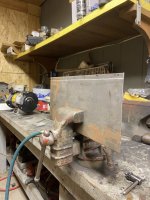
wife and kids went to the zoo in Detroit which gave me a day and a half to get some stuff done! My dad and I finished up the prep work by removing excess paint around the spots that needed to be welded. We punched holes on all the flanges for the parts that needed it!
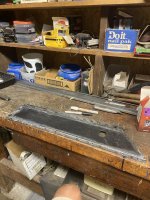
IMG_9849.jpeg IMG_9850.jpeg IMG_9851.jpeg

IMG_9848.jpeg
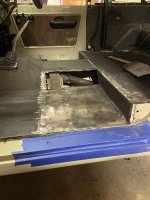
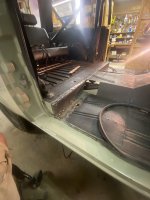
A buddy of mine that I helped mentor during the first transfer seat project when he was still in highschool was in town luckily and volunteered to help weld up the spots I couldn’t reach! We ended up knocking out
The brace and majority of the floor pan work in about 3 hours and I’m really impressed how it turned out!
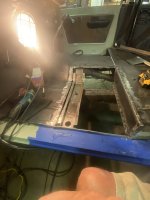
IMG_9855.jpeg IMG_9872.jpeg IMG_9856.jpeg IMG_9902.jpeg
 
OP
OP
rydog1130

rydog1130

Sponsor/Vendor
Bronco Guru
Joined
Jun 19, 2014
Messages
4,091
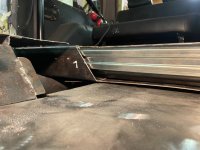
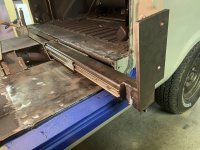
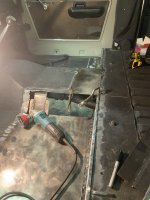
Now that the Floor pans are welded in it was the moment of truth! Will it fit??? Will it clear the rockers? So, we tried to slide the unit in through the drivers side and we met some resistance on the other end. My concern when eyeing it up was the indentation lines on top of the trans tunnel, you loose about 1/4 to 5/16” of space due to those stampings in the sheet metal. Well bust out the circular saw and zip that piece out!!! Now let’s see how it fits!!! Ha!
IMG_9904.jpeg IMG_9905.jpeg IMG_9906.jpeg IMG_9907.jpeg IMG_9908.jpeg IMG_9910.jpeg
Looks good doesn’t it? I have plenty of clearance on the rocker, about 1/4” on the drive shaft at the closest point so the 1” body lift will solve that! I cut a replacement piece for the trans tunnel, not sure if I’m going to add a flange to it or not to give a little extra space or not. I also cut the side piece for the trans tunnel to length too!
IMG_9912.jpeg IMG_9914.jpeg IMG_9915.jpeg
Next steps are to weld those pieces in place then lift the body and place my body lifts and take some measurements for the mounting brackets that will secure this thing to the frame.
 
OP
OP
rydog1130

rydog1130

Sponsor/Vendor
Bronco Guru
Joined
Jun 19, 2014
Messages
4,091
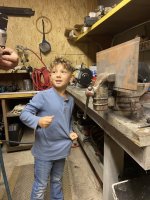
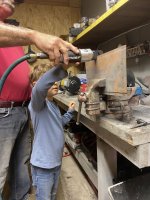
Little more progress, floor pans are done! What a process to get 4” tall by 5” wide hole through the trans tunnel!!! Had my special helper today! He thought it was pretty cool to punch the holes w/ gramps!
IMG_0063.jpeg IMG_0070.jpeg IMG_0092.jpeg IMG_0123.jpeg IMG_0134.jpeg

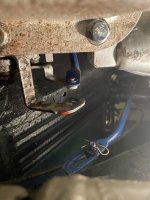
Now that’s done moved on to removing my roll bar bolts, disconnecting my trans linkage and steering column. Hopefully next time I’ll get the body lift in and make my mounting brackets that will tie into the frame

IMG_0139.jpeg IMG_0142.jpeg
 
OP
OP
rydog1130

rydog1130

Sponsor/Vendor
Bronco Guru
Joined
Jun 19, 2014
Messages
4,091
I usually remove all but 2 bolts, 1 front and 1 rear on one side, but have them loose. Then lift one side and install the mounts or pucks depending on which style, lifting with a 4x4 and a jack under the rocker. Then repeat under the other. That way the body stays aligned with the frame. Hope that makes sense.
can you get away with the factory bolts or do i need longer bolts? I can probably figure this out myself but thoughts id ask
 
OP
OP
rydog1130

rydog1130

Sponsor/Vendor
Bronco Guru
Joined
Jun 19, 2014
Messages
4,091
I’ve always just loosened the factory bolts
ok, but you can get away with keeping the factory bolts on a 1" lift? i don't need to buy new bolts that are 1" longer than the factory bolts?
 

Yeller

Contributor
Bronco Guru
Joined
Mar 27, 2012
Messages
6,653
Loc.
Rogers County Oklahoma
ok, but you can get away with keeping the factory bolts on a 1" lift? i don't need to buy new bolts that are 1" longer than the factory bolts?
My apologies, I thought you were referring to being able to jack up one side. Yes, you will need new bolts for the 1" longer for the body lift.
 
OP
OP
rydog1130

rydog1130

Sponsor/Vendor
Bronco Guru
Joined
Jun 19, 2014
Messages
4,091
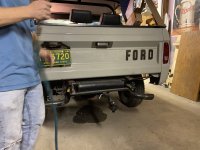
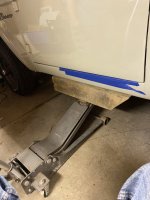
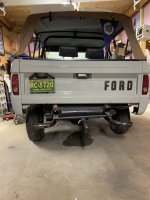
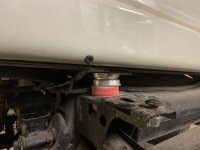
Yeller, I have to hand it to you! I was a little skeptical but man that was some of the best advice I’ve gotten on here in awhile! We took the bolts holding the column to the dash out. Then loosened everything up like you said and 2 hours later we were done!! I did get a little nervous jacking up the drivers side first. My door gap got a little out of skew even though the door was closed but once we set it back down and got the passenger side done it went back to its original position.

IMG_0790.jpeg IMG_0804.jpeg IMG_0812.jpeg IMG_0823.jpeg IMG_0835.jpeg IMG_0840.jpeg IMG_0856.jpeg IMG_0859.jpeg
 
OP
OP
rydog1130

rydog1130

Sponsor/Vendor
Bronco Guru
Joined
Jun 19, 2014
Messages
4,091
It's been awhile since I've updated. hunting season is going on and I've been slacking on this project. I believe I have some help lined up so once deer/duck hunting wraps-up I'll be back at it. Heres my to do list:

build mounting brackets and test mounting brackets.
final adjustments on parts, finish internal stop, trim pieces to allow additional clearance
paint unit and floor pans
mount and assemble unit and install seats
run wiring
re locate amp, wire amp and speakers
change vac wipers to electric wipers

drive it .... lol
 
OP
OP
rydog1130

rydog1130

Sponsor/Vendor
Bronco Guru
Joined
Jun 19, 2014
Messages
4,091
No pictures but, my cousin was up deer hunting and I talked him into putting my last for nuts and bolts in on the lift kits in the foot/seat pan area since my dad refused lol ….and took measurements for the brackets I need to make to hold this thing down!
 
OP
OP
rydog1130

rydog1130

Sponsor/Vendor
Bronco Guru
Joined
Jun 19, 2014
Messages
4,091
got my brackets designed. these will mount to the frame and will either be welded on or bolted on then the transfer seat box will be bolted to the brackets.
transfer seat mounting bracket jpg.jpg
 
OP
OP
rydog1130

rydog1130

Sponsor/Vendor
Bronco Guru
Joined
Jun 19, 2014
Messages
4,091
Did some remeasures and I have to make it 12” not 7” !
 
OP
OP
rydog1130

rydog1130

Sponsor/Vendor
Bronco Guru
Joined
Jun 19, 2014
Messages
4,091
Ok not bronco related but shot the biggest buck of my life a few a days ago! One of the main reasons I haven’t worked on the bronco!! Last day of duck is Sat/Sun so after that it’s back to work! Here’s some pics! 8 pt 19” spread scored 132 3/8
IMG_2640.jpeg
IMG_6211.jpeg
IMG_0769.jpeg
 
OP
OP
rydog1130

rydog1130

Sponsor/Vendor
Bronco Guru
Joined
Jun 19, 2014
Messages
4,091
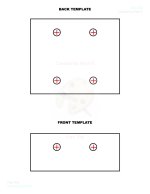
made a template for placing holes on the outer box frame that will bolt into the 1/2" thick by 3" L brackets that will be mounted to the frame. Hopefully after this week or maybe tomorrow i can get back to work on it.
TRANSFERSEAT HOLEB RACKET TEMP.jpg
 
Top