
• Welcome to ClassicBroncos! - You are currently viewing the forums as a GUEST. To take advantage of all the site features, please take a moment to register. It's fast, simple and absolutely free. So please join our community today!
    If you have problems registering or can't log into your account, please contact Admin.

Transfer Seat Part 2

OP
OP
rydog1130

rydog1130

Contributor
Bronco Guru
Joined
Jun 19, 2014
Messages
4,188
IMG_2772.jpeg
IMG_2778.jpeg
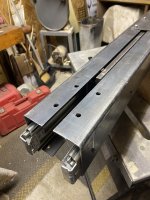
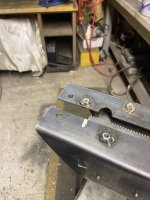
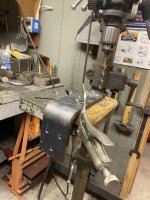
Went out today nothing like checking measurements in 20 weather! L bracket estimates look good. May have to trim about 1/4-1/2” off the bottom rear tower that holds the parallel links so it will clear the trans tunnel. Rear entry looks good and accessible for dropping bolts in once holes are placed. Will def have to shim device with washers for maximum level ness!
 
OP
OP
rydog1130

rydog1130

Contributor
Bronco Guru
Joined
Jun 19, 2014
Messages
4,188
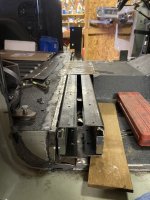
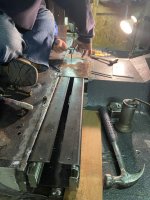
A little more farting around on fitment. Checked out the other vertical bar for the 4 link and shouldn’t have any issues there. Still going to trim the rear vertical post even though it has minimal clearance. Going to remove and drill my mounting holes and have my neighbor with the machine shop trim that piece and bend up some 1/2” thick by 3” wide steel to make my mounting L brackets tomorrow!
IMG_2820.jpeg
 

dmoses42

Contributor
Bronco addict
Joined
Jan 25, 2017
Messages
655
Loc.
Chatsworth, Ga
A little more farting around on fitment. Checked out the other vertical bar for the 4 link and shouldn’t have any issues there. Still going to trim the rear vertical post even though it has minimal clearance. Going to remove and drill my mounting holes and have my neighbor with the machine shop trim that piece and bend up some 1/2” thick by 3” wide steel to make my mounting L brackets tomorrow! View attachment 936676
Moving along, making progress... Love it!! Keep on hammering, brother!
 
OP
OP
rydog1130

rydog1130

Contributor
Bronco Guru
Joined
Jun 19, 2014
Messages
4,188
Not much of an update but dropped off rear vertical link and steel for trim job and brackets. I’ve mentioned Todd’s before in this thread and that’s where it’s at. He’s got some bigger fab jobs in the works right now so not sure when he’ll get to it. I’ll have to figure out some other things to work on in the mean time.
 
OP
OP
rydog1130

rydog1130

Contributor
Bronco Guru
Joined
Jun 19, 2014
Messages
4,188
just ordered set of twin sticks. if you want to save some coin order a set of jb fab from the graveyard. They're about $50 cheaper than if you order them from JB's site
 
OP
OP
rydog1130

rydog1130

Contributor
Bronco Guru
Joined
Jun 19, 2014
Messages
4,188
A little update! Twin sticks are here! Pretty excited about that! I probably should have done this years ago but looking forward to some smooth shifting! Also my support tower has had some clearance added to it or removed so it shouldn’t rub or come into contact with the corner of where the lower and up floor pan meet! I also got my support brackets made that will keep this thing from moving! Weather is warming up and anxious to start this project back up!!!

76264227355__265E5661-8201-4EC9-B283-50BF8D0B1991.jpeg
 
OP
OP
rydog1130

rydog1130

Contributor
Bronco Guru
Joined
Jun 19, 2014
Messages
4,188
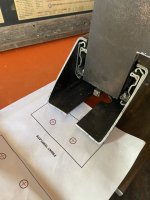
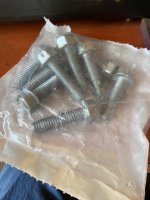
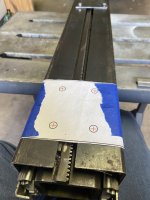
Well here’s a few pics for an update! You can see where I added clearance. I bought these self taping cutting 3/8” bolts to mount my support brackets into the frame. They have a serrated flange that should keep them in place along with some red lock tite. I double checked my drill templates for the mounting holes. I got those drilled out today. I’m going to toss this thing back in and mark the holes for my floor pan then drill those out, then clamp my brackets in place underneath to the frame and mark my holes to be placed on those brackets. I’ll also figure out where to put my holes in the bracket to mount to the frame. I’m hoping I can get that taken care of by this week! Once that’s done it’ll be painting and prep work

IMG_4602.jpeg IMG_4603.jpeg IMG_4604.jpeg IMG_4606.jpeg IMG_4615.jpeg IMG_4616.jpeg IMG_4617.jpeg
 
OP
OP
rydog1130

rydog1130

Contributor
Bronco Guru
Joined
Jun 19, 2014
Messages
4,188
Tomorrow the plan is to get the main unit back in the vehicle, get it shimmed and squared where it will sit and mark the holes for the mounting brackets. I’m also going to check and see if the gear box that operates the in out function clears the drive shaft. Looking at pictures I might need to rotate and remount it but we’ll see. I’ll also have to adjust the stop so it will clear the mounting bolts
 
OP
OP
rydog1130

rydog1130

Contributor
Bronco Guru
Joined
Jun 19, 2014
Messages
4,188
Checked out a few things, my gear box was mounted in the wrong position but luckily I can just rotate the gear box into a position that will give it clearance from the drive shaft


IMG_4628.jpeg IMG_4637.png

I also got the unit back in the vehicle and shined it up. Looks good and marked the holes for my brackets. Now I’m just waiting in one of my younger friends who can crawl under neath and help position the bracket s underneath so I can plot the mounting holes.

IMG_4634.jpeg IMG_4631.jpeg IMG_4632.jpeg
 
OP
OP
rydog1130

rydog1130

Contributor
Bronco Guru
Joined
Jun 19, 2014
Messages
4,188
Got quite a bit done today. I decided to drill a few holes and tap them so i could tie it into the top of the trans tunnel. Once that was done my buddy Nate helped me line up the brackets and we marked where the holes should go! We were just about to put everything back in and see how the brackets lined up when we lost power. Winds up here today we’re 55mph. Hopefully if the powers comes back on we’ll have the brackets mounted to the frame to see how everything fits!
IMG_4642.jpeg IMG_4643.jpeg IMG_4644.jpeg IMG_4645.jpeg IMG_4646.jpeg IMG_4648.jpeg IMG_4649.jpeg
 
OP
OP
rydog1130

rydog1130

Contributor
Bronco Guru
Joined
Jun 19, 2014
Messages
4,188
Well had a pretty productive Saturday. My friend Nate was in town and helped me get my brackets installed and we tested it with some weight on it! Then we took it all out and primed the floor pans so I can toss some raptor liner on it to make it look like it did before! The brackets are held on by self taping. 3/8 bolts. I’m going to add some blue lock tite on them when I put them back in. If they loosen up I’ll ever drill all the way through or weld them on but I think they’ll be ok! Anyways here’s some pics to show the progress!

IMG_4869.jpeg IMG_4872.jpeg IMG_4871.jpeg IMG_4879.jpeg IMG_4877.jpeg IMG_4878.jpeg IMG_4880.jpeg IMG_4876.jpeg IMG_4870.jpeg
 
OP
OP
rydog1130

rydog1130

Contributor
Bronco Guru
Joined
Jun 19, 2014
Messages
4,188
Not a huge update but got my stop tacked in place. Next step is to disassemble this sucker and get it painted inside and out! Then back in the truck!
IMG_4947.jpeg IMG_4948.jpeg
 

DirtDonk

Contributor
Bronco Guru
Joined
Nov 3, 2003
Messages
51,621
Lots of parts and pieces. Lots of bending metal.
Lots of progress!
 
OP
OP
rydog1130

rydog1130

Contributor
Bronco Guru
Joined
Jun 19, 2014
Messages
4,188
Lots of parts and pieces. Lots of bending metal.
Lots of progress!
yeah its been a fun and challenging project. A few hick ups here and there as some things don't always translate directly from paper, ha! Once its back in ill need to weld in the supports for the seat itself. Id like to rewire my speakers and relocate my amp too during this process, change up my hand controls a bit, install my twin sticks, and wire up my electric wipers. We'll see
 
OP
OP
rydog1130

rydog1130

Contributor
Bronco Guru
Joined
Jun 19, 2014
Messages
4,188
Had a little help with the tear down process! My boy is only 5 1/2 years old but he pretty much was able to take this thing apart with a box end wrench, hex head and a Phillips screw driver. I told him if he took it apart he could use the spray paint and painted of the parallel links with some gray cast blast! I’m super proud!

IMG_4964.jpeg IMG_4965.jpeg IMG_4966.jpeg IMG_4967.jpeg
 
Top