Updates on this:
Top part of the bumper showed up the following day. No notice, not knock, my kid who was on watch for the delivery guy reported no sightings so there I was a bit disappointed to say the least that Fed Ex somehow picked up three items from one location at the same time, all shipping to the same place, and for some unknown reason decided to separate them during shipping across the country. Taking the trash out late at night on day two of Fed-Ex watch (walked that same path multiple times during the day) and come across the top half of my bumper laying there against the house by the garage door...

All is good I guess, but I still left Fed-ex a nasty gram on their shipping procedures. Oh well...
So first up was double checking the stock style rear bumper for clearance. Noticed it was a bit bent in towards the body on the passenger side. I took it to the body shop (AKA Drive way) and got it up on rack (my garage floor doubles as a rack at times). After a close examination a plan was formed, safety procedures were adhered to, and the bumper was pulled back to straight with some little tugs and the use of a small sledge and 2x4 in the proper areas.
I didn't get after pictures, but you get the point. Plenty straight for this application. On to the carrier.
I'm not sure what requires a shipping company to place so many barcode stickers on these things but let's just say there wasn't a single piece of metal that didn't have something stuck to it. On top of that, who ever made the glue that holds these stickers down needs to be either sent to prison for the rest of their life or promoted to head sticky affixer guy at whatever company makes those labels, because it took me probably close to 2 hours to get all of them off using a standard paint scrapper, flat razor blades, standard screw driver, and copious amounts of Goo-Off and Brake cleaner. Got them all cleaned up and started the test fit process.
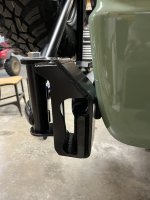
The instructional video on this install covers pretty much everything you need to know. And for the most part, it went right into place without much issue. A little prying here and there to line up the bolt holes was needed and a strategy was formed for putting it all back together after paint.
I will say this. They recommend taping off the passenger side rear bumper panel and I SECOND that recommendation whole heartedly. With exception to maybe having someone sandwich their hand between the bumper and body during install, I don't think there is anyway you can install this without hitting that body panel at least once. My Bronco is still perfectly painted in tears and primer, so I'm not too worried, but if it were actual paint that was cared for, you'd probably end up damaging it a bit. Just an FYI.

The lower bumper fit and was shipped off to the paint booth (AKA Rear patio). There it received two coats of primer, and about three coats of Rust oleum Gloss Black. There was a little debate here amongst myself and myself as to which paint color to go with. We decided everything below the tire carrier portion would be the same as the frame paint choice. I'm going to use the same paint and color on the hinge portion of this bumper as the tire carrier portion so that will get its actual color in a couple days. For now, the bare metal is covered in a couple coats of primer. Lower portion of the bumper mount will get a couple days of drying in the garage as upper portion gets worked on.