






Community

Buy / Sell



Bronco Tech
Fuel Tank Access Plate
3 Arm Wiper Setup
Fix Motor Mount
Roll Cage Braces
Throttle Body 65mm
Wheel Alignment
Heat Riser Replacement
Vent Window Repair
Center Console Mount
Straighten Bumper
Ford 6R80 6 spd
More Tech...
3 Arm Wiper Setup
Fix Motor Mount
Roll Cage Braces
Throttle Body 65mm
Wheel Alignment
Heat Riser Replacement
Vent Window Repair
Center Console Mount
Straighten Bumper
Ford 6R80 6 spd
More Tech...

-
Welcome to ClassicBroncos! - You are currently viewing the forums as a GUEST. To take advantage of all the site features, please take a moment to register. It's fast, simple and absolutely free. So please join our community today!If you have problems registering or can't log into your account, please contact Admin.
You are using an out of date browser. It may not display this or other websites correctly.
You should upgrade or use an alternative browser.
You should upgrade or use an alternative browser.
What have you done to your Bronco today?
- Thread starter Heus33
- Start date


Jwredneck
Full Member
Top of the springs is their heavy duty plate used in conjunction with the axle relocation plate. You can move the axle back 1" or 1.25" with this. I went with 1.25". I have the torque tamer and will install it after a couple hundred miles. Duff recommended letting the springs break in before mounting it. I also got to mount the rear sway still. The parking brake cables that came with the kit I am not going to use. I want to run them between the frame rail and body, so I need longer. Found an old thread on here that mentioned 72 F100 cables with part numbers, so I ordered those from Rock Auto.Is that a torque tamer bracket?

Make sure the truck is on the ground when you locate the tamer bracket. My mechanic did it on the lift do now I have to have it cut off and new one welded.Top of the springs is their heavy duty plate used in conjunction with the axle relocation plate. You can move the axle back 1" or 1.25" with this. I went with 1.25". I have the torque tamer and will install it after a couple hundred miles. Duff recommended letting the springs break in before mounting it. I also got to mount the rear sway still. The parking brake cables that came with the kit I am not going to use. I want to run them between the frame rail and body, so I need longer. Found an old thread on here that mentioned 72 F100 cables with part numbers, so I ordered those from Rock Auto.

Finished up the restoration on my roadster. Painted it the same color as the 74 wagon. This one was sans interior so I made new seats for it.
Attachments
-
 IMG_3091.jpeg188.4 KB · Views: 118
-
 IMG_3107.jpeg278.5 KB · Views: 120
-
 IMG_3108.jpeg287.6 KB · Views: 80
-
 IMG_3109.jpeg271.3 KB · Views: 81
-
 IMG_3110.jpeg247.6 KB · Views: 74
-
 IMG_3111.jpeg205 KB · Views: 109
-
 IMG_3112.jpeg184.7 KB · Views: 99
-
 IMG_3113.jpeg180.6 KB · Views: 112
-
 IMG_3120.jpeg201.7 KB · Views: 100
-
 IMG_3121.jpeg115.3 KB · Views: 112
-
 IMG_3122.jpeg222.1 KB · Views: 87
-
 IMG_3123.jpeg184.1 KB · Views: 113


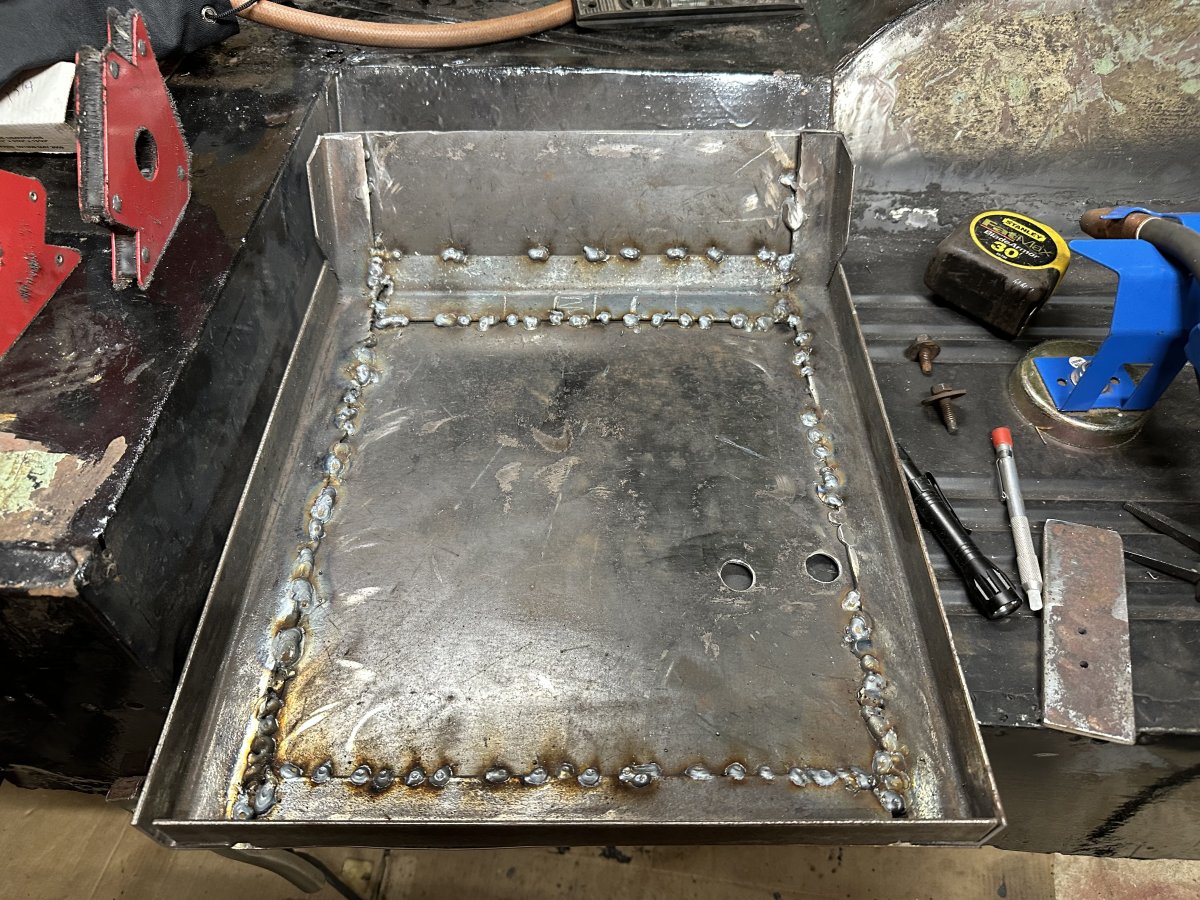
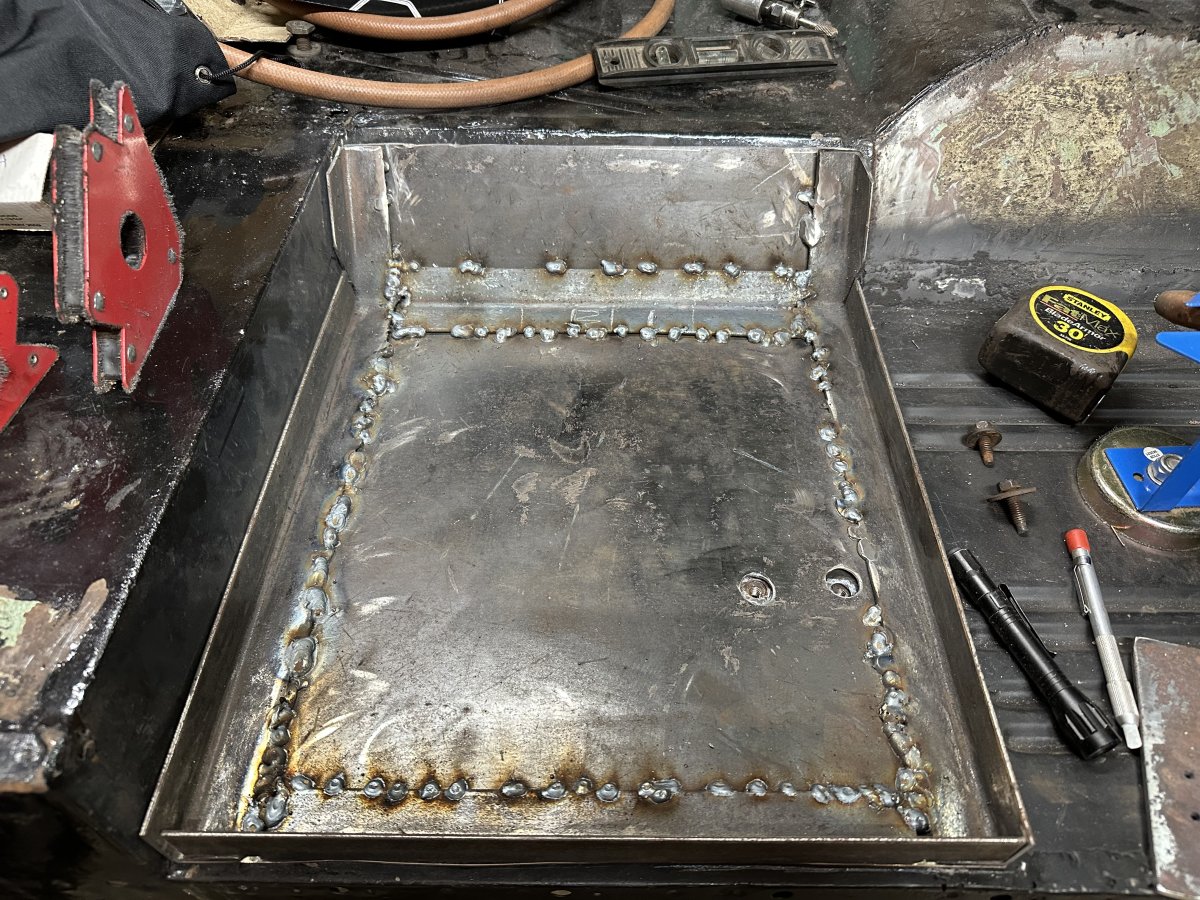
Can’t seem to get traction on the wiring, so jumped on getting a mount made for the P/S seat. As it’s going to be a 1/2 cab, no need for the seat to fold forward. I’ll use the seat bracket holes to anchor the unit. Will give me a little bit of lockable storage.

I saw my bronco under the cover in the same spot in my shop it been sitting for the last 3 months. 
Dont think I have driven it more than 2 times in the last 7 months.
Some day it will become a priority again.
Dont think I have driven it more than 2 times in the last 7 months.
Some day it will become a priority again.
small step for me, a HUGE step for mankind! (no catastrophic fire) Between the glass tub and 18lbs. of bad wiring cut out...should go pretty good now

Attachments
-
 00-NfmewEdBZpaPKHQAw15duo37JUqllZL3YGr4_whos6a1CyGPAxVPJOFnbw47y-3o4xJ2Twu75QF_jizMkB1ZdA.jpg141.7 KB · Views: 100
-
 00-NfmewEdBZpaPKHQAw15duo37JUqllZL3YGr4_whos6YL8GNUZ3mJifTePY_kfwlLVZV51t4MhjbEwRNyGscOgg.jpg140.5 KB · Views: 66
-
 00-NfmewEdBZpaPKHQAw15duo37JUqllZL3YGr4_whos6Z7hARCy5tl2Sq7HcIe8-2MKwg5ydwHipy3aIZBf9dNYQ.jpg114.5 KB · Views: 93

Rewire work is usually a royal PITA. Good luck on your project. Get a six-pack of this to help you.small step for me, a HUGE step for mankind! (no catastrophic fire) Between the glass tub and 18lbs. of bad wiring cut out...should go pretty good now

- Joined
- Apr 19, 2013
- Messages
- 435
Took the driver door apart so I could have the inside sand blasted, and I was going to wait until I got it back to fix the cracked window frame. Much worse than the other side, the crack was all the way through 2 sides. I had to tack it together to get it out of the door without further damage.
Passenger side:


Driver side:


Passenger side:
Driver side:

At 8%, that is a right proper beer! I wouldn't be getting much of anything done after 6 of those!Rewire work is usually a royal PITA. Good luck on your project. Get a six-pack of this to help you.
View attachment 945100

Probably the best advice I've seen on this forumRewire work is usually a royal PITA. Good luck on your project. Get a six-pack of this to help you.
View attachment 945100

@tasker since you're in NH, you may be able to get yourself some Nightshift Brewing 87 out of Boston...I believe they only come in pint cans tooAt 8%, that is a right proper beer! I wouldn't be getting much of anything done after 6 of those!


Picked up my interior panels from powder coating. Now I just need to paint my tub and put it all back together.

Sent from my iPhone using Tapatalk
What color code did you use? Looks great!
What color code did you use? Looks great!
I used Cardinal powder T009 BG-01 Almond as recommended by Doug @904Bronco
It’s a satin finish.
Sent from my iPhone using Tapatalk
Are those door panels aluminum?Picked up my interior panels from powder coating. Now I just need to paint my tub and put it all back together.
Sent from my iPhone using Tapatalk
Is that to match parchment or wimbledon?I used Cardinal powder T009 BG-01 Almond as recommended by Doug @904Bronco
It’s a satin finish.
Sent from my iPhone using Tapatalk
Similar threads

- Replies
- 38
- Views
- 9K

- Replies
- 23
- Views
- 6K

- Replies
- 34
- Views
- 5K
- Replies
- 5
- Views
- 2K
