


Community
Buy / Sell


Bronco Tech
3 Arm Wiper Setup
Fix Motor Mount
Roll Cage Braces
Throttle Body 65mm
Wheel Alignment
Heat Riser Replacement
Vent Window Repair
Center Console Mount
Straighten Bumper
Ford 6R80 6 spd
More Tech...
Fix Motor Mount
Roll Cage Braces
Throttle Body 65mm
Wheel Alignment
Heat Riser Replacement
Vent Window Repair
Center Console Mount
Straighten Bumper
Ford 6R80 6 spd
More Tech...

-
Welcome to ClassicBroncos! - You are currently viewing the forums as a GUEST. To take advantage of all the site features, please take a moment to register. It's fast, simple and absolutely free. So please join our community today!If you have problems registering or can't log into your account, please contact Admin.
You are using an out of date browser. It may not display this or other websites correctly.
You should upgrade or use an alternative browser.
You should upgrade or use an alternative browser.
migs Bronco Barn - a chronicle of what's happening at the new place
- Thread starter migs
- Start date


She is bright! pulled the rest of the masking off.
Does She have a name Tasker?
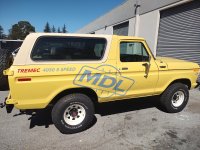
My 79 is the Yellow Sub...
OP
OP
- Joined
- Nov 12, 2011
- Messages
- 1,386
Been busy cutting and buffing the clear, that's done but I have a couple spots to fix before I roll it out of the booth area to make space to finish painting the other parts.
Here's a comparison of the paint surface before and after the wet sanding and buffing/polishing process.


Also, the sun peeked out today so I opened the door to shine a little sunlight on the pearl.


Here's a comparison of the paint surface before and after the wet sanding and buffing/polishing process.
Also, the sun peeked out today so I opened the door to shine a little sunlight on the pearl.


bronco1017
Sr. Member
- Joined
- Mar 22, 2010
- Messages
- 552
Damn!!!!Been busy cutting and buffing the clear, that's done but I have a couple spots to fix before I roll it out of the booth area to make space to finish painting the other parts.
Here's a comparison of the paint surface before and after the wet sanding and buffing/polishing process.
View attachment 940280 View attachment 940281
Also, the sun peeked out today so I opened the door to shine a little sunlight on the pearl.
View attachment 940282 View attachment 940283
OP
OP
- Joined
- Nov 12, 2011
- Messages
- 1,386
Ok, some quick updates, right around tasker's visit I was working on fixing a few blemishes in the finish. While wet sanding to six the blemishes I ended up going through the yellow in a few spots, oops. Hard to tell in these pics compared to the light reflections but the spots are located in the central area of the pictures.


And after blending new paint and clear:


And after blending new paint and clear:
OP
OP
- Joined
- Nov 12, 2011
- Messages
- 1,386
And with that done it was on to other tasks. First off I gave my blast cabinet a much needed rehab and tune up.... full clean out, new gloves, consumables, media and viewing glass protector as well as a refresh of the vac system. Also cleaned out the small paint booth and replaced the filter then went on a marathon of disassembling, cleaning, blasting and painting parts. Some things like the power steering pump and hydro boost were just cleaned and touched up a bit as they were in good order when removed.
Still plenty more to go.


Still plenty more to go.
OP
OP
- Joined
- Nov 12, 2011
- Messages
- 1,386
More little bits... So this tub does not have provisions built in for the upper pedal box mounting bolts, it just utilizes bolts through the cowl. Well, the previous builder had just made use of a crude strap, so I figured I'd make something a little thicker and larger to spread the load out.
And if it's going to be sitting there in plain sight might as well give it a little something extra.
Oh, I also made a couple of shims for the water pump pulley to replace the four washers that were being used to space it out.


And if it's going to be sitting there in plain sight might as well give it a little something extra.
Oh, I also made a couple of shims for the water pump pulley to replace the four washers that were being used to space it out.
Similar threads
- Replies
- 1K
- Views
- 286K
- Replies
- 16
- Views
- 4K
- Replies
- 21
- Views
- 3K