• Welcome to ClassicBroncos! - You are currently viewing the forums as a GUEST. To take advantage of all the site features, please take a moment to register. It's fast, simple and absolutely free. So please join our community today!
    If you have problems registering or can't log into your account, please contact Admin.

Nothing Special – ’71 daily driver – trail rig build thread

OP
OP
Nothing Special

Nothing Special

Sr. Member
Joined
Nov 25, 2016
Messages
805
The Bronco's brake conversion is done! I bought the hoses from the GMC power steering pump to the hydroboost unit and from the hrydroboost unit to the GMC steering gear. I also bought the hose from the Bronco power steering pump to the steering gear (actually the hose for a '70 F-series truck). That gave me all the fittings I needed, but not all on the right hoses. So I cut the hoses and had an industrial hose supply shop put them together they way I needed them. Not a cheap option, but it worked. I added a power steering cooler and T'd the return lines from the hydroboost and the cooler at the pump. That took care of the power steering fluid side.

At that point I needed to put the Bronco on the back burner while I worked on my parents travel trailer for a while, so this next update was delayed.

I got a new proportioning valve for disk / drum (since I was going away from disk / disk) and made all new brake lines. This evening my wife helped me bleed the brakes, so it's done!

I didn't take it for much of a test drive, because I don't have insurance on it, but the brakes come in a lot higher than they did with the vacuum power / 4 wheel disk setup. (One of my complaints about it was that the pedal was almost on the floor in a moderately hard stop. It always did the job, but it never inspired confidence.) The brakes are a bit touchy now, but they don't seem horrible. I think I'll be able to get used to modulating them easily enough.

Also I probably don't really have the rear drums adjusted correctly yet. I had intentionally left them "loose" so I did a few hard-ish stops in reverse to try to get the adjusters to tighten them up a bit. On the first few stops I locked the front brakes pretty easily. But after a few I was stopping just as hard without locking the fronts, so the rears must be coming in more now. We'll see how things go once I actually get it on the road.

OK, I said the brakes are done, but that's not quite true. I still need to do a little clean-up underneath, making sure the rear brake line is tied up appropriately. And even though getting a working parking brake was one of the driving forces in this project, I still don't have one. My air tank is in the way of the parking brake cables and even harder to address, my roll cage is in the way of the parking brake pedal. Both are surmountable obstacles, but both are going to need to wait a bit.

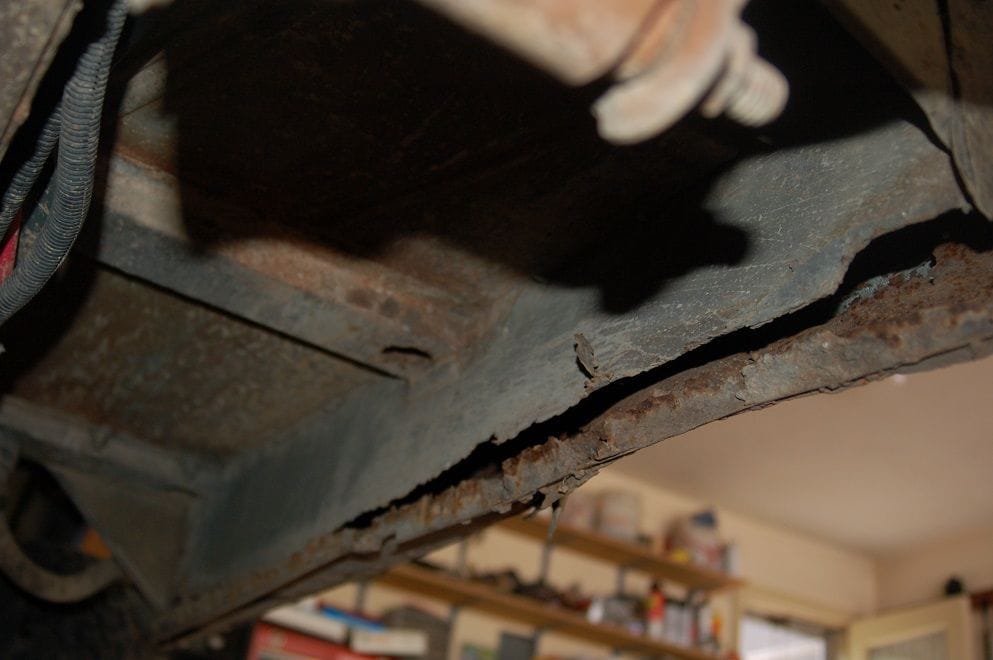
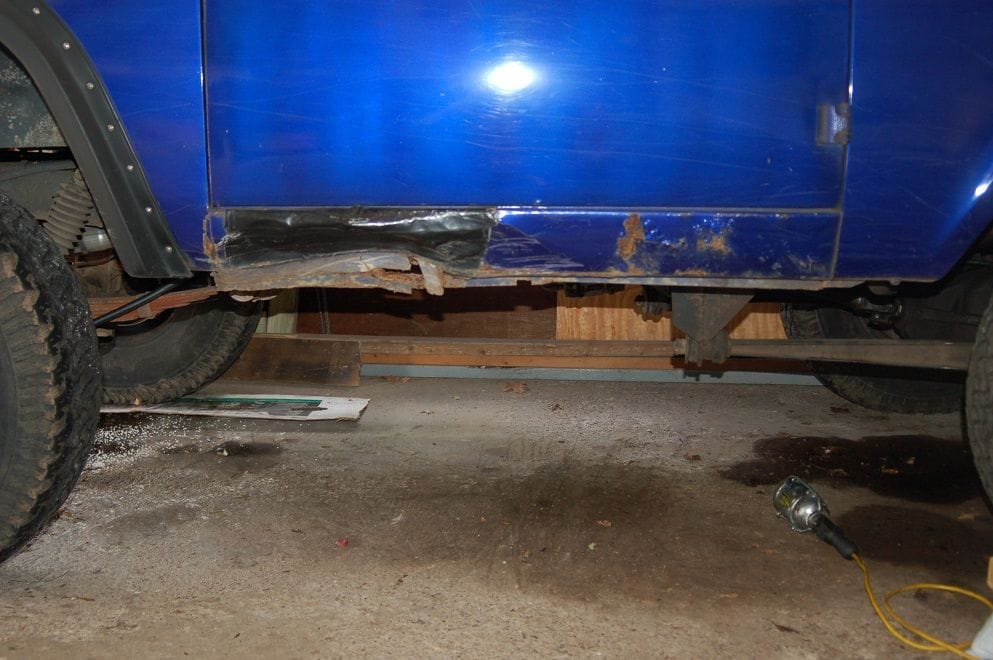
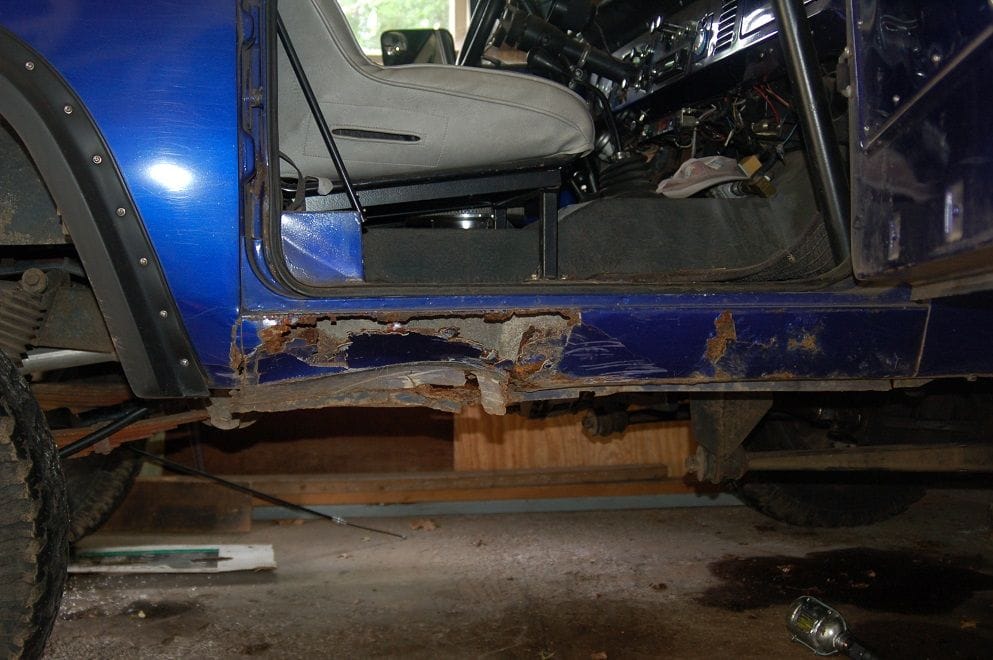
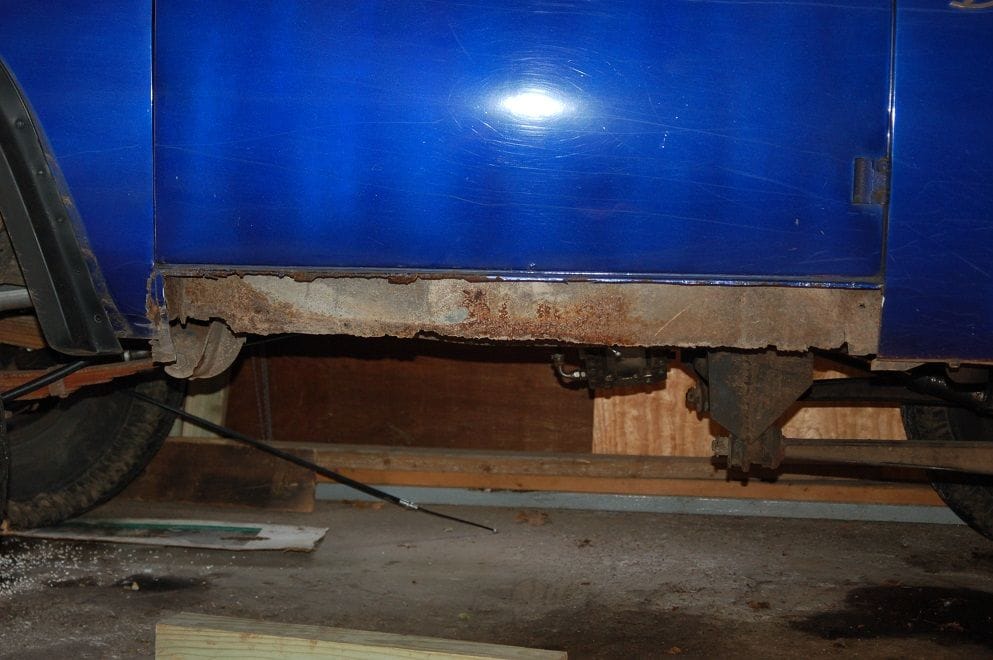
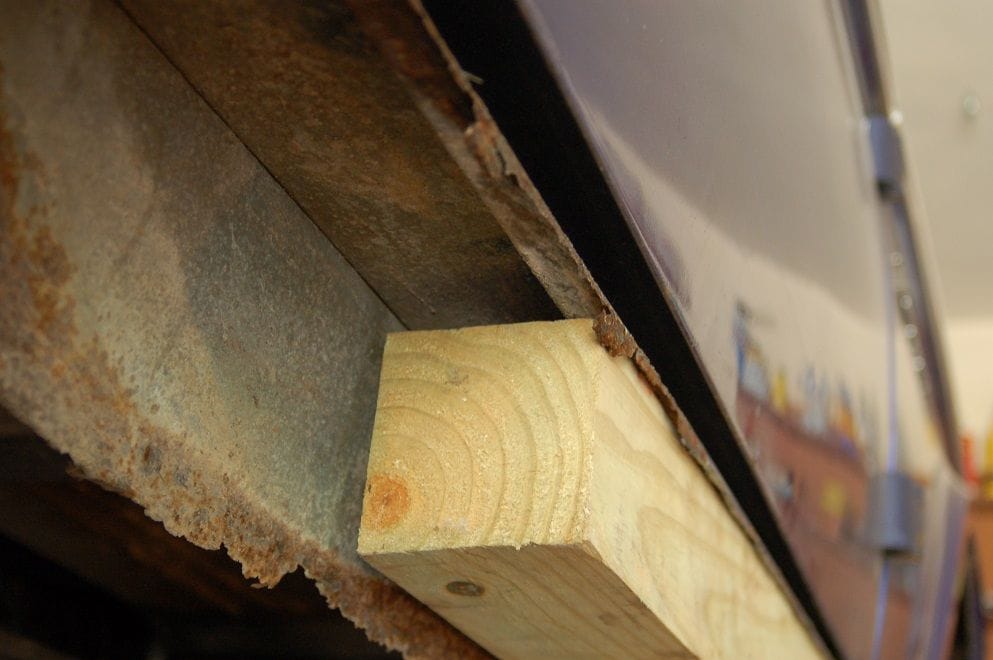
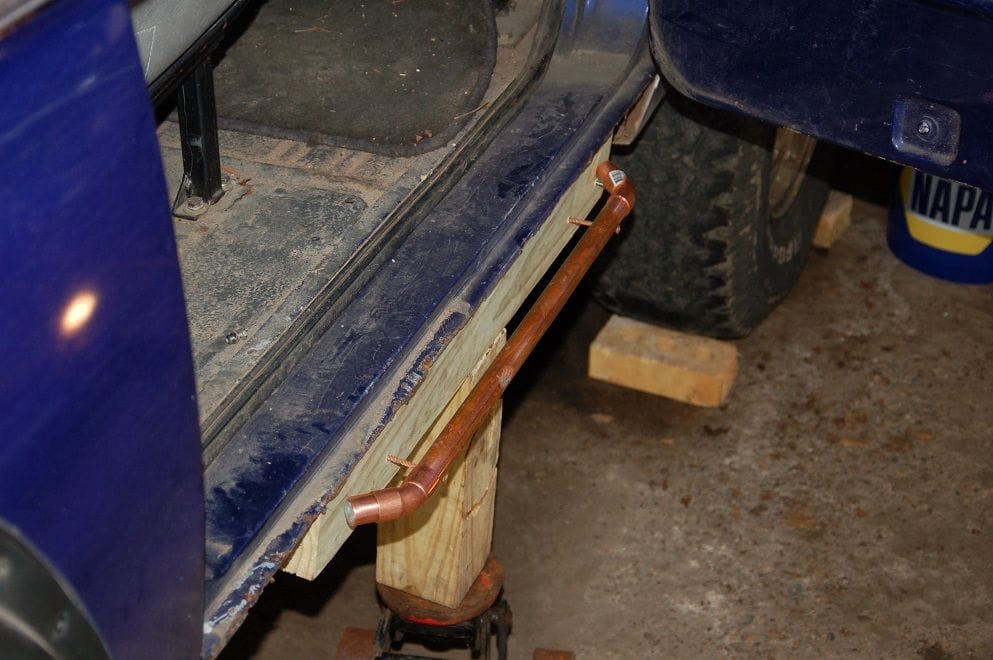
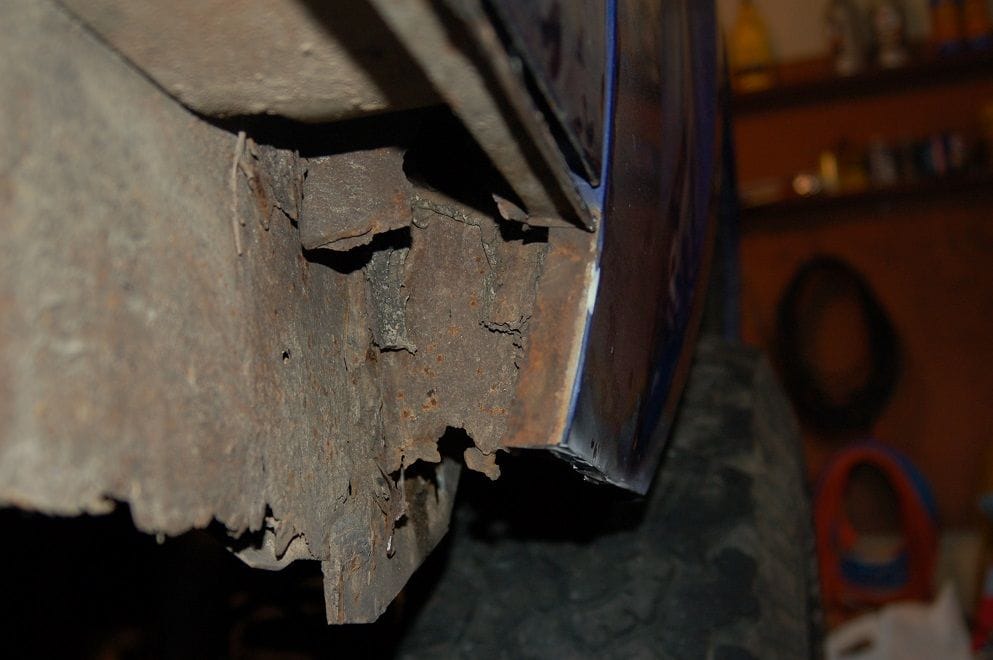
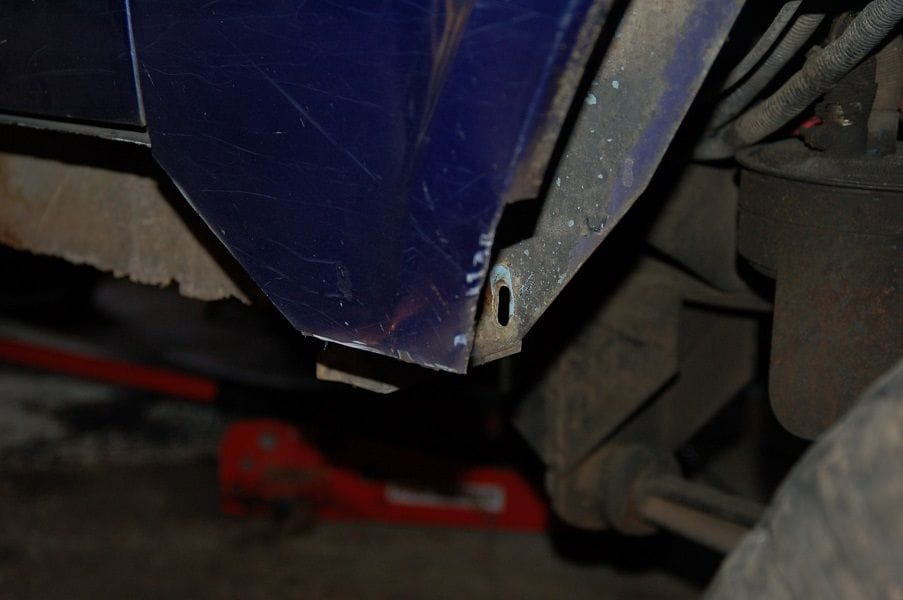
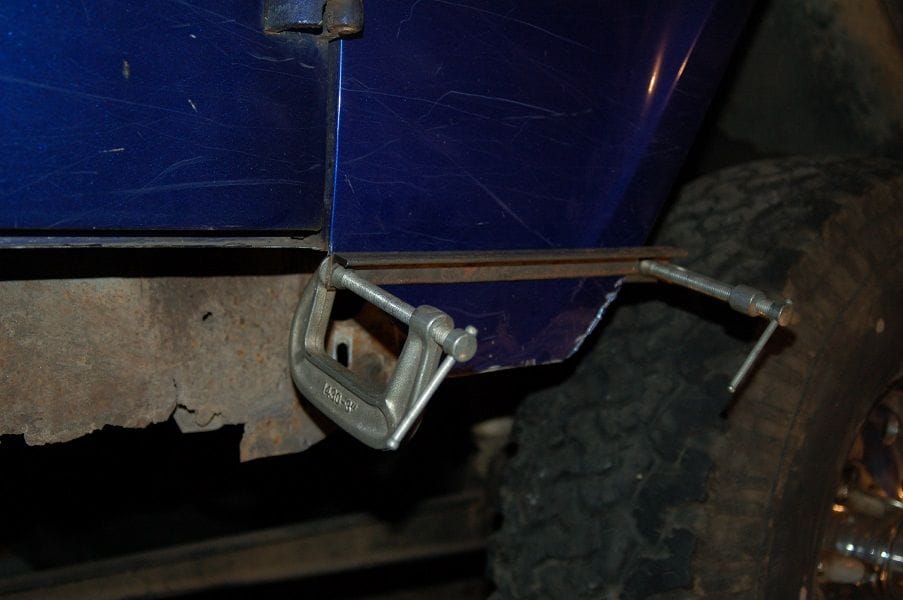
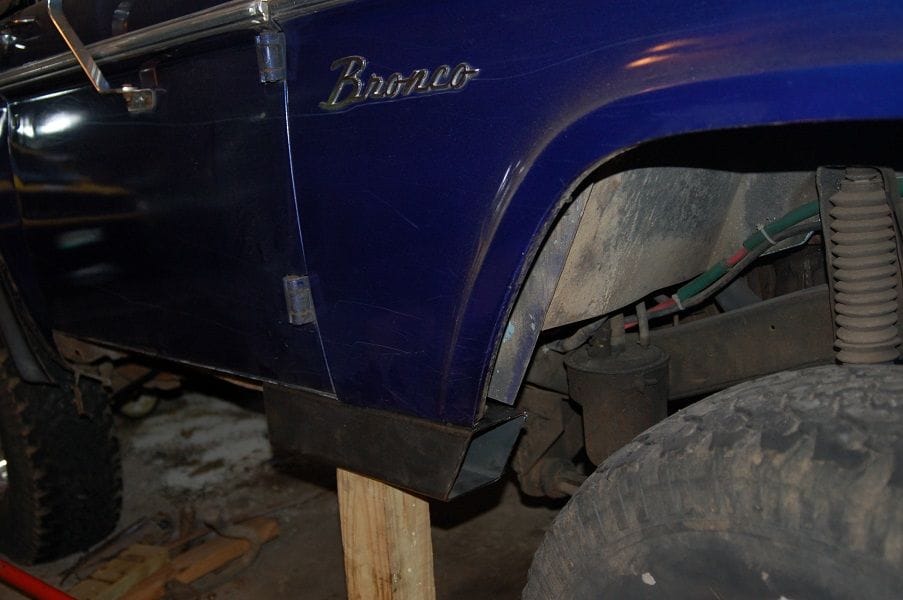
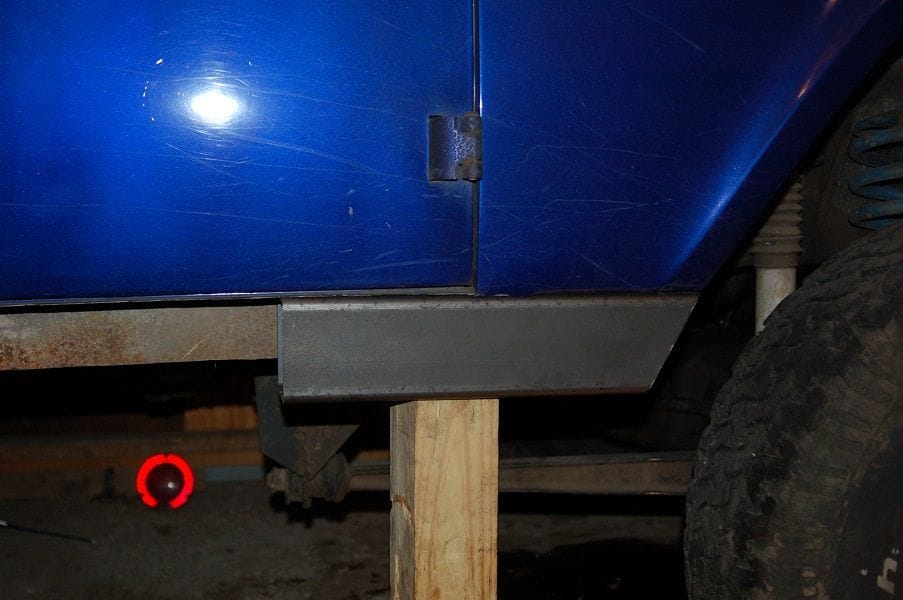
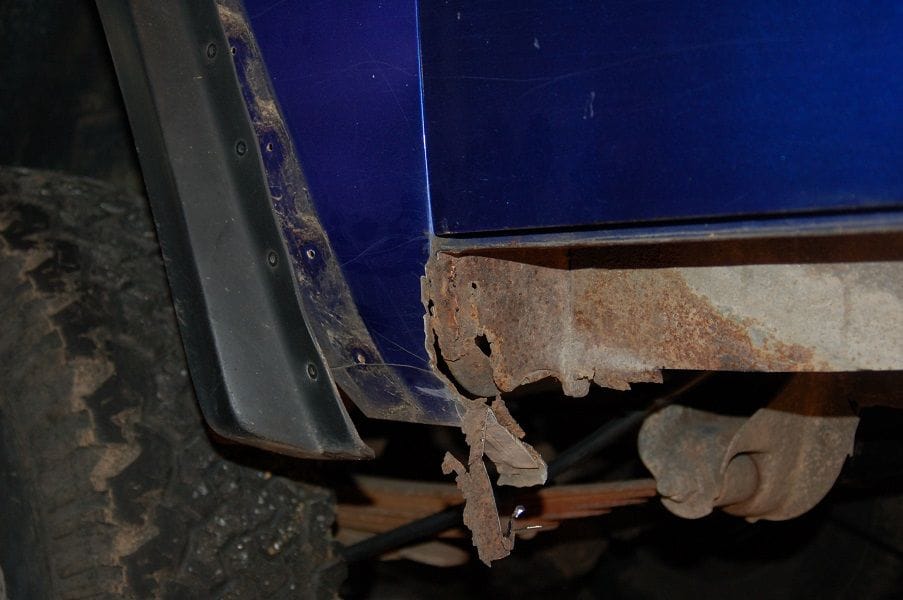
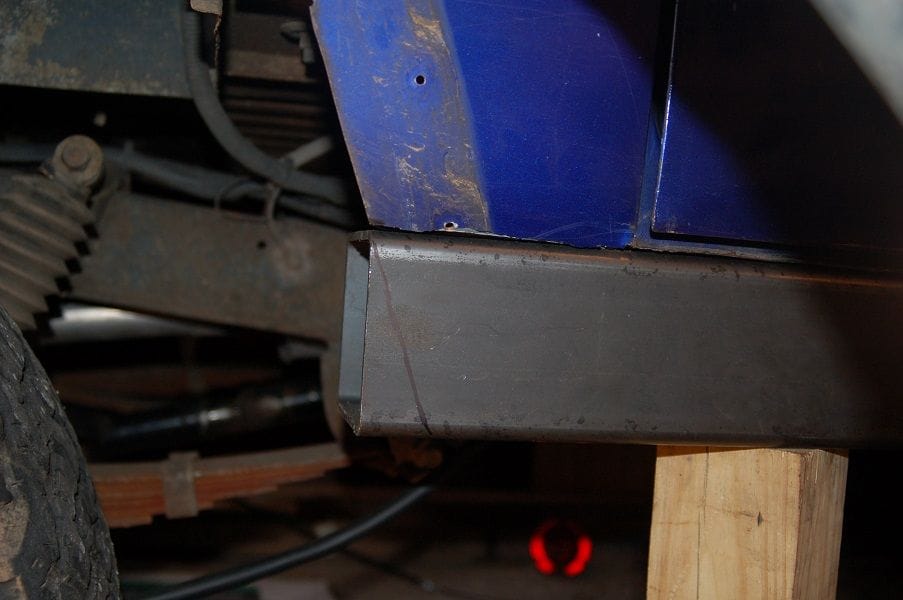
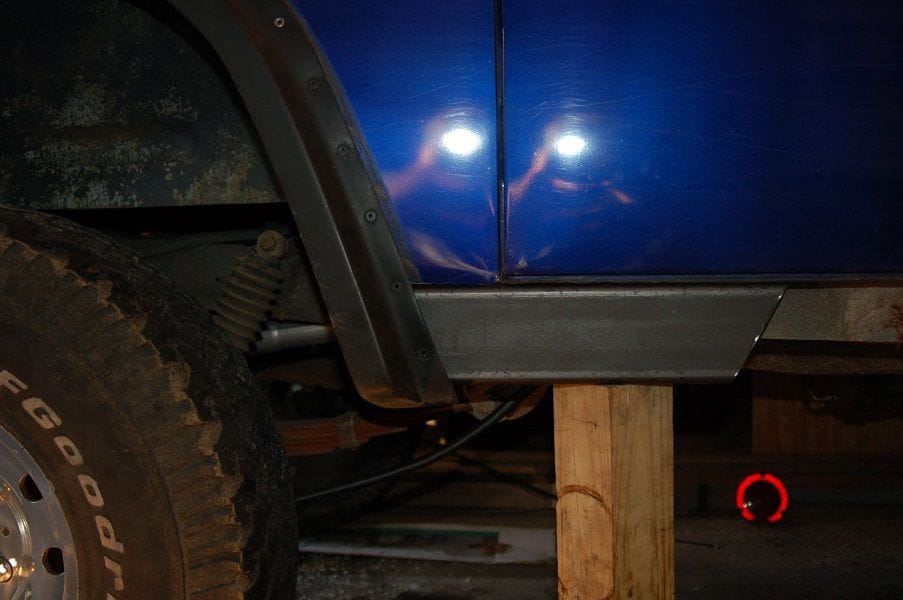
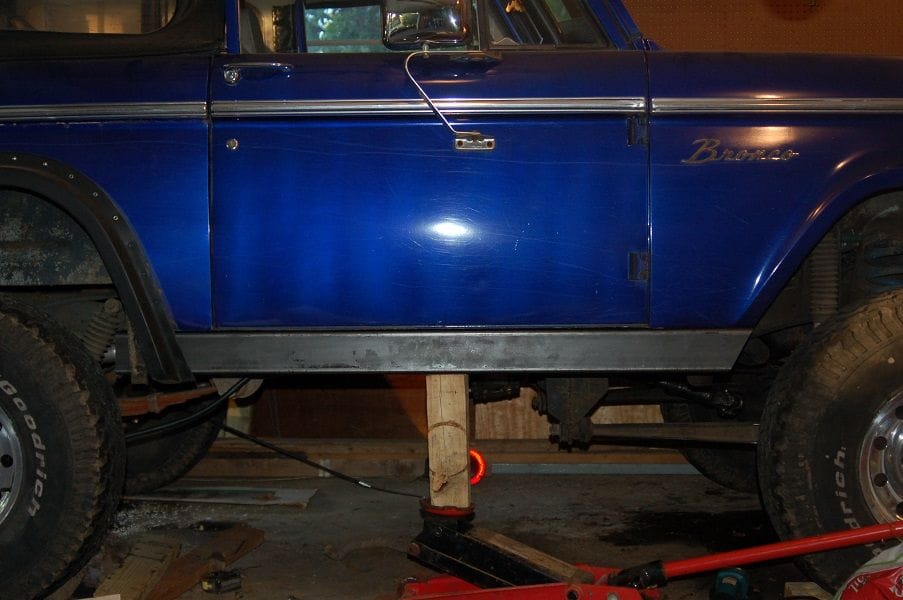
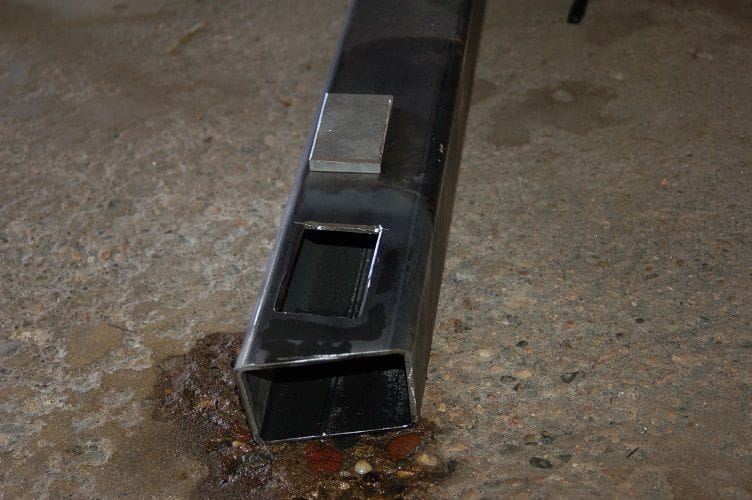
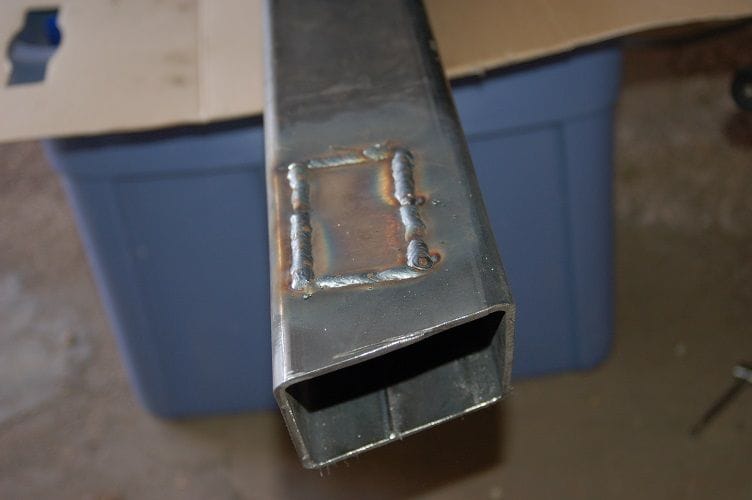
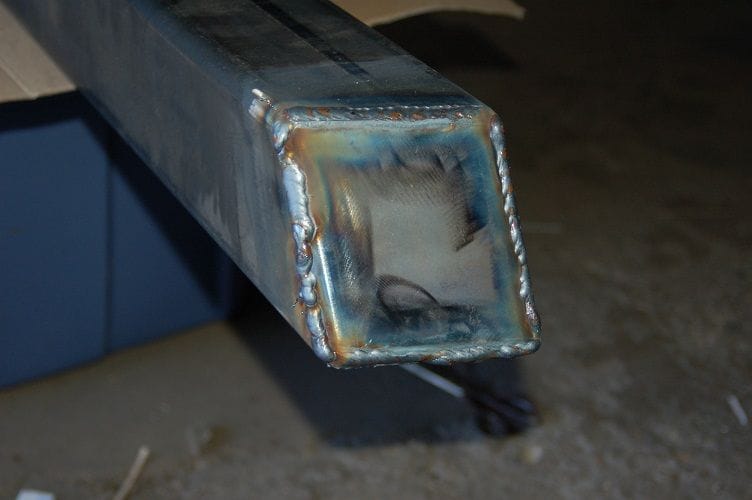
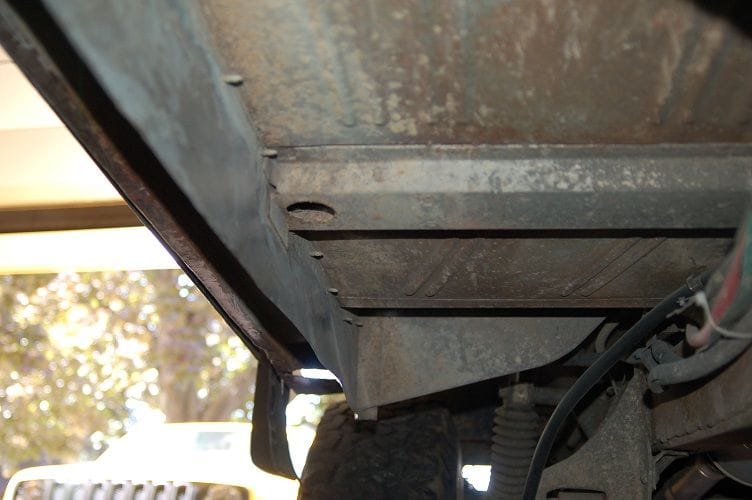
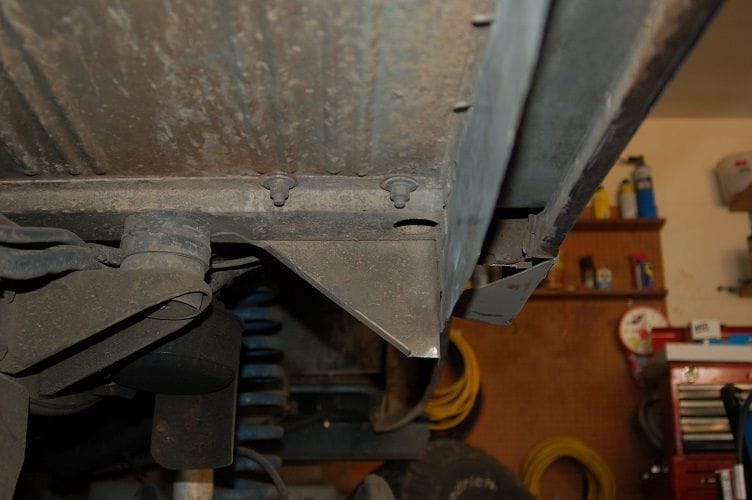
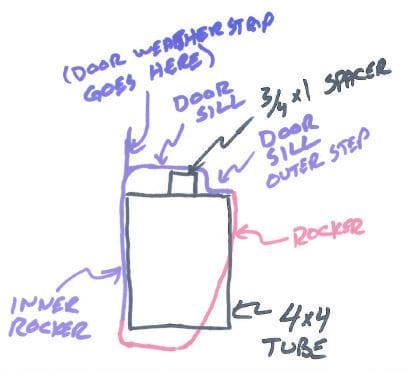
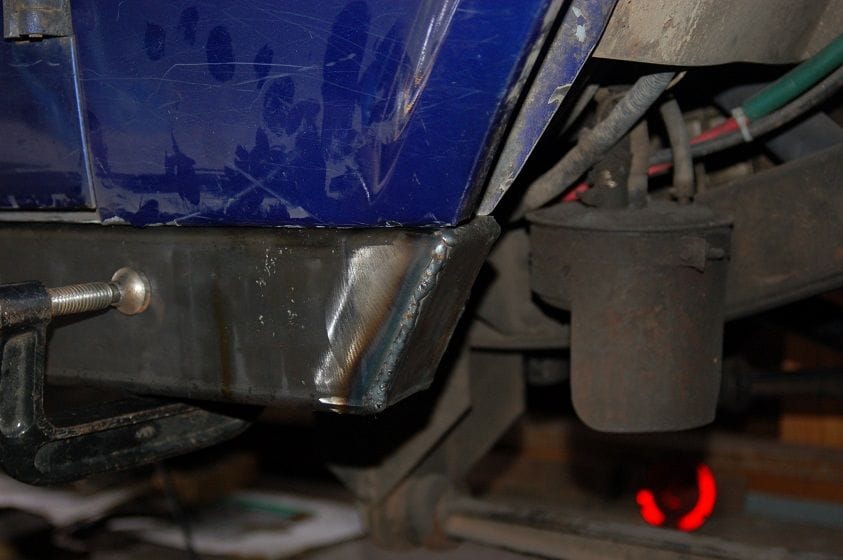
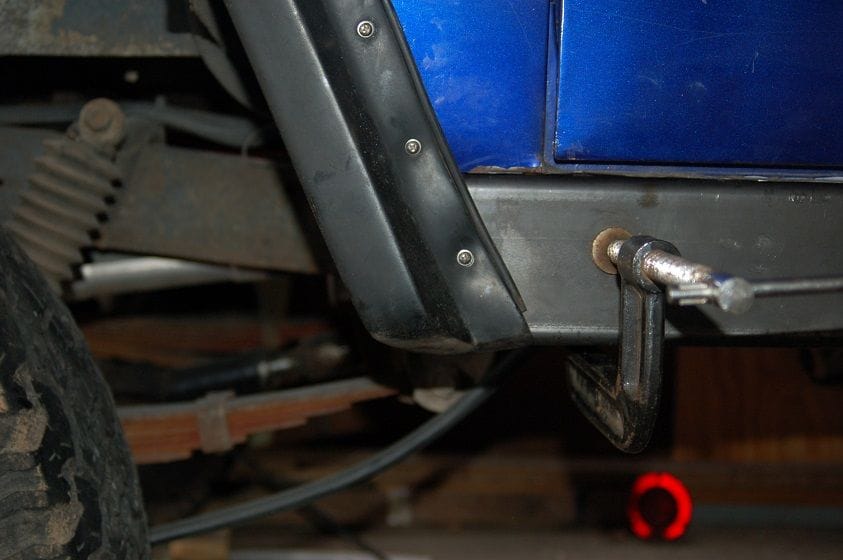
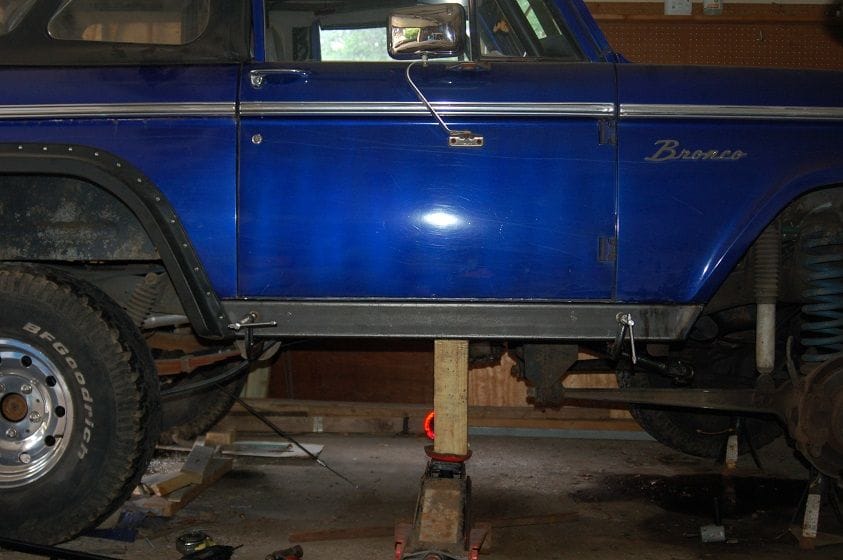
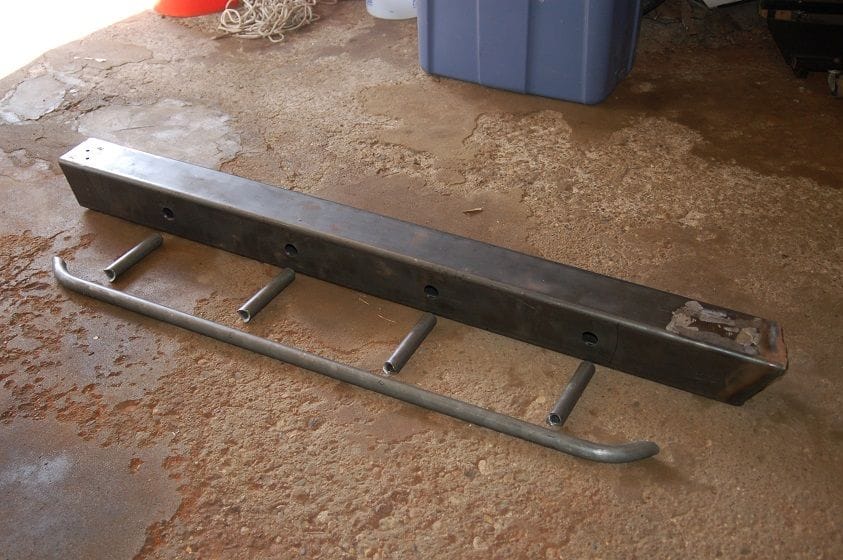
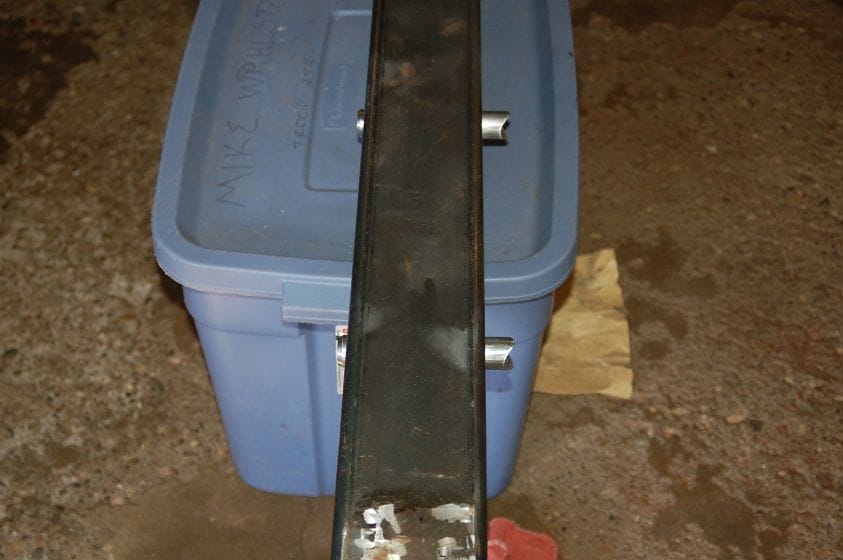
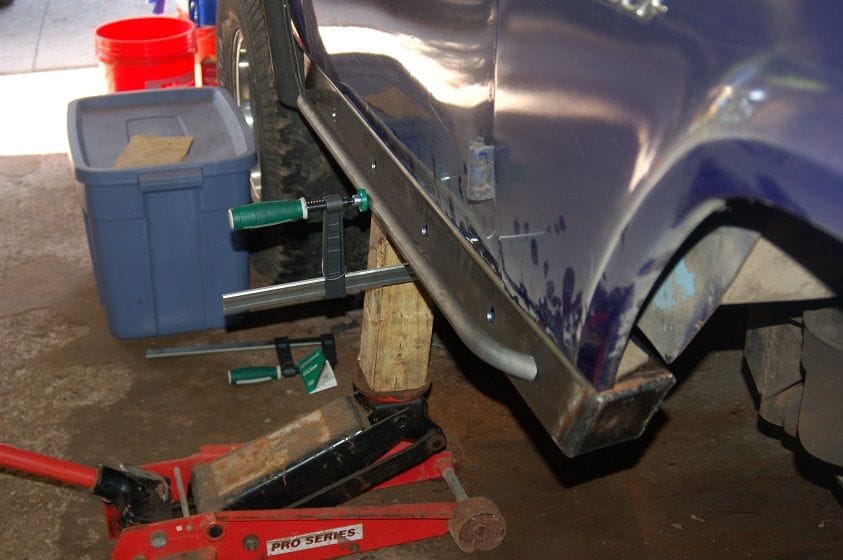
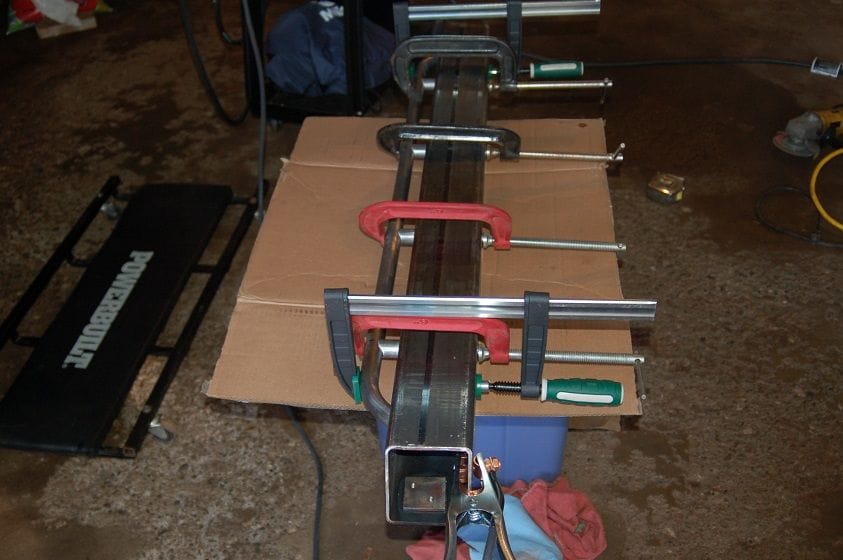
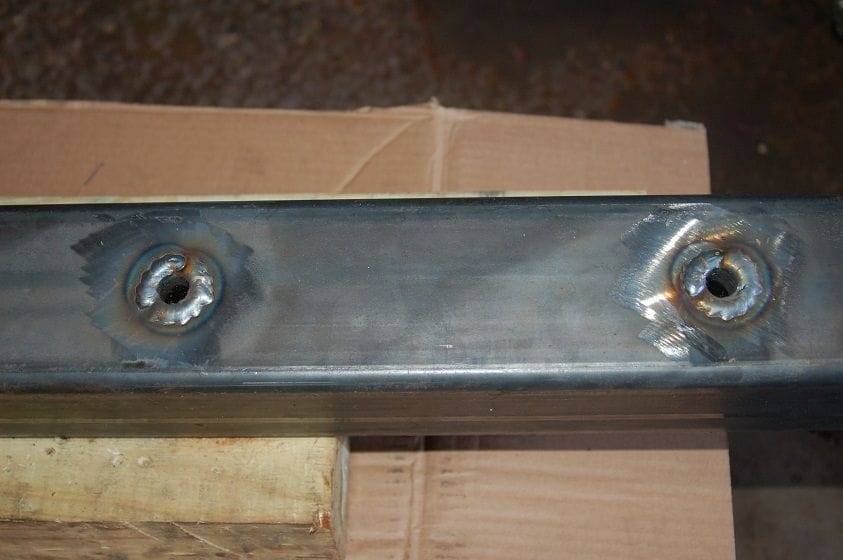
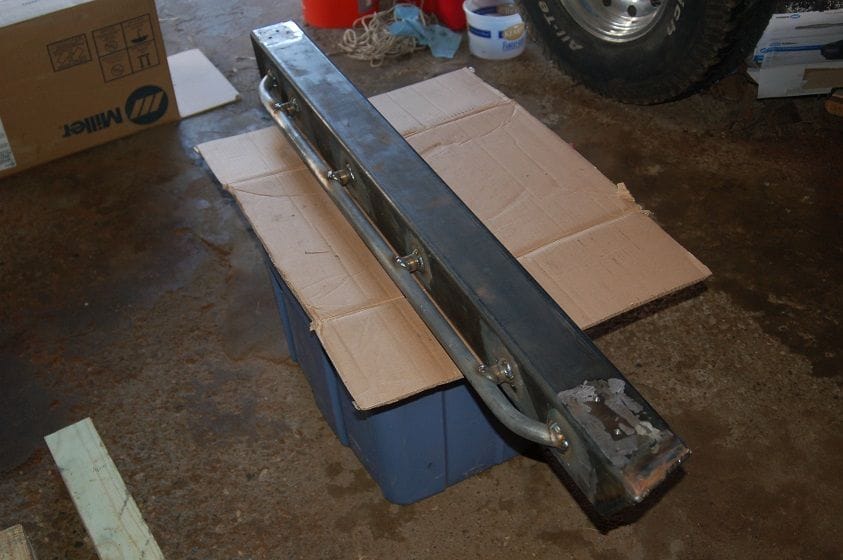
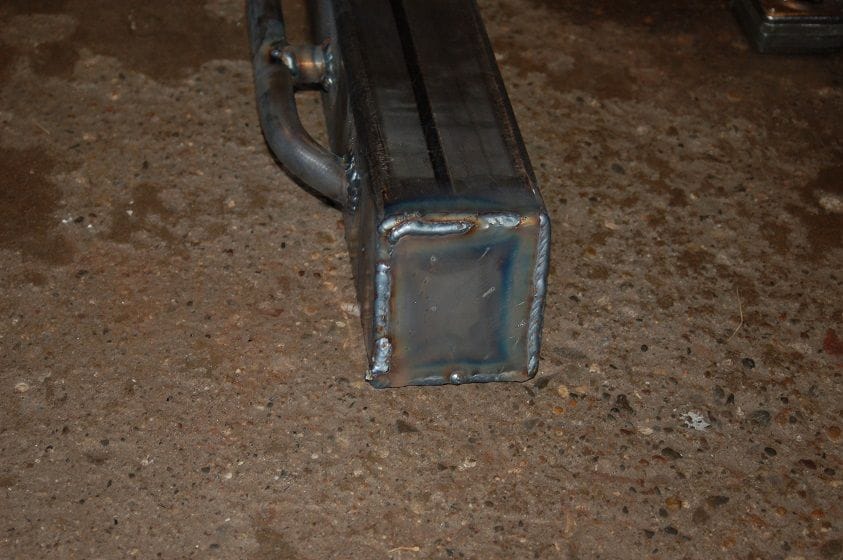
The next project, and the reason I'm not putting insurance on it just yet, is adding some rocker protection. Both rockers are rusted and crunched, but the passenger side is so far gone that the body is sagging to the point where the door doesn't operate correctly. So my plan is to cut away the rusted / crunched sheet metal and weld in some heavy-wall rectangular steel tubing. Hopefully I can get started on that project in the next few days...
 

904Bronco

Contributor
Bronco Guru
Joined
Sep 28, 2004
Messages
5,769
Loc.
San Martin, CA
I'm thinking that doesn't sound like a compliment!

My comment is neutral...

You chose a different path than most, I am watching to see if it is another way to do things. Anyone here will tell you that there are many ways to do HB.

As long as you are satisfied with the outcome, then that is all that matters.
 
OP
OP
Nothing Special

Nothing Special

Sr. Member
Joined
Nov 25, 2016
Messages
805
My comment is neutral...

You chose a different path than most, I am watching to see if it is another way to do things. Anyone here will tell you that there are many ways to do HB.

As long as you are satisfied with the outcome, then that is all that matters.

Don't worry, no offense taken.
 

BRONCITIS74

Contributor
Full Member
Joined
Oct 4, 2015
Messages
340
I love your thread as well as your Bronco. I have searched and searched for a pair of rear view side mirrors like you have on your doors. Please tell me where you got them.
 
OP
OP
Nothing Special

Nothing Special

Sr. Member
Joined
Nov 25, 2016
Messages
805
I love your thread as well as your Bronco. I have searched and searched for a pair of rear view side mirrors like you have on your doors. Please tell me where you got them.

Thanks!

Way back in 2003 I bought a set of mirrors at an auto parts store. I don't know the brand, and it wasn't a chain store so I can't give you any guidance there. Those mirrors were OK, but did vibrate a lot.

Then in 2018 I replaced the mirror heads with the same Ford mirrors that came on my F-250. Those were EXPENSIVE (like around $100 each) but they work GREAT! Even though I didn't get the Ford mounts (I kept the mounts that came with the mirrors I bought in 20030 there's very little vibration.

Unfortunately I don't think the Ford mirrors are available new anymore (although at the price it's hard to justify them). But you might have some luck getting mirrors from a junk yard. I'm not sure exactly what year these mirrors went into use, but probably early '90s or so. And they'd go through '96 on the Bronco, F-150 and F-250, and through '97 on the F-250HD and F-350.
 
OP
OP
Nothing Special

Nothing Special

Sr. Member
Joined
Nov 25, 2016
Messages
805
Maybe a little more than a few days, but only a week later, today I officially started replacing my rockers! Or more accurately, removing them to make room to replace them.

Here's a picture of the back side of the passenger rocker. You can see why I don't think there was enough structure there to attach armor to the existing rockers!
80-dsc_0422_bc789d809509dc1b71b066577b2d5564ca56c5fc.jpg


Here's what I had been looking at on the outside
80-dsc_0421_48428f66a4af358403511bb1133b3f3760bb0d8e.jpg


It looked even worse after removing the Gorilla Tape bodywork:
80-dsc_0424_1bf9ac2f30760c78455b39f85c51dab6160f25bd.jpg


And after about 15 minutes with a death wheel I had the rocker off:
80-dsc_0425_d1aed49723ea2a33566d32812bcc4ac4d1d09c8d.jpg


So I'm halfway done with one side already! (or maybe not quite half way)
 
OP
OP
Nothing Special

Nothing Special

Sr. Member
Joined
Nov 25, 2016
Messages
805
One thing I'd like a little help figuring out. I'm planning on getting a 4" x 4" square tube to weld in place of the rocker. Here's a pic with a wood 4x4 in place. Wood 4x4s are actually about 3.75" square, so a metal 4x4 tube will touch the inner vertical part of the original rocker that I left in place while still coming all the way out to the original outer line where I have the wood 4x4 in this picture.

The problem is the 3/4" step on the outside of the door sill (the metal above the 4x4 in this pic). I was planning on spot welding the inner side of the tube to the vertical inner rocker and the top of the tube to the door sill. But the outer step of the sill isn't as wide as I'd like, and the main sill is 3/4" above the 4x4. So I'm thinking I'll get a 3/4" tube and weld it to the top of the 4x4, and then spot weld the door sill to the 3/4" tube.

Does that seem like a reasonable approach? Or does anyone have a better suggestion?
80-dsc_0429_a36402a407528bdc06378b86bfa0ec0cff7bdb39.jpg
 
OP
OP
Nothing Special

Nothing Special

Sr. Member
Joined
Nov 25, 2016
Messages
805
Not much progress the latter half of the week, but I progressed toward being able to make progress (if that means anything ?:?). I now have two 6' lengths of 4x4x3/16 wall tubing in my garage. I don't buy steel often, so that was a bit of an adventure, but I'm set there now.

I also took a couple of 34" lengths of 1x1 tubing (probably 3/16" wall as well, but that's just by eyeball) and cut one side off to get a couple of 1x3/4 C channels. This was the only actual progress. I used a mill to cut the two corners off (one pass per side). It took about 45 minutes of my lunch hour including cleanup. No pictures of that yet, but I'll get some as I start getting the 4x4 ready to go in. I'll weld that to the top of the 4x4 and then spot weld the door sill to it. to bridge that gap.

I also spent some time staring up from a creeper to figure out what I'm going to do with the structure that comes down from the "A" and "B"pillars. Both are in the way of the 4x4, but I think I know how I'm going to cut and bend them so I can weld them to the tube and strengthen everything rather than weaken it. Again, pictures will have to wait until I start actually doing something about it.

I also stared up at what the bottom of the fender needs to do. Now it's bolted to an inner panel of the tub, but that's in the way of the 4x4. So one option is to slice it off at the top of the 4x4 and weld it there. But I'm not a good enough welder for that to end up looking very good, and I don't know that I want the fender welded to the body. So I'm not stoked about that.

Plan B has promise though. If I bend the bottom of the fender in at the top of the 4x4 I can drill and tap the top of the 4x4 (probably after adding some wall there to get more threads) and then I can bolt the fender to the top of the tube. The only challenge with that will be making a good straight crease where there's come contouring along the curve of the fender (at the very front in the photo below, in-line with the bottom of the door). But that's probably what I'll be trying to do.
80-dsc_0421_48428f66a4af358403511bb1133b3f3760bb0d8e.jpg


And the last thing is that I want the rocker to stick out far enough to protect the door a bit. I thought about getting a 6" wide x 4" tall tube, but I thought that might not look so good. So what I think I'm going to do is put a 1" OD tube on it. Below I've sort of mocked it up with the wood 4x4 and a 3/4" ID copper pipe. The real version will be longer, going beyond the front and back of the door. I'll also add a few supports in the middle. And it won't be made of wood and copper! Anyway, I found a local shop that can bend the 1" OD x 3/16" wall tubing. They're working on getting me a quote, so again, progressing towards progress!
80-dsc_0433_13b19e0bbd637de439feaa7d94c240061a1f6817.jpg

80-dsc_0433_13b19e0bbd637de439feaa7d94c240061a1f6817.jpg
 
OP
OP
Nothing Special

Nothing Special

Sr. Member
Joined
Nov 25, 2016
Messages
805
Actual progress tonight!

I started off cutting a chunk off the end of one of my 6' lengths of 4x4. That was mostly to have a smaller piece to use to mock up how the actual 4x4 will fit and also to practice cutting it off with the death wheel (that worked well enough that I think I can do all of my cuts that way rather than bringing them into work to use the cutoff saw).

Then I started getting the front fender and the bottom of the "A" pillar out of the way. I started by cutting off about the bottom 1" of the fender. That put the cut off edge about 3" below where the top of the 4x4 will be, so I'll have a good flange to bolt to the top of the 4x4 after the bottom of the fender is bent over (see the next picture).

This picture also shows the bottom section of the "A" pillar still in place. My thought was to bend it forward so I could weld it to the top of the 4x4. But I realized that it's in way too bad shape for that, so I just cut it off slightly above where the top of the 4x4 will be (cut out after this picture).

This picture also shows the flange on the back edge of the fender that needed to go away before I'd be able to bend the fender up.
80-dsc_0464_97623eceed7120d6935ccca564006bd8076d2f06.jpg


So then I cut off the bottom corner of the fender (along with the flange from the top of the 4x4 down), and cut off the flange on the front edge of the fender (actually the bottom corner behind the front tire).
80-dsc_0465_dd68ca7215f19582bbe5cb1bd9d64948b53bdf73.jpg


Next I needed a way to bend the fender straight, in spite of the contouring along the tire opening. So I took a couple small pieces of angle iron and C-clamped them together with the top edge of the inner one along the line I wanted to bend it on.
80-dsc_0467_903d73c6e380d99b7e3c494b7ca591aca2cbfe73.jpg


Then it was pretty easy to grab the C-clamps and twist them in and up to bend the sheetmetal.
80-dsc_0468_082fb16f94adb15aac40b3f4566ed394b486a6b9.jpg


It now looks like the 4x4 will fit in, but looks can be deceiving. There are still some remnants of the disintegrated "A" pillar on the vertical piece that will be behind the 4x4. And I'll need to do much the same as what I did here to the "B" pillar and the rear fender. So this step in the project isn't done, but I was. So I declared victory and quit for the night!
 
OP
OP
Nothing Special

Nothing Special

Sr. Member
Joined
Nov 25, 2016
Messages
805
More progress! Maybe not actually as much as last night, but it feels like a LOT more!

I started off grinding away the remains of the "A" pillar. That let me test fit my smaller chunk of 4x4. I think the angle from top to bottom that I roughed onto it looks about perfect! But I might angle it back from outside to inside to keep the inner corner farther away from the tire when it's turned.
80-dsc_0470_bf40a68102d9a944dcf85e140d59f100ee7224ac.jpg

80-dsc_0471_edb6a471d087d671b4ea07de93e12f08f497964c.jpg


Then I started into the mess that was the lower part of the ""B" pillar.
80-dsc_0472_1260f0089d6df37d2188dd0b3ed338a9cbd047bb.jpg


I also trimmed off the bottom of the fender and bent it in using my redneck sheetmetal brake. That let me test fit my little 4x4 in the rear. I haven't cut an end at the angle I expect to use for the rear, but the Sharpie line gives an idea.
80-dsc_0473_53f5b96d462ade0a2405c971cb6581daaaf1b7ea.jpg


And with the fender flare (loosely) in place it looks pretty good! Although the 4x4 doesn't hang down quite as far as the original rocker. I'll have to decide what to do with the flare hanging lower than the new rocker. Trim it off and lose the finished end? Or take it off completely and remount it where it wants to be now?
80-dsc_0474_7935fe2c2a4bd48349474ef4f5465155c4dc5d89.jpg


Then I realized that the piece I was going to use for the actual rocker would fit in. It's too long, so I lined up the front end and let the rear stick back close to the tire. But it looks pretty good!
80-dsc_0475_c18dea719b3ed54d41e87363e6028080e243e025.jpg
 
OP
OP
Nothing Special

Nothing Special

Sr. Member
Joined
Nov 25, 2016
Messages
805
Thanks!

After taking a couple days off I made more progress today. A little of the kind you can see and a lot of the kind that's no fun.

I started by giving myself a place to cut threads to attach the front fender to the 4x4 tube. I cut a 2x4 hole in the top of the 4x4, and then welded a 2x4 piece of 3/8" flat stock in the hole. This was the second time I used my welder (the first was so little it hardly counts) and I'm pretty happy with it. I'm not a great welder, but the auto settings seemed to work pretty well, and the end result ain't goin' nowhere. A friend of mine says you should never grind your welds. He says "You made that, like you made your children. You wouldn't grind down your children, would you?" But I ground these welds flat because the top of the tube needs to be smooth for the fender to attach nicely.
80-dsc_0476_eb1058d5849c346263d6fa316068b08cb3880f43.jpg

80-dsc_0477_7cfa037e6437cd1a974c3461ed66dd2f808f6245.jpg


Then I trimmed the front end of the tube to angle it back as it goes from outside to inside. You can see that in the picture above. That was to keep the same clearance between the tire and the inside edge of the tube as there is between the tire and the outside edge as the tire swings through turns.

And finally for the visible progress I cut a flat piece out of my extra 4x4 tube to cap off the front end and then welded it on. Again I'm happy with how the welds worked out (given who was doing the welding). In this picture the tube is upside down, so the corner closest is the inside corner that will be least visible. I started with that corner to try to figure out what I was doing before I welded the more visible corners.
80-dsc_0479_8999af87ba00d40195e7af9bc8c763e922ae070b.jpg


Then it was time for the other kind of progress. I took a flap wheel or wire wheel (whichever would fit) to the dirty, rusty surfaces that are going to get welded to the tube. This was slow, tedious progress, much of it working from my back on a creeper. But it cleaned up a lot better than I expected. There's a little cancer in the inner rocker just behind the "A" pillar, but otherwise the entire inner rocker cleaned up to solid metal. And even the door sill cleaned up a lot better than I expected. So not fun progress, and not obvious. But I'm getting a lot closer to being ready to weld the tube in!
80-dsc_0480_752dc6853420740a5549710df357fff01de1dcc7.jpg


Looking again at the existing structure inboard of the inner rocker I'm more convinced that this will be strong enough without adding any additional supports or ties back to the floor or frame. At the back of the door there's an angled brace that goes up and in to a body mount and the reinforced floor there. In the middle of the door there's a hat channel that reinforces the floor, and the end supports the inner side of the inner rocker (these are both shown in the first picture below). And at the front of the door there's another angled brace that goes up to the reinforced floor at another body mount (second picture below). I'm not thinking that this will result in something that could never be damaged. But for how this Bronco is used I think it will work out fine.
80-dsc_0481_e234a7ca5d1ea1ee93696f5e26a392a4423d57b3.jpg

80-dsc_0482_3d296de0d9dfeba706c0a8de50b04b6c73ab9cb1.jpg
 
Last edited:
OP
OP
Nothing Special

Nothing Special

Sr. Member
Joined
Nov 25, 2016
Messages
805
Possible slight change in direction here. Someone on another forum suggested I use panel adhesive rather than spot welding the 4x4 to the door sill and inner rocker. Does anyone here have any experience / opinions on which would be better?

The main advantage I see to adhesive is that it will keep moisture out of the joints, so it will be better for resisting rust. Also "they say" adhesive is stronger than welding (but who are "they" and what do "they" know?).

A big advantage to welding is that I'm more familiar with it so I know pretty much what it can and can't do. I'll be welding thin sheetmetal to a 3/16" thick tube, so it's not an ideal situation. But I know I can take my time getting things lined up and clamped together and then weld as I go.

Also the inner rocker is a bit too long, so it bulges inward when the 4x4 is in place, holding quite a gap between the sheetmetal and the tube. I can't push them together by hand, so there's quite a bit of force holding them apart, but I can squeeze them together with clamps. So I know I could hold them together while the adhesive cured, but I don't know how good the adhesive is in constant tension. Will it let go if the inner rocker is constantly trying that hard to pull away?

Here's a cross-section sketch of the rocker if it helps visualize. Blue is original sheetmetal that's staying. Red is original sheetmetal that's gone. Black is the new metal I'm adding.
80-rocker_3d6b5addac9c24f23683ad8fe17c1cc988a10ba6.jpg
 
OP
OP
Nothing Special

Nothing Special

Sr. Member
Joined
Nov 25, 2016
Messages
805
A little more progress today. I pulled the bottom of the fender flare forward until it swung up to the bottom of the 4x4 and it looked fine that way. So I trimmed the fender opening a little larger to match up with the new flare position, cut the tube off to match the new fender line and drilled a few new holes to mount the fender in its new position. I also welded in another 3/8" thick piece in the top of the tube to attached the rear fender (same as what I did for the front yesterday, so no new pictures) and drilled and tapped the holes in both plates to attach both fenders to the tube.

Otherwise I played around with clamping the tube in position (and ran into the issue with the inner rocker pulling away that I mentioned above). Still, it looks like I can get everything where it needs to be for either welding or adhesive, so I'm not stuck yet.

It was really mostly little putzy stuff, but it did get to the point where I had the tube essentially as it's going to be and in the right position. So a good time for some pictures.

Here's the front end of the tube.
80-dsc_0483_aa5a3e72efe4bf6d6134f62d542b01fba1ff054f.jpg


Here's the rear end with the fender flare attached.
80-dsc_0484_1c72a57bbfddcb517d5d91281294a6b4ceadd808.jpg


And here's the whole thing
80-dsc_0485_6edc9b6d11c07276ea1caba4e677bac23e3ca886.jpg
 
OP
OP
Nothing Special

Nothing Special

Sr. Member
Joined
Nov 25, 2016
Messages
805
Thank you!

Finally some more progress! I've been stuck waiting to get the 1" round tube bent for the rash bars. I finally was able to pick them up yesterday, so I could get back to work. I had asked for 3/16" wall tubing, but it ended up being .200" thick. Oh well, it's only 1/2 lb heavier.

Yesterday I drilled eight 1" holes through both sides of the 4x4 so I could mount the stand-offs to support the rash bar (pictures below will explain it better). I also fish-mouthed the stand-offs to fit against the rash bar. Here are the results of yesterday's machining:
80-dsc_0505_8d8b093b75d1f3694ae8bf24eabf41c9f7936bb9.jpg


And here are the stand-offs going through the 4x4:
80-dsc_0511_6b9b498e6c6f1bd16941463ae096f9580b1ba2e4.jpg


And one with the rash bar clamped in place to the 4x4 held in place with a jack:
80-dsc_0510_7d3d73df0970490bd48942ba7fcc3e393c4746aa.jpg


So tonight it was time to weld the rash bar to the 4x4. After getting everything cleaned up it was fun (not) trying to get everything clamped in place
80-dsc_0513_a516e6833aa59c6482c45780cd5c8e78db5cdc1c.jpg


Once that was set I fired up the welder again. I got beautiful welds on the inner end of the stand-offs! But these are the welds that need to be ground flat and will be where no one can ever see them, so that doesn't really matter.
80-dsc_0515_5be01bc523ed3d932b8e76298f918e1bd18aaaab.jpg


The welds on the outside, the ones that I don't plan to grind down and which are visible, well, they'll hold.
80-dsc_0518_02749217160c3a1d22683764f646f85effe6ba01.jpg


Then I was able to weld the cap on the back end of the 4x4
80-dsc_0519_23a4ce1d7da1b831683f497f629a203b39d4e6e0.jpg


So now I'm done making the rocker! Next will be to get everything prepped to attach them to the tub. After a lot of thought I'm planning on going back to plan A and plug-welding them on. I know that adhesive would be better at preventing corrosion, and it might hold better too. But I'm still not comfortable with the way the inner rockers would be pulling away. And I'm also not completely comfortable with the impact strength or the working time. So while I believe adhesive might be better than welding, I'm also afraid that it might be worse, and I'm pretty confident that welding will be good enough. Plus I have what I need to weld it already.
 
OP
OP
Nothing Special

Nothing Special

Sr. Member
Joined
Nov 25, 2016
Messages
805
Thanks! DIY is a lot more fun, and it fits in my budget better. But I had intended to have both rockers done this spring and didn't even have the brakes done then. So there's appeal to the "credit card" approach too!
 

sprdv1

Contributor
REBEL
Joined
Mar 8, 2007
Messages
81,756
Thanks! DIY is a lot more fun, and it fits in my budget better. But I had intended to have both rockers done this spring and didn't even have the brakes done then. So there's appeal to the "credit card" approach too!

lol, right. :)

Looks Beefy man Definitely ought to do the trick for ya
 
Top