67bondobronc
Sr. Member
- Joined
- Nov 14, 2002
- Messages
- 867
You may things look so easy, definately first class work.


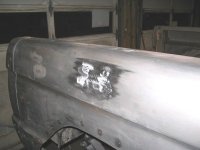
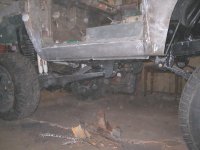
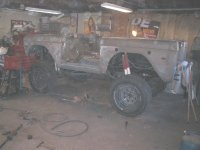
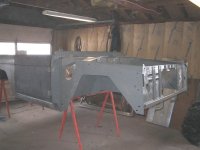
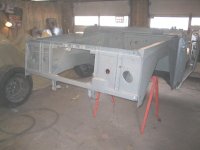
Thanks. I am doing this thread for a couple of reasons. First, so NYBronco can keep up with his truck because he lives hours away from me. Second was to show people how to fix a bronco with used parts, repair some parts, and use parts that are just so-so quality and still have a decent truck when done. This truck is not going to be a show truck but should turn out pretty nice. Some people just don't have the money to buy NEW parts so I wanted to show how things could be done with used parts ( quarter panel ) and patch panels ( rockers ) without having to spend the money for brand new parts. I am doing door skins on this truck too and I'll post pictures as I go along.67bondobronc said:You may things look so easy, definately first class work.
")
2badrotties said:Thanks. I am doing this thread for a couple of reasons. First, so NYBronco can keep up with his truck because he lives hours away from me. Second was to show people how to fix a bronco with used parts, repair some parts, and use parts that are just so-so quality and still have a decent truck when done. This truck is not going to be a show truck but should turn out pretty nice. Some people just don't have the money to buy NEW parts so I wanted to show how things could be done with used parts ( quarter panel ) and patch panels ( rockers ) without having to spend the money for brand new parts. I am doing door skins on this truck too and I'll post pictures as I go along.
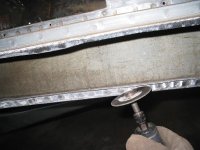
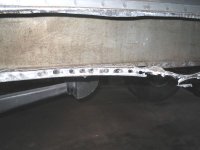
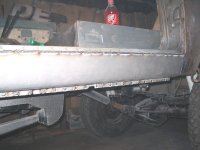
wdbowers said:progress looking nice. What kind of welder are you using, I was welding in my kick panel and inner fender today with a hobart mig welder and had a tendacy to burn through and cause warpage on lowest setting. using flux core wire.
. Please advise me what size wire and type of gas are you using. Like others I tend to burn through but I suspect its because I am using pure CO2 not C25 as my gas. Another question, do you just cut out the section you want, wasting the sheet metal around it, or do you cut out each section without damaging the other section? I am curious because my tub is bent, twisted and dented ;D but after seeing what you do it makes me think that it could be repaired? Although I think I will still just fix up a strait tub seems alot easier, but maybe I am wrong? Thanks for your help and great job!!Thanks for the help. FMAlthough I think I will still just fix up a strait tub
I don't want to think you abandoned this here, I may have just the frame for my Bronco ;D . ! Well that just sucks . I went in the house and tried to get it out by rubbing my eyeball with a Q-tip and then my fingernail , NO GOOD ! Gotta go to hospital to get it out. Went to emergency room and did the big long wait because there just isn't a eye doctor open in the middle of the night / early Sunday morning. Got home and slept for a while. So now I get a gallon of lacquer thinner and a red scotch brite pad and start scrubbing all of the primer back off :-X . Do you know what a pain in the azz it is washing epoxy primer off of a fire wall , door posts and cowl ? Good thing the wheel tubs and inner fenders are new and didn't see any stripper. I did learn a good lesson today. No matter how long ago something was stripped with stripper, wash it five or six times. Worst part is the entire truck ( EVERY NOOK AND CRANNY ) has been stripped and needs to be cleaned and cleaned and re-cleaned. I will not try wax and grease remover again either. I thought I was going to get something done this weekend and I'm almost back to where I started