• Welcome to ClassicBroncos! - You are currently viewing the forums as a GUEST. To take advantage of all the site features, please take a moment to register. It's fast, simple and absolutely free. So please join our community today!
    If you have problems registering or can't log into your account, please contact Admin.

Best Way to Deal With Sheared Bolt on Clutch Bell Crank Support?

fatboy

Contributor
Glad to be here.
Joined
May 15, 2006
Messages
7,062
Loc.
New Hampshire
I never understood why people can't seem to graps the simple concept that if you broke of a 3/8" bolt because the threads were stuck.....why on earth would you think that you could torque on a 1/4" diameter extractor jammed in to it and expect something good to happen? ;D;)

Because that is what the manufacturer of the extraction tool tells us it is for! ;D

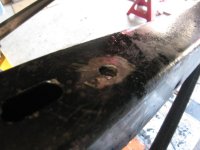
I had this very bolt break on my 67 build, however my tub was removed. I ended up drilling and retapping this bolt. I could not get a good plug weld and spun off a half a dozen nuts trying, but I had been using every kind of penetrating fluid I could find.
 

fatboy

Contributor
Glad to be here.
Joined
May 15, 2006
Messages
7,062
Loc.
New Hampshire
Wile I have the experts here, and I hate to sidetrack, but I'm going from stock c 4 to manual, does my frame have those mount holes? Thanks and sorry

I have only ever had 3 speeds but my guess would be yes. Looking at the 67 frame I am building, my left and right fraim rails are exactly the same, with both having all the holes for either side predrilled in them. They are actually stamped with the same part number, so I suspect there was no auto vs manual frame rail let a lone a left versus right. They made one universal rail for production is my guess, at least in 67.

Hijack off.
 
OP
OP
ILikeBond

ILikeBond

Sr. Member
Joined
Jan 27, 2009
Messages
908
OK, little update here.

I'm not a welder myself, but I had someone over today helping me to some repair and asked if he'd help try to extract the bolt with the welded nut trick. Well, like someone else mentioned, we ended up just shearing off a few nuts in a row - wasn't having any of it (see last picture).

With him inside the engine compartment and me under the wheel well, we were able to slowly drill it out, though, then re-tap it. It's not perfect to the previous alignment because of the angle limitation with the firewall there, but should serve the intended purpose. Whole thing took like an hour plus. Very big PITA.
 

Attachments

  • IMG_3280.jpg
    IMG_3280.jpg
    121.7 KB · Views: 18
  • IMG_3282.jpg
    IMG_3282.jpg
    96.4 KB · Views: 16
  • IMG_3284.jpg
    IMG_3284.jpg
    94.5 KB · Views: 17
  • IMG_3285.jpg
    IMG_3285.jpg
    84.1 KB · Views: 18
  • IMG_3289.jpg
    IMG_3289.jpg
    74.5 KB · Views: 18
  • IMG_3291.jpg
    IMG_3291.jpg
    68.8 KB · Views: 19
  • IMG_3294.jpg
    IMG_3294.jpg
    102.5 KB · Views: 16
  • IMG_3295.jpg
    IMG_3295.jpg
    72.9 KB · Views: 17
  • IMG_3302.jpg
    IMG_3302.jpg
    82.2 KB · Views: 16

lonesomecur

Contributor
Full Member
Joined
Dec 7, 2007
Messages
334
Those nuts sheared because you didn't weld the flat washer first! The reason for the washer is its thin and easy to get penetration into broken bolt. With a nut the arc begins by striking the nut not the broken bolt. It's difficult to reach the bottom of a 3/8 hole without touching sides. Therefore you don't get penetration into bolt. Try it next time.
 

fatboy

Contributor
Glad to be here.
Joined
May 15, 2006
Messages
7,062
Loc.
New Hampshire
OK, little update here.

I'm not a welder myself, but I had someone over today helping me to some repair and asked if he'd help try to extract the bolt with the welded nut trick. Well, like someone else mentioned, we ended up just shearing off a few nuts in a row - wasn't having any of it (see last picture).

With him inside the engine compartment and me under the wheel well, we were able to slowly drill it out, though, then re-tap it. It's not perfect to the previous alignment because of the angle limitation with the firewall there, but should serve the intended purpose. Whole thing took like an hour plus. Very big PITA.

Those nuts sheared because you didn't weld the flat washer first! The reason for the washer is its thin and easy to get penetration into broken bolt. With a nut the arc begins by striking the nut not the broken bolt. It's difficult to reach the bottom of a 3/8 hole without touching sides. Therefore you don't get penetration into bolt. Try it next time.

That last picture looks very familiar. I do think penetration is the issue when I did it. I have had luck with this before but will try the washer trick next time. One question though for you lonesomcur, I will get good penatration with the washer but I still have the depth problem on the nut to the washer, so how is the washer helpful?
 

lonesomecur

Contributor
Full Member
Joined
Dec 7, 2007
Messages
334
You can weld the nut to washer on outside of nut. I use Lawson products. The washers are plenty big. If your brand are smaller use a fender washer if necessary. I work on construction equipment. In winter months I can spend days doing nothing but removing broken bolts. I've had lots of practice!!! Also just an FYI to everybody.... Caterpillar makes a thread insert that really works great. Much better than a heli coil. I've used then on belly pans of dozers and they hold up just fine.
 
OP
OP
ILikeBond

ILikeBond

Sr. Member
Joined
Jan 27, 2009
Messages
908
Those nuts sheared because you didn't weld the flat washer first! The reason for the washer is its thin and easy to get penetration into broken bolt. With a nut the arc begins by striking the nut not the broken bolt. It's difficult to reach the bottom of a 3/8 hole without touching sides. Therefore you don't get penetration into bolt. Try it next time.

Yeah, since I was having a guy work on it with lots of experience, I more or less just let him do his thing (he was aware of the tip/trick). He actually did something kind of interesting, which is he first built up a metal "nub" on top of the bolt, then welded the nut to that (after first trying to just turn it by hand using locking pliers). Anyway, good to know for next time. Thanks.
 
Top