Details on my gauge pod build
This mod was a relatively tiny part of the whole build and here are the details
I have built two serious rigs, a stretched 96 Bronco prerunner and my 72. The 96 had plenty of fab help, but I did the inside, gauges, radios and GPS. One day I decided to do the gauges over on the 96 and that was the time I was dealing with the dash on the 72 so I decided to do both at the same time.
The 96 got Autometer (Sport Comp II) and because they fit with individual instruments. At that time I had finished my LJ Jeep build (ha what a joke - it is never finished) and was at the Jeep safari and came across Speedhut display and got a coupon for discount. Went home and studied the Speed hut offerings and became sold on their products.
So I built both the 96 and 72 at the same time. Both companies sell high end smart gauges, totally programable for high, low led warnings and ability to control such things as fans via a relay. Quick review: The Autometer wiring is considered old school Speedhut has the latest connectors and was much easier to install. Speedhut has the best control and programming.
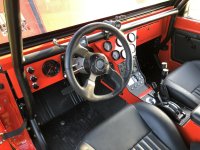
The 96 was a simple flat panel with holes I drilled myself. See the pic of the result.
Next the 72 build of my gauge pod and my new dash.
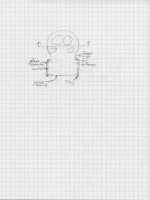
I started with a layout with dimensions of the face of the pod. Speedhut dimensions and spacing I liked. Took the drawing to my buddy, the fab guy and he used his CNC plasma table to cut the face plate. Cut Al metal strip to surround faceplate an did the fitment to the steering wheel.
Next - I used 3/8” soft Al tubing that I split with my Dremel to wrap around the AL metal strip. Attached the tubing with epoxy. The gauge surface and metal strip were TIG tack welded together. Now I have the desired shape.
See one of the mounting brackets that attach to the cross bar of the cage, Welded to the gauge plate.
Next – I wrapped the metal surface with lots of filler for thickness on top of the metal sheet. Then vacuum bagged to get the necessary smooth surface. Peal ply and sheet plastic was used all taped together.
When done I sanded to remove the coarseness created by the peal ply.
I used rattle can bed liner for a slight texture surface to reduce glare. Note at this point the shape to fit the steering column was not complete.
Final With soft “U” strip that lets the pod to be supported to the steering column.
Last item was the knob for backlight between the two 4” gauges.
FYI The dash mod
Final shown
Also shown are the pieces being painted. The process was to cut the opening that supports the glovebox door then weld that to a flat plate that eventually was attached to the large opening I cut in the stock dash. The final result is I can take the assembly off to access wiring behind. The glove box had major mod because I had to make a relief for a defroster tube.That was done with glass and epoxy and was a pain to get it to fit correctly. The stock fuse box has been relocated to behind the new panel.
More access is provided on the drivers side speaker removal where most of the wiring resides.