• Welcome to ClassicBroncos! - You are currently viewing the forums as a GUEST. To take advantage of all the site features, please take a moment to register. It's fast, simple and absolutely free. So please join our community today!
    If you have problems registering or can't log into your account, please contact Admin.

Fireball's '76 build thread - "Piece by Piece" - PAINTED, ASSEMBLED & ON THE ROAD!

Burkulater

Jr. Member
Joined
Mar 30, 2011
Messages
316
Loc.
Lancaster, PA
Estate Green Metallic. A Ford color used on Explorers and Expeditions and perhaps some other models. We thought long and hard about this, and picking out the paint color is about the only thing my wife has been interested in during the build, so I went with her wishes for a dark green color. I really wanted to find a green that was originally on a Bronco that we really liked, but just couldn't Boxwood green is pretty, but is fairly common. The other greens are just a bit too bright.


Hella H4 euro lights, new chrome grille surround, headlight rings, 66-68 amber TS lenses, and riv-nuts and buttonhead SS screws for all visible fasteners. Quick shout out to Nick's Trix for the cool ideas...got to look at his latest build at SuperCel, they use riv-nuts and the Hella lights, looks awesome.


And the tailgate, with a wimbledon white stripe. Saw this on a few other builds and really like how it looked. To the keen observer, yes there is a dent right where the spare tire latch bracket goes. Body man suggested not to try and fill it and smooth it because 1) it'll be mostly covered by the bracket and the spare and 2) it would likely just crack anyway


Close up shot:

nice color I like it as well, I had a 69 firebird that I painted pretty darn close to that
 
OP
OP
Fireball05

Fireball05

Bronco Guru
Joined
Oct 7, 2012
Messages
1,822
Well, it has finally happened. I have a freshly painted Bronco!!!


It turned out awesome. Super happy with the results. The hours of block sanding and minor body work turned out great. Only a few small dirt marks in the clear which we will buff out tomorrow. The bodywork isn't absolutely perfect, but you have to stare at it pretty long and hard to pick out any flaws.


I've got to come up with the covers for the tops of the quarter panels. They are very wavy and we intentionally didn't try to fix or fill them because it's likely they could crack if I put the HT back on.


The fenders and doors still need painted. I started hacking up the doors today to make the frames removable. If anyone has any input on how to do the bolts/nuts/inserts please check this thread out.

Funny it seems like this is a big step towards completion, but there is still tons of work left to be done. I greatly underestimated the amount of time energy and effort and money a complete strip and repaint would cost! Over $250 just in color and clear today!
 

Attachments

  • IMG_3067.jpg
    IMG_3067.jpg
    84.4 KB · Views: 91
  • IMG_3072.jpg
    IMG_3072.jpg
    79.5 KB · Views: 88
  • IMG_3084.jpg
    IMG_3084.jpg
    86.5 KB · Views: 93
  • IMG_3085.jpg
    IMG_3085.jpg
    83.4 KB · Views: 95
  • IMG_3086.jpg
    IMG_3086.jpg
    109.9 KB · Views: 101
  • IMG_3095.jpg
    IMG_3095.jpg
    82.3 KB · Views: 101

Unknown

Sr. Member
Joined
Jan 21, 2012
Messages
695
She looks great, fantastic work! Gonna have to change your avatar now;D
 

Blue Bastard

Bronco Guru
Joined
May 14, 2012
Messages
2,161
Fireball's '76 build thread - "Piece by Piece" - GETTING PAINTED!

zypujysa.jpg


Looks good!


Blue

Sent from my iPhone using Tapatalk 2
 

broncobsession

Bronco Guru
Joined
Aug 12, 2001
Messages
4,049
Looks amazing! And I don't think you'll get much sympathy for $250 paint job, even with all your hard work. Should be 20 times that. You gonna go back with the little skips painter man at the bottom of the tailgate?
 
OP
OP
Fireball05

Fireball05

Bronco Guru
Joined
Oct 7, 2012
Messages
1,822
Looks amazing! And I don't think you'll get much sympathy for $250 paint job, even with all your hard work. Should be 20 times that. You gonna go back with the little skips painter man at the bottom of the tailgate?

Thanks everyone for the compliments. I'll post some pictures tomorrow of all the little imperfections it might help some folks out as learning points.

$250 was just the cost of paint and clear today. That doesn't include all other materials...1 coat etch primer over bare metal, 2 full coats of primer, color for underside of hood, grille and tailgate, and we haven't yet done doors and fenders. Not to mention shop supplies. $1,000 minimum in materials alone. Then add labor. Then add more labor and materials for all the scratches and touchups that will be needed after I'm done slapping the door, fenders, hood, grill and tailgate on :)

Product is PPG Envirobase color and Deltron DC3000 and 4000 clear. I don't know anything about paint, but from what I am told this is a middle end product, maybe middle-high end. Allen, et al., feel free to chime in and correct that statement if needed.
 

AZ73

Contributor
Bronco Guru
Joined
Mar 28, 2012
Messages
3,621
Frikin Beautiful........Totally jealous. Nice Job!
 

72pabronco

Full Member
Joined
Oct 18, 2009
Messages
172
Looks good Ben

Welcome to Gang Green Let me know the day of the 1st drive we can come down and do a mini Bronco parade
 

tasker

Contributor
all knowing of nothing
Joined
Jun 2, 2006
Messages
21,135
Loc.
NH
looks great Ben, no more hanging anywhere near mine! just beautifull!
 
OP
OP
Fireball05

Fireball05

Bronco Guru
Joined
Oct 7, 2012
Messages
1,822
Fireball's '76 build thread - "Piece by Piece" - GETTING PAINTED!

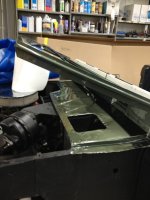
Thanks guys! Just the other day in another thread Allen Fahey made a great suggestion about moving the windshield back-and-forth while painting the vehicle to illuminate any problems with the paint rubbing off the windshield hinge. Because of the fact that the bronco is partially assembled while we were painting it and the way we taped it off, this wasn't possible. So I was a little nervous today but I had to fold the windshield down to install the seal and the dash pad.

ImageUploadedByTapatalk1373650725.674775.jpg

Happy to report, that the paint on the hinge held up fine, The seal and pad are installed and the windshield likely won't come forward again during my ownership!
ImageUploadedByTapatalk1373650769.228098.jpg

Now I can turn my attention onto more important parts of the build, i.e. installing stickers :)
ImageUploadedByTapatalk1373650823.429006.jpg
 
Top