


Community
Buy / Sell


Bronco Tech
3 Arm Wiper Setup
Fix Motor Mount
Roll Cage Braces
Throttle Body 65mm
Wheel Alignment
Heat Riser Replacement
Vent Window Repair
Center Console Mount
Straighten Bumper
Ford 6R80 6 spd
More Tech...
Fix Motor Mount
Roll Cage Braces
Throttle Body 65mm
Wheel Alignment
Heat Riser Replacement
Vent Window Repair
Center Console Mount
Straighten Bumper
Ford 6R80 6 spd
More Tech...

-
Welcome to ClassicBroncos! - You are currently viewing the forums as a GUEST. To take advantage of all the site features, please take a moment to register. It's fast, simple and absolutely free. So please join our community today!If you have problems registering or can't log into your account, please contact Admin.
You are using an out of date browser. It may not display this or other websites correctly.
You should upgrade or use an alternative browser.
You should upgrade or use an alternative browser.
Gunmetal Gray Luber No More - Meet "Mallory," My Mallard Green Rig!
- Thread starter ILikeBond
- Start date

OP
OP
ILikeBond
Sr. Member
- Joined
- Jan 27, 2009
- Messages
- 908
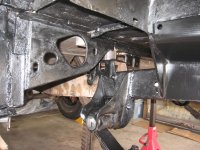
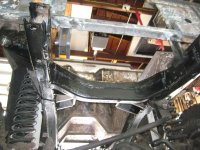
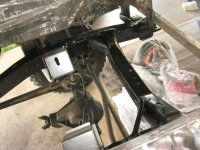
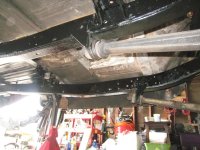
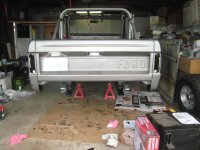
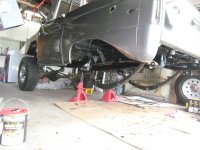
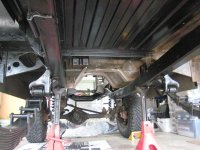
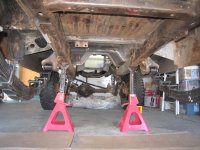
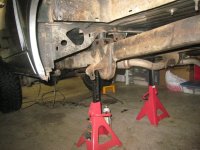
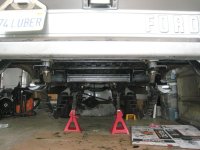
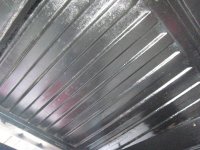
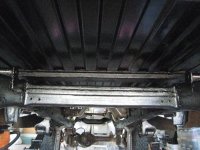
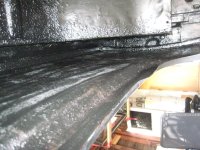
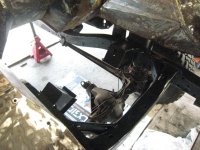
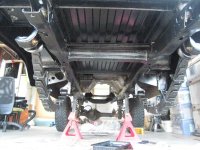
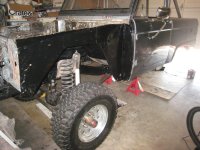
I hit the front half of the frame next.
Attachments
-
 IMG_2986.jpg131.6 KB · Views: 82
 -
 IMG_2982.jpg114.3 KB · Views: 90
 -
 IMG_2968.jpg118.8 KB · Views: 83
 -
 IMG_2955.jpg132 KB · Views: 74
 -
 IMG_2952.jpg126.9 KB · Views: 83
 -
 IMG_2946.jpg127.3 KB · Views: 80
 -
 IMG_2935.jpg118 KB · Views: 80
 -
 IMG_2934.jpg126.2 KB · Views: 81
 -
 IMG_2995.jpg122.6 KB · Views: 100
 -
 IMG_2991.jpg130.6 KB · Views: 82
 -
 IMG_2988.jpg123.5 KB · Views: 86
Sweet build... Your motor looks a lot like my 347 build. This makes me wish I would have taken my build further... Will be watching!
Fireball05
Bronco Guru
- Joined
- Oct 7, 2012
- Messages
- 1,822
WOW! That is a labor of love. Looking great, keep up the hard work.
Approximate number of hours and/or beers involved in all that cleaning prepping and painting??!
Approximate number of hours and/or beers involved in all that cleaning prepping and painting??!
OP
OP
ILikeBond
Sr. Member
- Joined
- Jan 27, 2009
- Messages
- 908
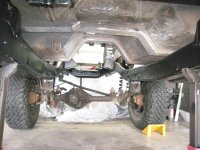
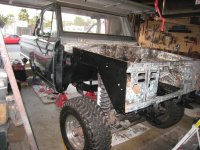
Here are some comparisons, and additional pictures showing the Chassis Saver paint job. It will need some touch-up in places and some completion as a few more things come off (radius arms, front spring and shock brackets, etc.), but I have 85% of it covered now. Only part missing is the undercarriage from the firewall to the front floor pans. I'm planning on laying Lizard Skin down there, and not sure which to put on first, so I held off on the Chassis Saver for now.
Attachments

Last edited:
OP
OP
ILikeBond
Sr. Member
- Joined
- Jan 27, 2009
- Messages
- 908
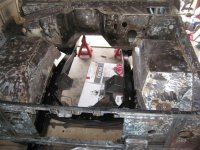
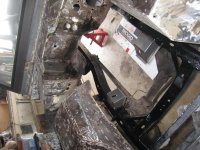
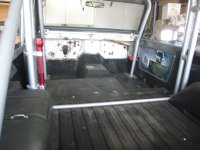
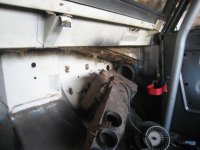
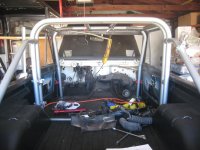
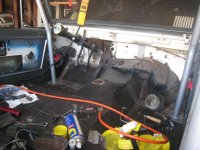
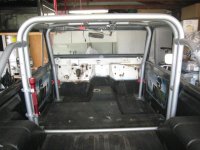
Here are some photos of the dash tear-down. This is a little out of order - did this the same time as disassembling the engine compartment. Flipped down the windshield and was pleased to find no rust. Last few pics are what the interior cab looks like all cleaned out.
Attachments
-
 IMG_3004.jpg98.1 KB · Views: 107
 -
 IMG_3002.jpg101 KB · Views: 117
 -
 IMG_2754.jpg76.4 KB · Views: 110
 -
 IMG_2728.jpg105.2 KB · Views: 120
 -
 IMG_2727.jpg113.2 KB · Views: 125
 -
 IMG_2282.jpg96.2 KB · Views: 113
 -
 IMG_2280.jpg72.7 KB · Views: 118
 -
 IMG_2277.jpg86.8 KB · Views: 130
 -
 IMG_3009.jpg96.9 KB · Views: 105
 -
 IMG_3008.jpg108.9 KB · Views: 115
broncoitis
Bronco Guru
- Joined
- Jul 23, 2010
- Messages
- 4,449
Nice build and nice to see it comin along. Keep at it and it will get there. ;D
OP
OP
ILikeBond
Sr. Member
- Joined
- Jan 27, 2009
- Messages
- 908
Approximate number of hours and/or beers involved in all that cleaning prepping and painting??!
Hard to say, I didn't really keep track. I would say it was probably less than I expected. Probably a half-dozen days of 3-4 hours of work, I'd say maybe, for the cleaning. All the paint shown here I did this Friday and Sunday, again, 3-4 hours each day, but not necessarily all of it painting (some breaks, etc.). I still have some left to do, as well as the Lizard Skin on the firewall, tunnel, and front floor panels, and body paint in the engine compartment.
OP
OP
ILikeBond
Sr. Member
- Joined
- Jan 27, 2009
- Messages
- 908
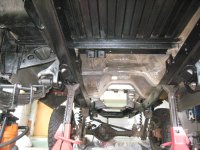
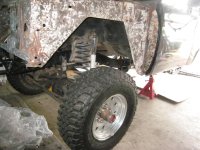
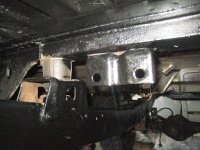
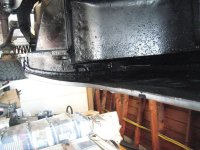
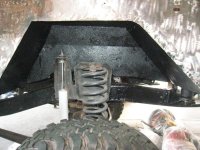
Work was slow today, so I played hookey for a half day and used the time to touch up the Chassis Saver I had laid down, and to hit a few areas I missed, including the inside of the rear fenders, the front wheel wells, and the motor mounts (was originally going to keep them bare steel, but decided against it).
First set of pics are what it looked like after the first coat - found plenty of areas that needed touching up or were thin and needed another coat.
First set of pics are what it looked like after the first coat - found plenty of areas that needed touching up or were thin and needed another coat.
Attachments
-
 IMG_3061.jpg149.2 KB · Views: 61
 -
 IMG_3054.jpg117.7 KB · Views: 62
 -
 IMG_3049.jpg119.1 KB · Views: 66
 -
 IMG_3047.jpg129.3 KB · Views: 69
 -
 IMG_3045.jpg142.8 KB · Views: 69
 -
 IMG_3041.jpg122.7 KB · Views: 75
 -
 IMG_3037.jpg143.6 KB · Views: 72
 -
 IMG_3032.jpg123.2 KB · Views: 73
 -
 IMG_3067.jpg150.6 KB · Views: 70
 -
 IMG_3063.jpg137.8 KB · Views: 73
OP
OP
ILikeBond
Sr. Member
- Joined
- Jan 27, 2009
- Messages
- 908
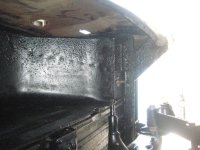
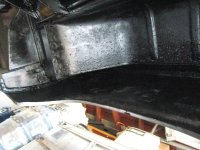
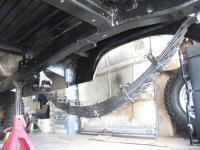
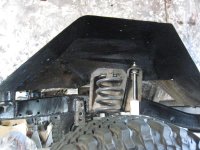
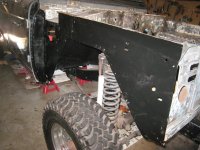
Still needs some touching up here and there, but it's getting closer. The only area that's getting Chassis Saver that hasn't been hit yet is the front floor pans/tunnel into firewall area - holding off on that until I have Lizard Skin ready to put on over it in those areas.
I may end up hitting the whole thing with some rattle can black over the top just to ensure complete coverage and kind of blend things together a bit - some of the nooks and crannies can be very difficult to get with the Chassis Saver using just paint brushes like I'm doing.
I may end up hitting the whole thing with some rattle can black over the top just to ensure complete coverage and kind of blend things together a bit - some of the nooks and crannies can be very difficult to get with the Chassis Saver using just paint brushes like I'm doing.
Attachments
-
 IMG_3095.jpg128.5 KB · Views: 63
 -
 IMG_3088.jpg127.2 KB · Views: 67
 -
 IMG_3086.jpg136.1 KB · Views: 61
 -
 IMG_3082.jpg142.7 KB · Views: 58
 -
 IMG_3081.jpg129.1 KB · Views: 58
 -
 IMG_3075.jpg128.7 KB · Views: 60
 -
 IMG_3070.jpg139.6 KB · Views: 66
 -
 IMG_3069.jpg136.7 KB · Views: 61
 -
 IMG_3131.jpg125.1 KB · Views: 71
 -
 IMG_3124.jpg131.1 KB · Views: 70
 -
 IMG_3109.jpg128.7 KB · Views: 72
 -
 IMG_3102.jpg133.7 KB · Views: 69
Dude, looking good. Just stumbled across your build thread.
Labor of love, my friend. You have more patience then I did/do. I tried doing my build in manageable phases that actually let me drive it now and again to keep the motivation level up. Git r done so you can wheel that beast!
Labor of love, my friend. You have more patience then I did/do. I tried doing my build in manageable phases that actually let me drive it now and again to keep the motivation level up. Git r done so you can wheel that beast!
OP
OP
ILikeBond
Sr. Member
- Joined
- Jan 27, 2009
- Messages
- 908
Little update here.
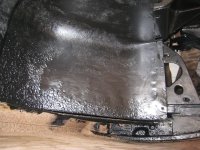
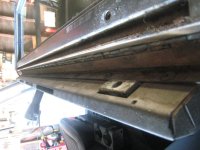
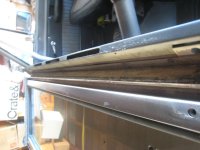
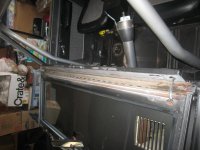
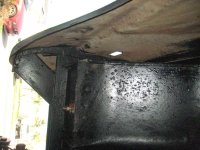
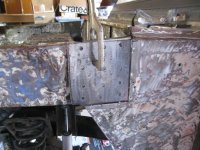
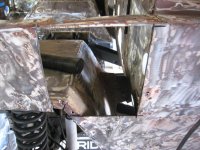
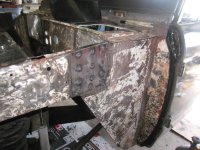
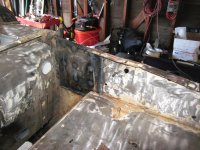
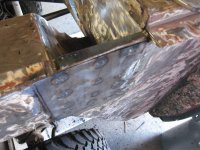
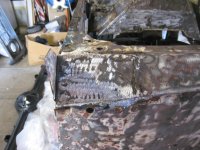
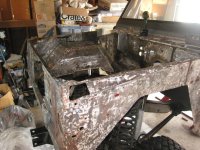
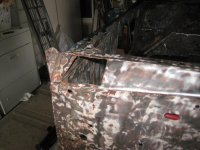
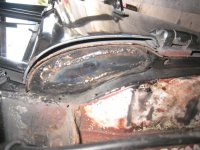
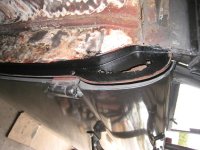
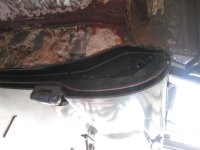
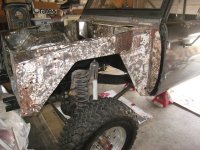
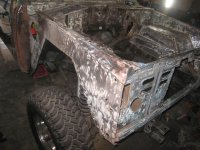
My driver side front clip had some rust and PO damage. A brother on these boards (Tony) hooked me up with a guy who came and did a great job repairing these areas. Front clip is getting closer to being ready for paint.
Here are some before, during, and after pics of the biggest repair.
My driver side front clip had some rust and PO damage. A brother on these boards (Tony) hooked me up with a guy who came and did a great job repairing these areas. Front clip is getting closer to being ready for paint.
Here are some before, during, and after pics of the biggest repair.
Attachments
-
 IMG_3231.jpg118 KB · Views: 93
 -
 IMG_3224.jpg116.7 KB · Views: 84
 -
 IMG_3223.jpg111.6 KB · Views: 90
 -
 IMG_3222.jpg112.8 KB · Views: 88
 -
 IMG_3213.jpg104.3 KB · Views: 84
 -
 IMG_3211.jpg123.6 KB · Views: 90
 -
 IMG_3207.jpg104.6 KB · Views: 86
 -
 IMG_3184.jpg131.9 KB · Views: 97
 -
 IMG_3242.jpg123 KB · Views: 78
 -
 IMG_3238.jpg124.7 KB · Views: 78
 -
 IMG_3236.jpg129 KB · Views: 81
 -
 IMG_3232.jpg116.3 KB · Views: 81
OP
OP
ILikeBond
Sr. Member
- Joined
- Jan 27, 2009
- Messages
- 908
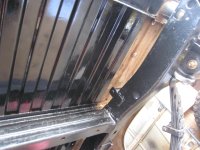
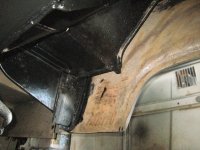
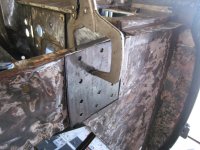
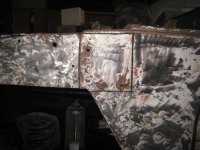
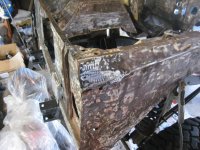
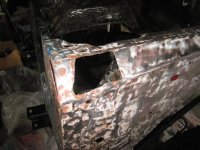
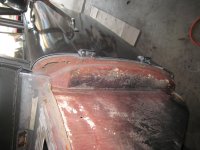
Same side, looks like a PO cut out a square, probably to remove some cancer, but never repaired it correctly.
Attachments
OP
OP
ILikeBond
Sr. Member
- Joined
- Jan 27, 2009
- Messages
- 908
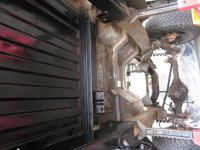
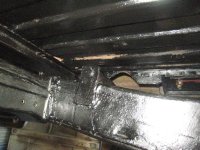
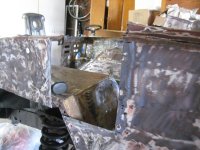
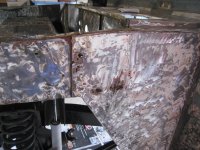
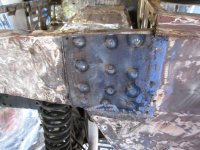
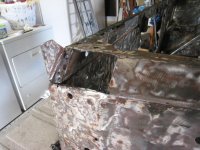
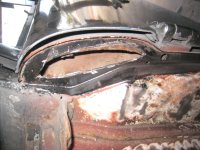
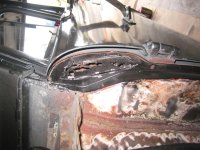
Last area, there was some cancer on the striker post. Since it's under the fender, I was just going to use Chassis Saver and be done with it, but since the guy was repairing the other areas, I thought I'd take the opportunity to do it right.
Sorry the pics are on their sides. They're correct on my computer; its frustrating that they don't upload correctly.
Sorry the pics are on their sides. They're correct on my computer; its frustrating that they don't upload correctly.
Attachments

OP
OP
ILikeBond
Sr. Member
- Joined
- Jan 27, 2009
- Messages
- 908

Similar threads
- Locked
- Replies
- 2
- Views
- 5K
- Replies
- 3
- Views
- 2K
- Locked
- Replies
- 17
- Views
- 3K
- Replies
- 6
- Views
- 2K
- Replies
- 56
- Views
- 12K