• Just a reminder that you won't be able to start new posts or reply to existings posts in the Archive forum.

    This is where all the old posts go so they can still be used for reference and searched.
  • Welcome to ClassicBroncos! - You are currently viewing the forums as a GUEST. To take advantage of all the site features, please take a moment to register. It's fast, simple and absolutely free. So please join our community today!
    If you have problems registering or can't log into your account, please contact Admin.

I'm making some progress on Frank!

OP
OP
Bronco Ben

Bronco Ben

Contributor
Jckofalltrdes master/none
Joined
Aug 9, 2003
Messages
2,356
Loc.
Coffeeville, Alabama
update Feb 6, 2005

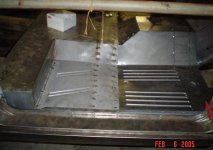
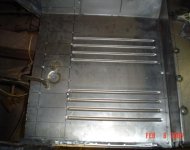
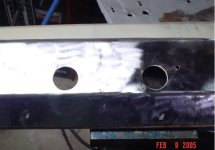
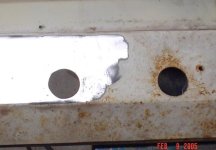
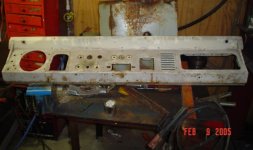
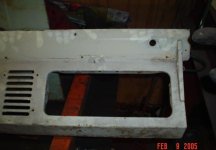
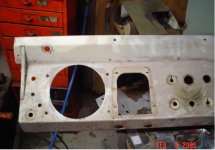
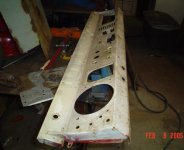
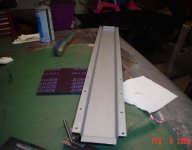
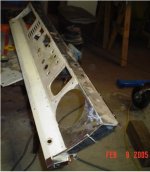
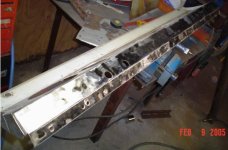
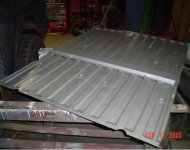
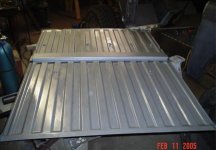
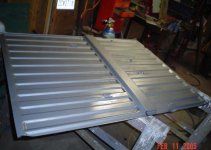
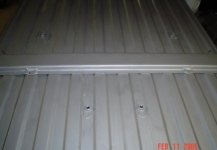
not much progress today. I basically was out of sheilding gas, should get some tomorrow, (taking off to spend the day with the kiddies).I did however get the chance to drill out all my holes for my plug welds in the front pan section. Somehow I'm off nearly 3/8" but its something I can live with.

I finally took some good advice and screwed down my new front pan with self tapping screws that way all I have to do tomorrow is just weld it in. (thanks for that tip taxx/trailphyco). anyways heres a couple pictures. Better update tomorrow I hope.
Ben
 

Attachments

  • floorpans3 002.jpg
    floorpans3 002.jpg
    41.1 KB · Views: 63
  • floorpans3 003.jpg
    floorpans3 003.jpg
    41.6 KB · Views: 79
  • floorpans3 005.jpg
    floorpans3 005.jpg
    39.1 KB · Views: 72

MnkyBiz

Bronco Guru
Joined
Jan 17, 2004
Messages
3,758
Loc.
Northern VA/DC
Ben.....

....eat my shorts not much progress!!!!

You are mapping crucial welds! That is progress alone!

Keep the faith & you will be wiring soon!!!!!!

If no one else does, I believe you will be there VERY SOON!!!!!

Bill
 

1975stroppebaja

Bronco Guru
Joined
Apr 18, 2003
Messages
1,405
Lookin good Ben! It sure is nice to be doing more installing/welding than cutting/removing isn't it?? ;D

Keep up the good work and keep the pics a comin.
 
OP
OP
Bronco Ben

Bronco Ben

Contributor
Jckofalltrdes master/none
Joined
Aug 9, 2003
Messages
2,356
Loc.
Coffeeville, Alabama
no progress yesterday,.....was home with the twins, but they require more of an watchful eye these days. However I did get my sheilding gas bottle refilled, finally (and I do mean finally....)got an oxygen bottle for my torches I've had for seems like 100 years. And got that all hooked up. Now I need to find an old rim and build me a hose stand tonight. ;D

oh and I did manage to pick up more self tapping screws to help with the floor pans. I was gonna buy a mig welder cart but the welding shop wanted $150 for a off brand and $180 for a miller cart.........I said... :eek: :eek: :eek: ...forget that give me the oxygen bottle! lol.......I'll probably pick up one at harbor freight later on if they have one cheap enough!

Ben
 

Kidney

Sr. Member
Joined
Jun 22, 2004
Messages
416
Ben....You have a welder......Make your own cart.


You don't need much just some spare sheet metal, pipe, and a couple wheels.
 
OP
OP
Bronco Ben

Bronco Ben

Contributor
Jckofalltrdes master/none
Joined
Aug 9, 2003
Messages
2,356
Loc.
Coffeeville, Alabama
very true. I just dont need to have to many projects going on at one time ;D ......remember I'm not the organized one!
 

Kidney

Sr. Member
Joined
Jun 22, 2004
Messages
416
It took me two hours to make it. It's nothing fancy just bent up some 16 gauge sheet metal welded a few square tubes to the sides and cut a hole in the back for the gas bottle and welded on the wheels. Just used some old black paint to cover it.
 
OP
OP
Bronco Ben

Bronco Ben

Contributor
Jckofalltrdes master/none
Joined
Aug 9, 2003
Messages
2,356
Loc.
Coffeeville, Alabama
well I spent last night trying to see where I'm off in my floor pan measurements. The big debate is if the front floor section goes under the lip or on top of the lip of the back floor section on the drivers side and passenger side. I've been told that the drivers side goes on top of the rear pan section......I've also been told that the passenger side front pan goes under the rear section of rear pan.

now I just cant understand why ford would put one side on top of the rear pan and the other side on bottem?.....It would definetly work out better if the drivers side was on bottem for me. But I do want it correct. I guess the only correct way to do it is however I want it done to look right and whatever Im happy with..........but that leads to another problem. IF the front section of pan isnt correct then it throws off the two front extension sections from being right. Dang! this restore business is a PITB! Andy makes it look all so easy! I guess once I've installed one set of pans, it will all work and I'll know from this point on. Man, body work grammer school is a pain. Maybe one day I can graduate from 6th grade jethro! ;D
Ben
 

agent_orange_71

Sr. Member
Joined
Dec 30, 2001
Messages
831
Loc.
Bluefield, WV
Hey Ben, those floors are looking pretty nice. Ive got another suggestion for you on the welder cart. If youve got an old gas grille around use the frame from that. Chuck the grille, then make something to hold the spool of wire, a wood deck on top framed /w angle iron, and a piece of plate in the bottom to hold the O2 bottle. the handles make for a nice place to coil the cord up too. ;)
 
OP
OP
Bronco Ben

Bronco Ben

Contributor
Jckofalltrdes master/none
Joined
Aug 9, 2003
Messages
2,356
Loc.
Coffeeville, Alabama
thanks agent. I'm really in no hurry to get a cart, so I'll just mess around with the kids wagon for now...I should really add a bottle carrier to it though! ;D


as for the spare option do you mean the one in the photos below?

if so this is a VERY rare 1970 option, only offered in South Alabama. It can only be installed by a professional. And required two large 1/2 (probably actually a little bigger) holes be drilled in the quarter panel, and a 8-10 piece of 1/4" plate be mounted behind the inside of the bed to keep it from pulling thru. It is for sale if anyone is interested. $$ lol ;D
ben
 

Attachments

  • dsc00051.jpg
    dsc00051.jpg
    51.1 KB · Views: 46
  • dsc00137.jpg
    dsc00137.jpg
    47.3 KB · Views: 43
OP
OP
Bronco Ben

Bronco Ben

Contributor
Jckofalltrdes master/none
Joined
Aug 9, 2003
Messages
2,356
Loc.
Coffeeville, Alabama
update Feb. 09, 2005 10:28 p.m. LA TIME!

tonight I said to heck with the floor pans, I ventured off back to sanding and painting my rust bullet on my bed panel Channel support piece which is picture number 1 below. Then went on to rust bullet the front channel under my front floor pan. (no picture). Then I drug out my Dash and finished taking it apart. Sanding the paint and primer off it down to the metal and ospho'ed it to protect it until I can finish it tomorrow night. At which time I hope to maybe weld my rear bed channel to the bed floor and possibly spray the bottem of the floor and dash with some epoxy primer. Will all depend on how it looks and how cold it is. IF I'm not happy with the looks of the dash, I could just wait and have it sand blasted...........progress tonight looks slow, and it was, but at least I'm working on it! ;D

Ben
 

Attachments

  • dashfeb092005 036.jpg
    dashfeb092005 036.jpg
    35.4 KB · Views: 36
  • dashfeb092005 035.jpg
    dashfeb092005 035.jpg
    33.1 KB · Views: 28
  • dashfeb092005 033.jpg
    dashfeb092005 033.jpg
    38.3 KB · Views: 21
  • dashfeb092005 032.jpg
    dashfeb092005 032.jpg
    29.4 KB · Views: 17
  • dashfeb092005 031.jpg
    dashfeb092005 031.jpg
    33.9 KB · Views: 23
  • dashfeb092005 030.jpg
    dashfeb092005 030.jpg
    43.1 KB · Views: 20
  • dashfeb092005 029.jpg
    dashfeb092005 029.jpg
    35.9 KB · Views: 23
  • dashfeb092005 028.jpg
    dashfeb092005 028.jpg
    31 KB · Views: 25
OP
OP
Bronco Ben

Bronco Ben

Contributor
Jckofalltrdes master/none
Joined
Aug 9, 2003
Messages
2,356
Loc.
Coffeeville, Alabama
a few more shots.......

shot #4 is a close up of the allen head screw you have to loosen to remove the knobs on emergency flashers, and a couple more knobs on the dash. I also removed the air tray runner, and the the defrost, heater knobs etc. The cubby has all my dash stuff in it (less speedometer).

the bottem of my dash had the most rust. I prepped it with a 2" scotch brite pad, then ospho'ed it. I'll finish it tomorrow.

on the radio hole, I think I'm gonna go pick out a aftermarket AM/FM/single CD that is removable and cut the dash to match, or install it in a tuffy box and buy a stock AM radio to go in place of the old stock radio. Depends on how much the stock radio will cover up on the dash hole.
Thanks
Ben
 

Attachments

  • dashfeb092005 048.jpg
    dashfeb092005 048.jpg
    45.2 KB · Views: 22
  • dashfeb092005 047.jpg
    dashfeb092005 047.jpg
    42.8 KB · Views: 24
  • dashfeb092005 040.jpg
    dashfeb092005 040.jpg
    44.9 KB · Views: 22
  • dashfeb092005 039.jpg
    dashfeb092005 039.jpg
    32.8 KB · Views: 26
  • dashfeb092005 038.jpg
    dashfeb092005 038.jpg
    40.4 KB · Views: 28
Last edited:

MnkyBiz

Bronco Guru
Joined
Jan 17, 2004
Messages
3,758
Loc.
Northern VA/DC
Ben!

Looking Saweeet!

I wussed out & sent my dash in to get powdercoated. I was charged $50 for the dash & the tuffy glovebox. Not bad in my book, but I wasn't modding the dash at all.

Keep up the good work & don't get frustrated!

Bill
 
OP
OP
Bronco Ben

Bronco Ben

Contributor
Jckofalltrdes master/none
Joined
Aug 9, 2003
Messages
2,356
Loc.
Coffeeville, Alabama
man, how did they get a am radio thru 5 holes? lol........what are those slots in your dash jeepster? What about the 71-77 dashes are they the same? or did they come with AM FM radios? I'm guessing none had cassette players until the early 80's?........I may fix my dash and just install a CD player into my (future) tuffy console.
thanks for the picture jeepster!
Ben
 
OP
OP
Bronco Ben

Bronco Ben

Contributor
Jckofalltrdes master/none
Joined
Aug 9, 2003
Messages
2,356
Loc.
Coffeeville, Alabama
thanks flash, I'll take it.

update Feb. 11, 2005 12:06 am alabama time:

I sanded the other side of the bed channel support, and test fit my new bed panel. decided to weld the bed channel support to the bed panel tonight, grind down the welds (to make it purty) and sand and apply my rust bullet. Here are a few pictures of my results. As you will be able to see in the last picture, the support channel did not match up correctly so I cut both sides with my metabo cut off wheel and bent a small section back so it would mount in the origional place. I did a little measuing so hopefully it will fit correctly now. I'll apply a second coat of rust bullet in the morning and once its dry I'll be installing the bed panel and other 2 corner panels. Then hopefully the floor panels will go back in correctly.
thanks for viewing
Ben
 

Attachments

  • bedpanelfeb1005 001.jpg
    bedpanelfeb1005 001.jpg
    38.7 KB · Views: 33
  • bedpanelfeb1005 002.jpg
    bedpanelfeb1005 002.jpg
    40.2 KB · Views: 36
  • bedpanelfeb1005 003.jpg
    bedpanelfeb1005 003.jpg
    42.3 KB · Views: 35
  • bedpanelfeb1005 004.jpg
    bedpanelfeb1005 004.jpg
    24.2 KB · Views: 35

77TexasBronc

Bronco Guru
Joined
Jan 27, 2003
Messages
2,002
Loc.
Baytown Texas
When you get on a roll your unstoppably …Nice job Ben! Send me a PM if you want to get rid of your old dash since your getting a better one. I need one and I’m not too picky
 
Top