OP
OP
- Joined
- Nov 12, 2011
- Messages
- 1,379


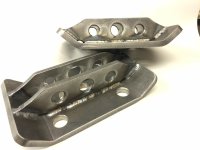
Not too much to report, still picking away at small things... working on getting the rear axle ready to go back in for good. I did make some new U-bolt plates to better fit with the new set up.
He does make it look easy!! Same holes worked for my tank with prewelded brackets. Just watch clearance on underside of bed with EFI style. Had to space mine down.Looks like those existing frame holes worked well for your tank too! Nice brackets!;D
Looks like those existing frame holes worked well for your tank too! Nice brackets!;D
He does make it look easy!! Same holes worked for my tank with prewelded brackets. Just watch clearance on underside of bed with EFI style. Had to space mine down.
Sent from my SM-G900V using Tapatalk

He didn't shave the 9 inch and build a new bottom for it out of 1/4 inch plate?
SMH......................JK
;D;DNice Job B'. Is the glove to be welded directly to the tank or will it utilize brackets in some way? In process of trying to get my tank mounted but still fighting on how high it should actually fit from the bed or frame. Looks like your mounts are mounted low on the plates so assuming the tank is a bit higher. What's your approx. measurement from the frame up to the bottom of the filler neck? Forget what your running for a body lift.
Thank you for not letting me down! You will have to print a catalog before too long.
Ha! no, no... just need a little extra material for this one so it doesn't wear out too quick dragging it around.
But that's why you should shave it, the extra ground clearance keeps it from dragging. ;D
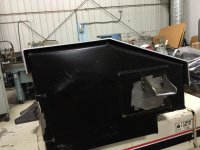
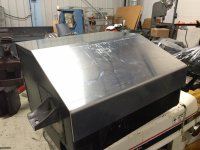
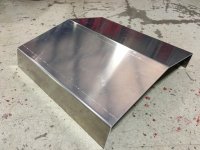
Today I started on making a "glove" for the new fuel tank... fits pretty good so far.;D
also made up a couple of pieces to weld on the rear housing for extra protection, and picked up a little drain plug to be added as well.
It's going to bolt to the tank?Today I started on making a "glove" for the new fuel tank... fits pretty good so far.;D
also made up a couple of pieces to weld on the rear housing for extra protection, and picked up a little drain plug to be added as well.
I think I need one of those skid plates for my Aero tank