• Welcome to ClassicBroncos! - You are currently viewing the forums as a GUEST. To take advantage of all the site features, please take a moment to register. It's fast, simple and absolutely free. So please join our community today!
    If you have problems registering or can't log into your account, please contact Admin.

My Edelbrock Pro-Flo 4 Install

neilvonarb

Contributor
New Member
Joined
Aug 8, 2020
Messages
78
Loc.
Kansas City
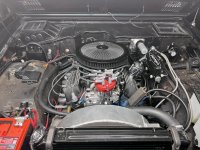
I know there have already been a couple of Edelbrock Pro-Flo 4 install posts, but as I'm learning on this forum, inconsistency is the most common consistency with a classic Bronco. So, here is my experience installing the PF4 on my rig and hopefully you find a few takeaways if you're considering something similar. I also know this is pretty basic info for you guys that have been wrenching on Broncos since the Nixon administration, so don't role your eyes too hard at me.

What I have:
- 1974 Ranger w/122k miles
- Original 302
- Original C4 automatic w/original Dana 20
- 2 1/2" suspension lift (no body lift with original, slightly compressed body mounts)

The Why:
I bought it in the fall of 2020 and drove it half a dozen times before winter hit. During the winter, I crawled and poked around the rig, rebuilt the 2150/2100 carb (it seemed to be in those between years) and changed the plugs, wires, and coil. When I would take it out the following summer, I would have a lot of problems with hot starts. Through this forum, I did some reading and came up with a few possible contributors (heat soak, vapor lock, etc). I wanted this to mostly be my family's (me, wife and 3 year old) weekend driver (and eventually, when my son gets older our excuse to go get in trouble somewhere) and I didn't want to put ourselves in the position of having to be towed from somewhere. Instead of approaching the problem and solutions in small, calculated ways and learning more about carburetors (I was already thinking this about myself before your recent Huck post, @Monster Mike ), my brilliant solution was to convert to EFI. Like a lot of other people have said, I wanted to get in, turn on the key and go. This would fix everything, right? Well, kinda.

What it took/what I bought while I was at it:
- Edelbrock Pro-Flo 4 kit (comes with new distributer) from WH
- Edelbrock heater hose intake fitting 8159
- ARP intake manifold bolts 154-2101
- M1A1 w/in-tank pump from WH
- Filler and vent hoses from WH
- Fuelab 818011 in-line 10 micron fuel filter
- Aeromotive 13129 fuel pressure regulator and 15633 fuel pressure gauge
- 30' of -6AN push lock fuel hose
- Assortment of -6AN Russel push lock fittings
- Fuel pump block off plate and gasket
- 20' of 5/16" rubber hose for tank vent
- Delorean rollover valve
- Dorman 911-198 vapor canister
- Duffs 2-into-1 exhaust kit (minus headers and muffler)
- Scott Drake shorty headers w/Remflex 3003 gaskets
- Stage 8 8913A locking header bolts
- MagnaFlow Straight-Through muffler 11216
- Fel-Pro 1250 S-3 intake gaskets......Fel-Pro 1250 S-3 intake gaskets.....Fel-Pro 1250 intake gaskets (it's a long story)
- Motorcraft starter solenoid B6AZ11450B (I kept the old one just in case, thanks to reading on here)
- Odyssey 34/78-PC1500DT Battery
- Fastronix mil spec battery terminals
- 1-gauge battery cables
- Painless 50102 fuel pump relay
- Lokar kickdown cable KD-20C4HT
- Lokar throttle and kickdown cable bracket TCB-40PFL (specifically for PF4)
- Misc wire, clips, fasteners, sealants, etc.

Continued….
 
OP
OP
neilvonarb

neilvonarb

Contributor
New Member
Joined
Aug 8, 2020
Messages
78
Loc.
Kansas City
Continued…

How it went/what I learned:
- As can be seen from the parts list, this (for me anyway) was not just something you bolt on on a Saturday. Even without some of the non-related EFI project stuff on the list, it still takes quite a bit of additional stuff to do it in what I would consider, or what my knowledge tells me is, the "right way". So, consider this if the PF4 is something you're thinking about doing.

- I only got to work on this project this winter on a few days off work and for a couple hours on Saturdays and Sundays while my kid napped. With installing everything above, and including reinstalling the accessory drive and radiator, new trans cooler and coolant/washer fluid tank, I had 40-50 hours in it...or at least that's what I'm telling myself.

- Educate yourself about the system (I'm still doing this part). There is a PF4 forum out there that is both helpful AND terrifying. Lots of good, specific info and lots of horror stories that make you question what you're getting yourself into and why you didn't just learn more about carb's. The system comes with a set of pretty detailed installation and operating instructions - follow them. Most of the problems I've read about come from people not following the instructions (e.g., buying the wrong kit for the application, picking the wrong map for the system, wrong fuel pressure setting, not wiring the fuel pump correctly, not wiring the ECU correctly) - all stuff explicitly described in the instructions.

- Hood clearance: This setup did sit higher than the stock 302 intake + EGR carb spacer + 2100 carburetor (I want to say it ended up about 3/4" taller). With a 1/4" air cleaner spacer and a 2" air cleaner, I have about 3/8" of space between the top of the cleaner housing and the hood. This is also with original body mounts that are probably about 1/2" thick.

- The M1A1 is a bit of bear to install by yourself, but it's possible. Just make sure your vent, feed/return lines, and wires for fuel pump and sending unit are long enough to go over the back cross member while the tank is sitting on the ground (if you're in a retro-fit situation). The construction of the tank is awesome and high quality. The in-tank pump is louder than I hoped, but this is my first experience with in-tank, so maybe it is what it should be. So far, the sending unit they supply works with my original wiring and gauge. I'm with @jamesroney , I don't understand why the vent for the tank is below where the "full" level would be. I didn't do any mods to this but just used the rollover valve and plan on trying not to go over 20-ish gallons when I fill it.

- I had the original intake manifold that has never been removed, and it took a big ol' gooseneck crow bar and some leverage to get the thing loose. If you have the same, keep the threaded studs and use them to help with the new intake install. They keep you in the right place when you're dropping it down.

- It took me 3 sets of intake gaskets. With the first set of 1250 S-3's I was worried I didn't get enough RTV at the front and back of the block, so I pulled it to re-do those areas. With the second set of 1250 S-3's, I discovered that the opening for the water passages is too big for my heads and it allows water to leak at the front edge of the head. That took me to just the standard 1250's, which people seem to have really strong negative feelings for, but so far, so good. I chose to use RTV only at the front and back of the block.

- The intake and distributer drop in place like any other intake and distributer I suppose (this was my first time). Lots of retorquing of the bolts. Not sure why, but I did have a leak at where the fuel sensor screws into the front of the fuel rail. It is a NPT thread, so I put some sealant rated for fuel on it and it did the trick. It comes with the fuel rail crossover hose at the back, but that and the fuel sensor/fuel line input can all be moved around. It looks like some guys move the crossover hose to the front, but it seems like you'd fight the distributer doing that. I left the fuel input on the front, drivers side and ran the fuel line up kind of how it already did from the mechanical fuel pump on that side. The distributer diameter is big and my 14" air cleaner, with the help of a 1/4" spacer, clears the #5 plug wire by less than 1/8". I'm not sure why that thing has to be so big. I've seen other builds where they didn't have a chance of getting a 14" air cleaner on, so not sure how I was able. I'm looking at trying a Spectre carb hat type assembly too.

- I mounted the fuel pressure regulator on the drivers side fire wall, just to the right of the steering shaft, and ran the supply and return lines on the inside face of the frame rail. Getting rid of the dual exhaust I had before made this easier and cleaner and less susceptible to heat.

- I got rid of the stock coolant expansion tank and replaced it with the coolant/washer fluid tank that mounts to the front drivers corner so I could clean up the passenger side and mount the ECU to the top of the inner wheel well. I don't love it here but I was running out of options based on harness lengths and other things to install and I didn't want to open the can of worms/spend the amount of time to install it inside the cab.

- Connecting the harness to everything is pretty straightforward. You just have to follow the instructions. The one connection I was worried about was the 12v switched power (it has to be 12v both in On and Cranking). From reading on this forum, it looks like there is only one viable option for that on a Bronco. The PO had installed a kill switch that came off the back of the ignition switch, so I was lucky and already had a source that worked for this.

- The maximum draw for a fuel pump that can be wired directly to the ECU is 10 amps, otherwise you have to run a relay. I'm pretty sure the in-tank pump in the WH M1A1 is 10 or under, but I went ahead and still ran a relay. I mounted it in the engine bay, but the fuel pump lead off the harness is 84", so it is plenty long to run closer to the tank area.

- I mounted the O2 sensor on the passengers side header collector. It seemed like there was only one real option for its orientation on that side. The O2 sensor lead from the harness is 35" long, so I think it could reach the drivers side where it seemed like there were more options for orienting the sensor. The Scott Drake headers come with O2 bungs in both collectors.

- Duff's 2-into-1 exhaust was pretty straightforward. The only piece I had to end up cutting was the tailpipe where it extended too far past the face of the fender. With the O2 sensor and the exhaust needing a good seal, I used the exhaust band clamps instead of the saddle clamps. I will say that the tailpipe and the strap from the M1A1 tank don't play nice in the same space, so that will take some head scratching and a custom solution.

- I abandoned the original evap cannister behind the drivers seat and added the Delorean rollover valve (mounted on the outside of the frame rail on the passengers side) and Doorman vapor cannister (mounted to the firewall on the passengers side). 5/16" hose comes from the M1A1 tank to the rollover valve and from the rollover valve to the vapor cannister. 3/8" hose goes from the cannister to full time vacuum at the back of the intake. In my mind, this should seal up gas fumes/vapors, but it still seems pretty strong in my garage. If you've made it this far in the post and have any ideas, I'm all ears.

- I was able to use the original accelerator bell crank and throttle linkage. It seems like people get mixed results on this and most switch to a throttle cable. I didn't even attempt to use the original kickdown rod, so I broke off half a paycheck and paid for a Lokar bracket and kickdown cable. Both were straightforward installs.

- The first start up: let's just call it very anticlimactic. No crank, no click, nothing. After 10 minutes of electrical tests, for some reason I decided to see if it was in Park. Nope, I had put it in gear to make it easier to put on the #8 plug wire and only got it back to R when I went back to shift it back to P (I love and hate these moments - easy fix but I feel like an idiot). Once in Park, I turn the key and it fires right up. The system uses Edelbrocks E-Turner app, either on your own device or a Fire tablet that comes with the kit, to pick a map for engine and to do the initial setup. It can feel pretty overwhelming at first, but it's fairly easy to understand, follow, and use.

- I'm currently in the self-learning/tuning phase. After reading a lot on the Edelbrock forum, it appears there are a lot things that require you to make an adjustment and then restart the self-learning phase. I have some Idle issues I'm working through, but so far it seems to be running pretty well. Attached is a screenshot of one of the digital displays that shows what all can be adjusted and tracked.

My takeaways:
I'm still thinking about this. What this system is capable of doing is way above my current paygrade and knowledge, so it's made me have to learn a lot more about the "how" and "why" behind engine...science (?), which is where I should have started anyway. It was definitely fun to think about, plan, buy (not pay for), figure out, install, and now enjoy. Would I do it again with the exact situation I had and the problem I was trying to solve? Probably not. I would've started with smaller (and cheaper) bites. Hopefully I can remember this post the next time I want to jump in the deep end.

Screenshot_20200317-055406.png

IMG_0682.jpeg
IMG_0681.jpeg
 

Attachments

  • IMG_0680.jpeg
    IMG_0680.jpeg
    277.5 KB · Views: 152
Last edited:

ngsd

Contributor
Bronco Guru
Joined
Mar 2, 2019
Messages
2,598
Good write up and very helpful for others jumping in. I have been fighting mine since I installed it. I learned a lot along the way but never could get it to run right. The biggest mistakes are timing not correct for the startup, wrong power wiring, and wrong maps. When I was convinced that I did it over and over correctly, I finally threw in the towel and had a local speed shop take a stab at it. My work was fine, I had issues with sticking valves and they are tearing it open and pulling the heads right now to see if the machine work was done correctly. Good luck. I think if I do another I think I will give the Terminator set up a try. I have done the FITech and Snipers already too.
 

nvrstuk

Contributor
Just a Bronco driver for over 50 yrs!
Joined
Jul 31, 2001
Messages
9,345
1- Good STUFF!

2- How did YOU know I've been driving Broncos since the Nixon Admin?? Just wondering... :)
 

DirtDonk

Contributor
Bronco Guru
Joined
Nov 3, 2003
Messages
48,964
Great write up. Thanks for going to the trouble!
And thank you for the support at wild horses. 😁

Disconnect the vacuum line to the charcoal canister. It is not meant for that unless your EFI computer has a control circuit for a canister purge solenoid. Otherwise known as CAN-P.

You never, ever run straight manifold vacuum to a charcoal canister without some kind of computer control. Eventually, you are just going to suck raw gas right into it and into the engine where the computer might not know what to do with it.

I don’t see two lines on the canister in your picture though. Is yours the three port design, or the four port?
You should have the line from the tank connected to the smallest port, and then either the slightly larger 3/8 fitting, or one of the larger ones with the caps on it plumbed to the air cleaner.
 
OP
OP
neilvonarb

neilvonarb

Contributor
New Member
Joined
Aug 8, 2020
Messages
78
Loc.
Kansas City
Good write up and very helpful for others jumping in. I have been fighting mine since I installed it. I learned a lot along the way but never could get it to run right. The biggest mistakes are timing not correct for the startup, wrong power wiring, and wrong maps. When I was convinced that I did it over and over correctly, I finally threw in the towel and had a local speed shop take a stab at it. My work was fine, I had issues with sticking valves and they are tearing it open and pulling the heads right now to see if the machine work was done correctly. Good luck. I think if I do another I think I will give the Terminator set up a try. I have done the FITech and Snipers already too.
Thanks, @ngsd . Good luck with yours, I hope you get it figured out.

Thanks for your informative posts!

Todd Z.
No problem, @toddz69

1- Good STUFF!

2- How did YOU know I've been driving Broncos since the Nixon Admin?? Just wondering... :)
I've read a lot of your psts, @nvrstuk , you seemed kind of....older?? I mean, experienced. ha

Great write up. Thanks for going to the trouble!
And thank you for the support at wild horses. 😁

Disconnect the vacuum line to the charcoal canister. It is not meant for that unless your EFI computer has a control circuit for a canister purge solenoid. Otherwise known as CAN-P.

You never, ever run straight manifold vacuum to a charcoal canister without some kind of computer control. Eventually, you are just going to suck raw gas right into it and into the engine where the computer might not know what to do with it.

I don’t see two lines on the canister in your picture though. Is yours the three port design, or the four port?
You should have the line from the tank connected to the smallest port, and then either the slightly larger 3/8 fitting, or one of the larger ones with the caps on it plumbed to the air cleaner.
I actually read about the canister purge solenoid early on during my research and completely forgot about it until I just read your post. I'm glad you read my post and responded, @DirtDonk . I'll get this switched over to the air cleaner. There are two lines running to the cannister, you just can't see the 5/16 line in the pic because the 3/8 line is covering it up. The 5/16 line is from the vent on the tank with the Delorean rollover in between.
 
Last edited:

1969

Contributor
Full Member
Joined
Feb 28, 2022
Messages
751
Thank you for the informative write up. I am highly considering this efi system.
 

nvrstuk

Contributor
Just a Bronco driver for over 50 yrs!
Joined
Jul 31, 2001
Messages
9,345
Yeah, I think I'm entering the cranky old guy category lately!!

:)

Keep the good stuff coming...
 
Last edited:

73azbronco

Contributor
Bronco Guru
Joined
Nov 11, 2007
Messages
8,150
great writeup. This is the system I have been watching and will make my next motor work with. BTW, right now, spend a paycheck and buy another computer as a spare. Not like those are going to be around in 10 years...

Back when A9L was the rage with Explorer swaps, I learned way to much about all the circuits, which are now OBE. I was ground breaking with my NV too.... like a dinosaur ground breaking....
 

brewchief

Sr. Member
Joined
Feb 11, 2007
Messages
872
We did a pro flow 4 on a friends 78 shortbox with a 460 over the winter.

Same fuel leak at the pressure sensor.

It's had some starting issues on occasion and some times it just didn't seem right, his wife noticed it was showing 67% throttle when just idling down the road, TPS sensor issue, looking online it seems pretty common and there is a standard brand TPS that many users seem to have better success with.

Overall it's been pretty good, the instructions can get a bit vague when it comes to tuning but we are learning and its been much better at the dunes then the old carb.

Sent from my SM-G965U using Tapatalk
 

bstamm42

Newbie
Joined
Feb 16, 2020
Messages
9
Thanks for the info. Hoping to fire mine up this summer. Any advice on the air cleaner? Looks like you picked the edelbrock. Thanks
 
OP
OP
neilvonarb

neilvonarb

Contributor
New Member
Joined
Aug 8, 2020
Messages
78
Loc.
Kansas City
Thanks for the info. Hoping to fire mine up this summer. Any advice on the air cleaner? Looks like you picked the edelbrock. Thanks

My setup allowed for only a 2” tall filter. It’s an Edelbrock housing but a different brand filter. The air temp sensor goes just fine into it.

I’ve bought and am also considering trying the Spectre low profile kit below to see if I can get a little cooler air temps.

07df34b040bafa7ee04e66cac91d17c5.jpg
 

reamer

Contributor
Bronco Guru
Joined
Mar 20, 2008
Messages
1,249
I did the pro flow 4 in @ 8 hrs time, 2 hrs doing tear down and the rest with the install. I DID NOT do any sort of special EFI pump-in-new-tank, .....Edelbrock offers a EFI sump kit,, You use the stock mechanical fuel pump, and original gas tank. your original pump pumps gas to the sump. In the sump is the high pressure fuel pump that goes to the intake. Turn key, set timing, and some other stuff (on your phone) and have not looked back (16 months now) NO loss of "memory" and "re-programing" (like a sniper or Fitech)... Sweet and simple!
 
Top