• Welcome to ClassicBroncos! - You are currently viewing the forums as a GUEST. To take advantage of all the site features, please take a moment to register. It's fast, simple and absolutely free. So please join our community today!
    If you have problems registering or can't log into your account, please contact Admin.

Project: 76, Orange Special Decor

OP
OP
gnsteam

gnsteam

Contributor
Bronco Guru
Joined
Jan 29, 2010
Messages
3,584
Loc.
Lincoln NE
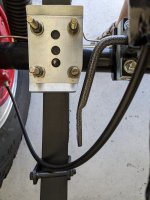
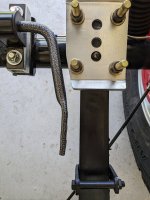
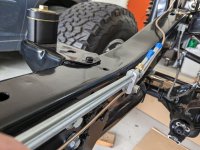
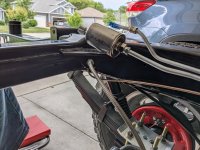
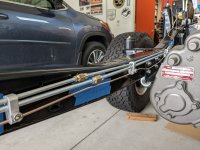
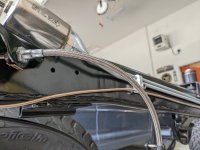
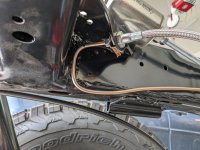
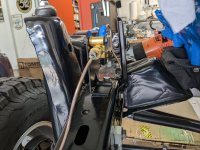
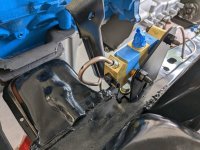
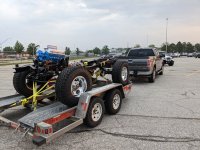
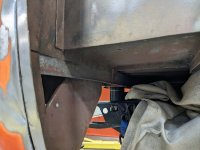
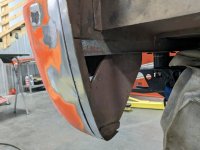
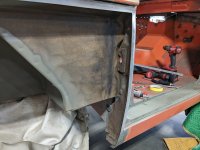
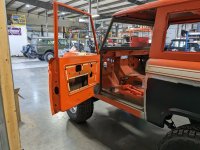
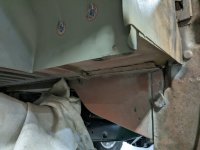
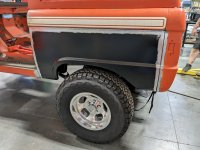
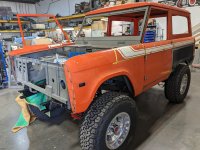
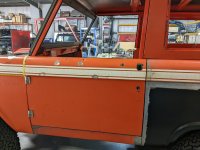
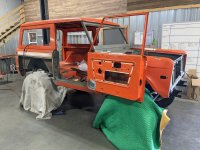
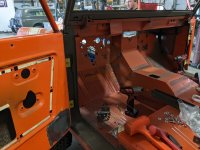
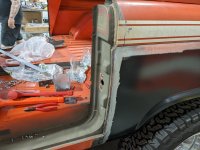
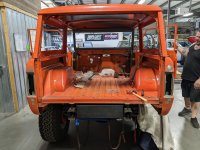
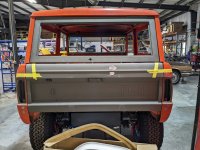
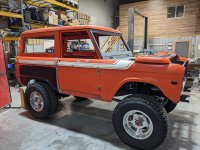
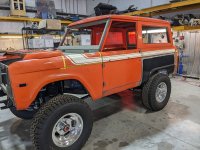
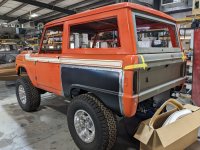
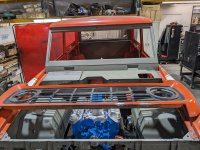
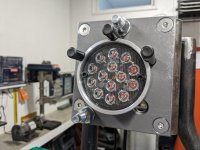
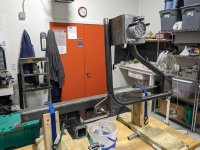
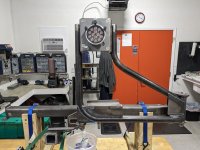
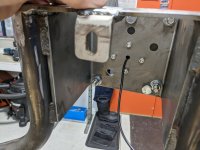
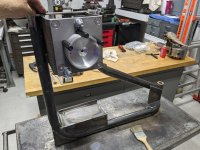
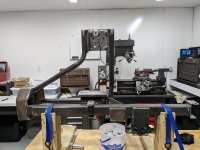
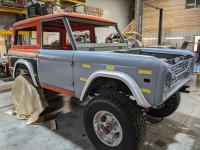
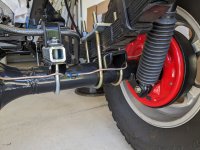
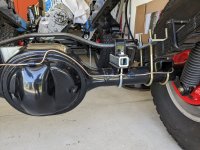
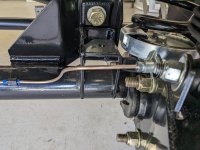
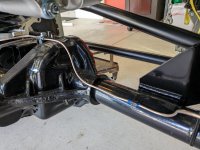
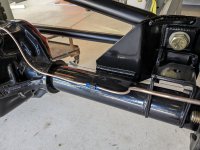
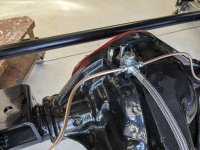
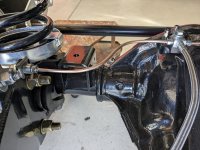
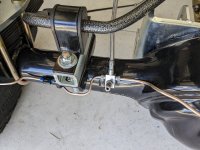
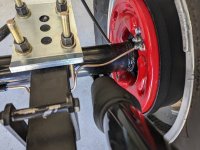
Some more progress on the chassis today. I Installed hard brake lines on the axles.
 

Attachments

  • PXL_20230527_232307419.jpg
    PXL_20230527_232307419.jpg
    203.2 KB · Views: 64
  • PXL_20230527_232310751.jpg
    PXL_20230527_232310751.jpg
    218.3 KB · Views: 57
  • PXL_20230527_232436145.jpg
    PXL_20230527_232436145.jpg
    200.6 KB · Views: 56
  • PXL_20230527_232441614.jpg
    PXL_20230527_232441614.jpg
    219.1 KB · Views: 57
  • PXL_20230527_232439762.jpg
    PXL_20230527_232439762.jpg
    209 KB · Views: 54
  • PXL_20230527_232405297.jpg
    PXL_20230527_232405297.jpg
    235 KB · Views: 49
  • PXL_20230527_232401886.jpg
    PXL_20230527_232401886.jpg
    230.7 KB · Views: 44
  • PXL_20230527_232345820.jpg
    PXL_20230527_232345820.jpg
    206.1 KB · Views: 45
  • PXL_20230527_232335228.jpg
    PXL_20230527_232335228.jpg
    183.7 KB · Views: 57
OP
OP
gnsteam

gnsteam

Contributor
Bronco Guru
Joined
Jan 29, 2010
Messages
3,584
Loc.
Lincoln NE
I almost forgot another mod from today. If you install one of the earlier versions of James Duff's torque tammer and rear sway bar kit. There is a clearance issue at the leaf spring retaining plate and the sway bar. So I had to trim the spring retainer plates.
 

Attachments

  • PXL_20230527_232252677.jpg
    PXL_20230527_232252677.jpg
    185.8 KB · Views: 32
  • PXL_20230527_232236688.jpg
    PXL_20230527_232236688.jpg
    182.8 KB · Views: 31
Last edited:
OP
OP
gnsteam

gnsteam

Contributor
Bronco Guru
Joined
Jan 29, 2010
Messages
3,584
Loc.
Lincoln NE
Today the chassis was taken to the body shop. So that they could start squaring up the body on it final resting place. So I had to finish up what I could before taking it to them. I was able to finish the break lines from the proportioning valve to the calipers and drums. I also installed the EFI hard fuel lines. Next I installed the new 23 gallon fuel tank. Held in place with hold down straps. They needed the tank for fitment of the new fuel filler cap tube. I really want to get the exhaust fitted but some parts are on backorder. I should still get some time to finish things up, when the body goes back to the rotisserie for paint.
 

Attachments

  • PXL_20230602_211649937.jpg
    PXL_20230602_211649937.jpg
    168.3 KB · Views: 58
  • PXL_20230602_211636052.jpg
    PXL_20230602_211636052.jpg
    204.2 KB · Views: 51
  • PXL_20230602_211626294.jpg
    PXL_20230602_211626294.jpg
    194.9 KB · Views: 49
  • PXL_20230602_211606693.jpg
    PXL_20230602_211606693.jpg
    154.6 KB · Views: 43
  • PXL_20230602_211558403.jpg
    PXL_20230602_211558403.jpg
    194.9 KB · Views: 44
  • PXL_20230602_211712906.jpg
    PXL_20230602_211712906.jpg
    200.2 KB · Views: 43
  • PXL_20230602_211731972.jpg
    PXL_20230602_211731972.jpg
    211.1 KB · Views: 49
  • PXL_20230608_112909332.jpg
    PXL_20230608_112909332.jpg
    278.8 KB · Views: 65
OP
OP
gnsteam

gnsteam

Contributor
Bronco Guru
Joined
Jan 29, 2010
Messages
3,584
Loc.
Lincoln NE
The body shop called requesting door, tail and lift gate hardware. So a stop at the shop was in order today. Body is back on the frame for fitment. Driver side rear quarter is in, passengers side in progress. So I was able to capture a few good behind the quarter pictures. I have to pinch myself everytime I look at the body on this Bronco. The shop is making great progress.
 

Attachments

  • PXL_20230613_202412632.jpg
    PXL_20230613_202412632.jpg
    142.7 KB · Views: 70
  • PXL_20230613_202409068.jpg
    PXL_20230613_202409068.jpg
    168.3 KB · Views: 68
  • PXL_20230613_202418948.jpg
    PXL_20230613_202418948.jpg
    158.8 KB · Views: 62
  • PXL_20230613_202416078.jpg
    PXL_20230613_202416078.jpg
    158.6 KB · Views: 58
  • PXL_20230613_202359771.jpg
    PXL_20230613_202359771.jpg
    180.2 KB · Views: 60
  • PXL_20230613_202355766.jpg
    PXL_20230613_202355766.jpg
    181.8 KB · Views: 57
  • PXL_20230613_202537543.jpg
    PXL_20230613_202537543.jpg
    212.4 KB · Views: 58
  • PXL_20230613_202534849.jpg
    PXL_20230613_202534849.jpg
    192.7 KB · Views: 59
  • PXL_20230613_202422455.jpg
    PXL_20230613_202422455.jpg
    151.6 KB · Views: 60
  • PXL_20230613_202526451.jpg
    PXL_20230613_202526451.jpg
    189.3 KB · Views: 78
OP
OP
gnsteam

gnsteam

Contributor
Bronco Guru
Joined
Jan 29, 2010
Messages
3,584
Loc.
Lincoln NE
Here are a few more pictures.
 

Attachments

  • PXL_20230613_202609502.jpg
    PXL_20230613_202609502.jpg
    227.2 KB · Views: 48
  • PXL_20230613_202341471.jpg
    PXL_20230613_202341471.jpg
    248 KB · Views: 50
  • PXL_20230613_202559932.jpg
    PXL_20230613_202559932.jpg
    164.6 KB · Views: 46
  • PXL_20230613_202333078.jpg
    PXL_20230613_202333078.jpg
    226.8 KB · Views: 44
  • PXL_20230613_202547991.jpg
    PXL_20230613_202547991.jpg
    177.8 KB · Views: 48
  • PXL_20230613_202544554.jpg
    PXL_20230613_202544554.jpg
    179.3 KB · Views: 49
  • PXL_20230613_202448640.MP.jpg
    PXL_20230613_202448640.MP.jpg
    220.9 KB · Views: 54

DirtDonk

Contributor
Bronco Guru
Joined
Nov 3, 2003
Messages
47,921
I must've missed it in the discussion, but it looks like you're going to go with the '77 style gas door(s) instead of exposed caps?
Or are you going with a non-stock type door instead of '77 style?

Paul
 
OP
OP
gnsteam

gnsteam

Contributor
Bronco Guru
Joined
Jan 29, 2010
Messages
3,584
Loc.
Lincoln NE
I must've missed it in the discussion, but it looks like you're going to go with the '77 style gas door(s) instead of exposed caps?
Or are you going with a non-stock type door instead of '77 style?

Paul
Hi Paul, the 77 fuel door mod was my initial plan. But to save some cost and a little easier install. I am going for more flush mount, pop up gas cap. I saw this mod on JefeAZ's, F8 build. I posted some picture from Jefe's build. It is post #300. Also note, that the side marker lights will stay in the original location on the new quarter panel. The new quarters were required because of a PO's hack job cut out. I will be cutting the new quarters for Bronco Design fiberglass flairs.
 

DirtDonk

Contributor
Bronco Guru
Joined
Nov 3, 2003
Messages
47,921
Great, thanks! I saw the markings for the vertical mount 77 style marker light and that’s what made me think of it.
 

76YETI

Contributor
Sr. Member
Joined
May 27, 2015
Messages
873
Loc.
KC METRO
Oh, I like the fuel cap modification. Probably going to have to steal that idea when I get around to it. Looking good!
 
OP
OP
gnsteam

gnsteam

Contributor
Bronco Guru
Joined
Jan 29, 2010
Messages
3,584
Loc.
Lincoln NE
Not much movement at the body shop over the last 2 weeks. I knew this going in that my project is fill in work for them, between other projects. Just a few tweaks to the liftgate/tailgate area and the door gaps should be close enough for a driver paint job. Here are a few current state pictures. Fenders will be cut for fiberglass flairs.
 

Attachments

  • PXL_20230629_201714804.jpg
    PXL_20230629_201714804.jpg
    216.8 KB · Views: 57
  • PXL_20230629_201653412.jpg
    PXL_20230629_201653412.jpg
    232.2 KB · Views: 54
  • PXL_20230629_201740655.jpg
    PXL_20230629_201740655.jpg
    226.4 KB · Views: 55
  • PXL_20230629_201723642.jpg
    PXL_20230629_201723642.jpg
    235.1 KB · Views: 53
  • PXL_20230629_201753234.jpg
    PXL_20230629_201753234.jpg
    229.8 KB · Views: 56

sprdv1

Contributor
REBEL
Joined
Mar 8, 2007
Messages
81,824
Hi Paul, the 77 fuel door mod was my initial plan. But to save some cost and a little easier install. I am going for more flush mount, pop up gas cap. I saw this mod on JefeAZ's, F8 build. I posted some picture from Jefe's build. It is post #300. Also note, that the side marker lights will stay in the original location on the new quarter panel. The new quarters were required because of a PO's hack job cut out. I will be cutting the new quarters for Bronco Design fiberglass flairs.

gonna look great w/those
 
OP
OP
gnsteam

gnsteam

Contributor
Bronco Guru
Joined
Jan 29, 2010
Messages
3,584
Loc.
Lincoln NE
Instead of just sitting here sulking over another Nebraska football game loss. I will update my build thread. The body shop is working on my project again. They have all the door gaps adjusted. So they have begun striping paint and cleaning up the welds around areas of repair. Next week we may get the Bronco Design flairs fitted and sheet metal removed. Next will be positioning the new fuel filler and side marker lights in the new quarters. Sorry no pictures from the shop at this time.
While waiting on the body shop. I have been working on the James Duff tire carrier. So far everything fits together nicely. However I decided to make a modification to the tire mounting area of the carrier. I fabricated a spacer plate with the addition of a third break light. I made the spacer plate 3/8" thick, to lessen the compression of the tire against the carrier framing. To this plate, I added three 1/2" x 3" dowel pins, on a radius matching the inside diameter of the wheels center hub opening. The dowels give me a support rest for the wheel when placing the tire/wheel on the carrier studs. The dowels are press fitted into the spacer plate and the carrier mounting plate. Next up, I fabricated an aluminum mount for a led tail light that I found on Ebay. The light mount, bolts to the plate with four bolts from behind the carrier mount. Oh, and the space plate is bolted to the carrier with four 3/8" flat head cap screws and nuts. All of the hardware is stainless.
I will paint the spacer plate and break light assembly black. The rest of the carrier will go to the body shop for painting. The hidden parts of the carrier and receiver hitch will be black. And the visible parts of the carrier will be body color matched. Here are a few pictures.
 

Attachments

  • PXL_20230903_205134936.jpg
    PXL_20230903_205134936.jpg
    188.3 KB · Views: 42
  • PXL_20230903_205119583.jpg
    PXL_20230903_205119583.jpg
    222.3 KB · Views: 44
  • PXL_20230903_205125659.jpg
    PXL_20230903_205125659.jpg
    197.3 KB · Views: 41
  • PXL_20230903_185243354.jpg
    PXL_20230903_185243354.jpg
    142.5 KB · Views: 36
  • PXL_20230903_192523476.jpg
    PXL_20230903_192523476.jpg
    58.8 KB · Views: 33
  • PXL_20230903_184531231.jpg
    PXL_20230903_184531231.jpg
    220.9 KB · Views: 34
  • PXL_20230903_205159838.jpg
    PXL_20230903_205159838.jpg
    181.3 KB · Views: 33
  • PXL_20230903_205147552.jpg
    PXL_20230903_205147552.jpg
    215.7 KB · Views: 36
  • PXL_20230903_205141719.jpg
    PXL_20230903_205141719.jpg
    226.1 KB · Views: 43
OP
OP
gnsteam

gnsteam

Contributor
Bronco Guru
Joined
Jan 29, 2010
Messages
3,584
Loc.
Lincoln NE
Some progress at the restoration shop. Bronco Design flairs positioned. And the appoxment location of the fuel filler is shown. If you all remember. I was going to have a fuel filler door grafted in, as on the 77 Bronco. So the rear side markers needed to move to the tail light housing as shown. Now that I have decided to use the pop up gas cap as shown in a previous post. The side marker move is not necessary. However, looking at the placement of the fuel filler and the moved position the side marker. I like the look. What do you all think? I would also like to center the side maker (front to back) in the rear housing. So we will install the tail light assembly and check out the clearance between the two housings. If you look at a 77 Bronco, the side marker is at the front edge of the rear housing.

In my next post. I will share an issue we found with my doors. I need to get some pictures.
 

Attachments

  • PXL_20231009_213130340.jpg
    PXL_20231009_213130340.jpg
    187.8 KB · Views: 44
  • PXL_20231009_213144890.jpg
    PXL_20231009_213144890.jpg
    225.7 KB · Views: 41
  • PXL_20231009_213057549.jpg
    PXL_20231009_213057549.jpg
    173.7 KB · Views: 41
  • PXL_20231009_213137131.jpg
    PXL_20231009_213137131.jpg
    177.3 KB · Views: 43
  • PXL_20231009_213104177.jpg
    PXL_20231009_213104177.jpg
    195.1 KB · Views: 39
  • PXL_20231009_213112683.jpg
    PXL_20231009_213112683.jpg
    194.2 KB · Views: 41
Top