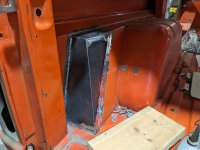
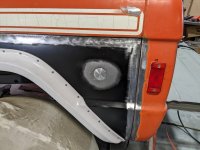
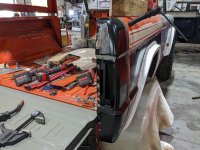
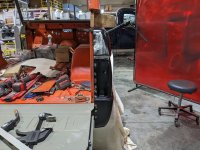
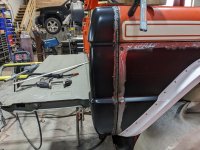
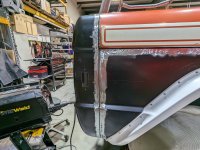
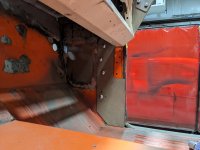
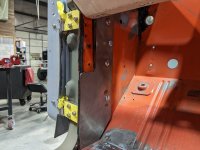
I have some more shop pictures to share of the progress being made on the body. First up the gas filler is installed in a more centered position between the rear flair and tail light housing body section. This required a a modification to the interior sheet metal to increase the size of the box. That allows clearance for the filler neck behind it. The filler is a pop out cap that threads into the filler neck. I got this idea from JefeAZ, a member on this site.
Community
Message Forum
Photo Gallery
Event Calendar
Book Reviews
Bronco Wallpaper
Bronco FAQ
Link Back to CB!
Photo Gallery
Event Calendar
Book Reviews
Bronco Wallpaper
Bronco FAQ
Link Back to CB!

Buy / Sell


Bronco Tech
3 Arm Wiper Setup
Fix Motor Mount
Roll Cage Braces
Throttle Body 65mm
Wheel Alignment
Heat Riser Replacement
Vent Window Repair
Center Console Mount
Straighten Bumper
Ford 6R80 6 spd
More Tech...
Fix Motor Mount
Roll Cage Braces
Throttle Body 65mm
Wheel Alignment
Heat Riser Replacement
Vent Window Repair
Center Console Mount
Straighten Bumper
Ford 6R80 6 spd
More Tech...

Install the app
-
Welcome to ClassicBroncos! - You are currently viewing the forums as a GUEST. To take advantage of all the site features, please take a moment to register. It's fast, simple and absolutely free. So please join our community today!If you have problems registering or can't log into your account, please contact Admin.
You are using an out of date browser. It may not display this or other websites correctly.
You should upgrade or use an alternative browser.
You should upgrade or use an alternative browser.
Project: 76, Orange Special Decor
- Thread starter gnsteam
- Start date
Next we decided to replace the right tail light housing. The original was so distorted by the weight of the factory tire carrier over the years. That it would take to much time to try and restore.
Attachments
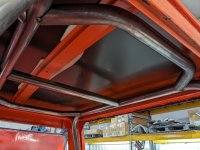
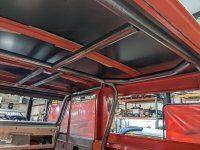
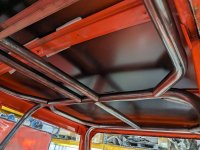
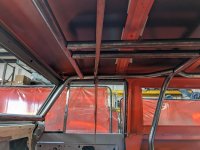
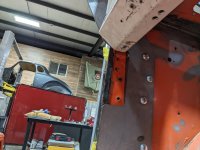
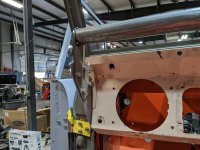
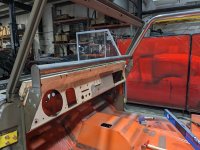
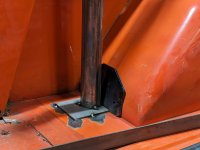
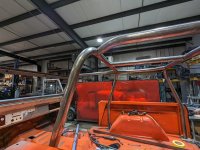
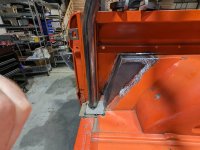
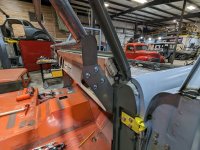
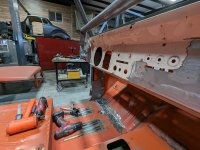
And on Friday. The shop started fitting the Tom Off Road, plate style, 6 point cage.
Attachments
-
 PXL_20231110_214202836.jpg142 KB · Views: 63
 -
 PXL_20231110_214210806.jpg160 KB · Views: 62
 -
 PXL_20231110_214215605.jpg154.1 KB · Views: 54
 -
 PXL_20231110_214222806.jpg179.1 KB · Views: 60
 -
 PXL_20231110_214229666.jpg210.1 KB · Views: 55
 -
 PXL_20231110_214251110.jpg133.1 KB · Views: 59
 -
 PXL_20231110_214313718.jpg211.7 KB · Views: 61
 -
 PXL_20231110_214406819.jpg186.9 KB · Views: 53
 -
 PXL_20231110_214448694.jpg233.6 KB · Views: 57
 -
 PXL_20231110_214509938.jpg210.2 KB · Views: 67
A few more pictures from todays work. Fitting up the cage.
Attachments
Hope everyone had a great Thanksgiving, we sure did. Our daughter, son inlaw and only (so far) granddaughter, spent the entire week with us. Their now on there way home to Erie CO.
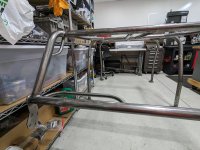
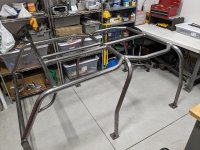
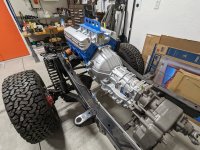
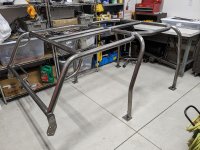
One of the highlights of the week, was that the restoration shop was finished with the chassis for now. So I picked it up Wednesday afternoon. They also finished up the roll cage. So it came home as well. I will do the final cleanup on the cage and I will paint it myself. Now I am hoping for a warm day in the next couple weeks, so I can give the chassis a wash.
The shop will be starting on the final stripping. Then beginning the final body work. They think it will be ready for paint in January. I certainly hope so.
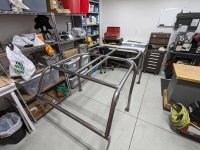
Here are a few pictures of the cage, chassis and a couple of the body.
Attachments
-
 PXL_20231122_212941041.jpg251.3 KB · Views: 53
 -
 PXL_20231122_212928382.jpg248.1 KB · Views: 53
 -
 PXL_20231126_210329259.jpg220.5 KB · Views: 45
 -
 PXL_20231126_210242027.jpg217.5 KB · Views: 47
 -
 PXL_20231126_210154970.jpg241.9 KB · Views: 51
 -
 PXL_20231126_210426923.jpg279.6 KB · Views: 50
 -
 PXL_20231126_210148661.jpg237.4 KB · Views: 51
 -
 PXL_20231126_210422658.jpg219.6 KB · Views: 46
 -
 PXL_20231126_210317539.jpg234.1 KB · Views: 44
 -
 PXL_20231126_210312345.jpg238.9 KB · Views: 54
- Joined
- Jan 28, 2012
- Messages
- 1,533
Your build is coming along great! Can't wait to see the next step as this build moves along....
Heck yea! Keep 'em coming. Looking great!
Yesterday, after work it was beautiful outside. So I rolled the chassis out of the garage to clean off the body shop dust. A good blast of compressed air and a light rinse with the garden hose. It cleaned up pretty easily.
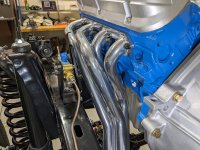
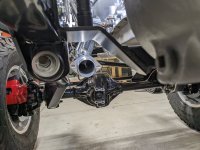
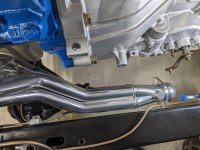
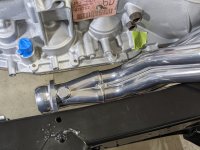
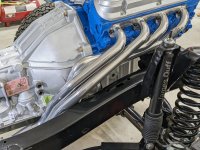
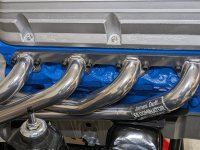
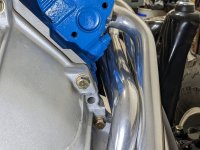
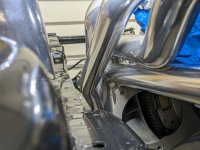
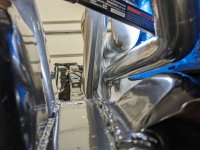
Tonight I test fitted the headers. I am installing the James Duff, SS Dominator headers and their duel exhaust setup. The headers are very nice and well made. As with any headers on a Bronco. The drivers side header installs easy with plenty of clearance. The passenger side header is a different story. It was pretty easy to install but it is a tight fit at several points. The passenger header clears everything and I only found one place that is closer than I'd like. There is less than, an 1/8 of an inch between the outermost pipe and the frame rail. Otherwise the fitment is much improved over the old style Duff long tube headers that I tried to fit.
I still need to order a good set of header gaskets. What brands have worked well for you all? I have a 96, 5.0 and I will be running EFI. Also, are there better header fasteners than what I have pictured? These came with the old style Duff headers.
Attachments
-
 PXL_20231130_234654742.jpg168.1 KB · Views: 34
 -
 PXL_20231130_234736494.jpg154.2 KB · Views: 35
 -
 PXL_20231201_005715364.jpg198.7 KB · Views: 32
 -
 PXL_20231201_005606268.jpg240.3 KB · Views: 32
 -
 PXL_20231201_005636092.jpg188.2 KB · Views: 34
 -
 PXL_20231201_005646417.jpg221.3 KB · Views: 29
 -
 PXL_20231201_005626463.jpg211.4 KB · Views: 36
Pictures of the passenger side header fitment.
Attachments
-
 PXL_20231201_010132046.jpg161.1 KB · Views: 35
 -
 PXL_20231201_010025024.jpg234.5 KB · Views: 34
 -
 PXL_20231201_010048202.jpg141.3 KB · Views: 28
 -
 PXL_20231201_010148819.jpg245.1 KB · Views: 30
 -
 PXL_20231201_010158400.jpg271.3 KB · Views: 32
 -
 PXL_20231201_005736526.jpg212.1 KB · Views: 32
 -
 PXL_20231201_005850579.jpg241.8 KB · Views: 28
 -
 PXL_20231201_005947584.jpg244.3 KB · Views: 24
 -
 PXL_20231201_005828662.jpg153.5 KB · Views: 25
 -
 PXL_20231201_005823137.jpg162.2 KB · Views: 37
Congrats, you have successfully made it so that you’re never going to want to drive it! Going to be too nice.
omureebe
Full Member
- Joined
- Jun 18, 2013
- Messages
- 402
Boy I've had good luck with Remflex - they do a super job sealing. I'm 90% sure it's part# 3003 since I have rectangular ports.Yesterday, after work it was beautiful outside. So I rolled the chassis out of the garage to clean off the body shop dust. A good blast of compressed air and a light rinse with the garden hose. It cleaned up pretty easily.
Tonight I test fitted the headers. I am installing the James Duff, SS Dominator headers and their duel exhaust setup. The headers are very nice and well made. As with any headers on a Bronco. The drivers side header installs easy with plenty of clearance. The passenger side header is a different story. It was pretty easy to install but it is a tight fit at several points. The passenger header clears everything and I only found one place that is closer than I'd like. There is less than, an 1/8 of an inch between the outermost pipe and the frame rail. Otherwise the fitment is much improved over the old style Duff long tube headers that I tried to fit.
I still need to order a good set of header gaskets. What brands have worked well for you all? I have a 96, 5.0 and I will be running EFI. Also, are there better header fasteners than what I have pictured? These came with the old style Duff headers.
Good luck!
You got that write.Congrats, you have successfully made it so that you’re never going to want to drive it! Going to be too nice.
The body is ready to be stripped and prepared for paint. It may get sprayed in January.Looks like you have been busy! Very nice looking Headers.
How's the Body coming along? Seems that part always takes the longest time.
Thanks for suggesting, I will check them out.Boy I've had good luck with Remflex - they do a super job sealing. I'm 90% sure it's part# 3003 since I have rectangular ports.
Good luck!
I saw pictures of your Special Decor on 6G that you sent. Very nice truck! I was hoping there was some progress for you.The body is ready to be stripped and prepared for paint. It may get sprayed in January.
This is the only Special Decor I have built now. One of my 77s is a SD but not completed yet.
I love you 6G, very very nice. I once had a release day reservation for a BL 2dr. With plans to do as you have done. It was going to be all white with an orange Decor stripe. Reverse paint to my 76 and homage to my first bronco. A 77 all white Ranger that I bought in 1978. After several months I canceled the reservation and put keep my focus on the 76. Once it running again I may pursue the 6G dream.I saw pictures of your Special Decor on 6G that you sent. Very nice truck! I was hoping there was some progress for you.
This is the only Special Decor I have built now. One of my 77s is a SD but not completed yet.
View attachment 914893
I went from building 15 or so Early Ford Broncos to the 6G Broncos for about 2 years. Now that they are complete it's time to get back to the earlier ones and get them finished.
Good luck with the Special Decor! I am looking forward to more progress.
Good luck with the Special Decor! I am looking forward to more progress.
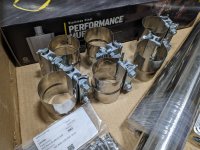
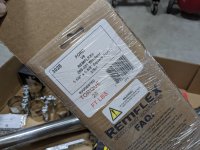
Un-boxed the SS Dominator, duel exhaust kit. Will start test fitting this week. Never been a fan of kits, because they never fit as advertised. Wish me luck.
Attachments
-
 PXL_20231202_214103507.jpg248.4 KB · Views: 30
 -
 PXL_20231202_214048547.jpg255.2 KB · Views: 27
 -
 PXL_20231202_214053571.jpg256.5 KB · Views: 24
 -
 PXL_20231202_214026698.jpg277.9 KB · Views: 27
 -
 PXL_20231202_214057185.jpg228.8 KB · Views: 26
 -
 PXL_20231202_214120312.jpg222.7 KB · Views: 24
 -
 PXL_20231202_214041979.jpg259.2 KB · Views: 32
Bruners4
Newbie
I too am a Remflex fan as I see JD is. But there are other factors to insure a long leak free header installation. First is to make sure that the exhaust port surface is clean and flat. Second is to make sure the same is true of the header flange. Test fitting w/o a gasket and checking for gaps between the surfaces is hard to do but necessary. In your current situation, this will be very easy.
For fasteners I only use the ARP header studs. With their fine threaded 12-point nuts, you can get a more even and consistent torque on them.
The key is the maintenance of the torque on the header bolts/nuts. I retorque after the first 2 to 6 heat cycles. Then it becomes a once a week check until finding that I'm not adding anything to them. Then I recheck every oil change. Over time you learn what they want and can retorque as you feel it is needed.
I've followed this Technik multiple times and have zero leaks. My current '96 Bronco has the original header gaskets installed since 2017 and 80k miles. It now has become part of the annual maintenance cycle.
Everything is looking great, and I can't wait to hear it!
Similar threads
- Replies
- 609
- Views
- 173K
- Replies
- 0
- Views
- 145
- Locked
City: Bowling Green, Kentucky
Price: $16500
- Replies
- 2
- Views
- 633


