Community
Message Forum
Photo Gallery
Event Calendar
Book Reviews
Bronco Wallpaper
Bronco FAQ
Link Back to CB!
Photo Gallery
Event Calendar
Book Reviews
Bronco Wallpaper
Bronco FAQ
Link Back to CB!

Buy / Sell


Bronco Tech
3 Arm Wiper Setup
Fix Motor Mount
Roll Cage Braces
Throttle Body 65mm
Wheel Alignment
Heat Riser Replacement
Vent Window Repair
Center Console Mount
Straighten Bumper
Ford 6R80 6 spd
More Tech...
Fix Motor Mount
Roll Cage Braces
Throttle Body 65mm
Wheel Alignment
Heat Riser Replacement
Vent Window Repair
Center Console Mount
Straighten Bumper
Ford 6R80 6 spd
More Tech...

Install the app
-
Welcome to ClassicBroncos! - You are currently viewing the forums as a GUEST. To take advantage of all the site features, please take a moment to register. It's fast, simple and absolutely free. So please join our community today!If you have problems registering or can't log into your account, please contact Admin.
You are using an out of date browser. It may not display this or other websites correctly.
You should upgrade or use an alternative browser.
You should upgrade or use an alternative browser.
What have you done to your Bronco today?
- Thread starter Heus33
- Start date
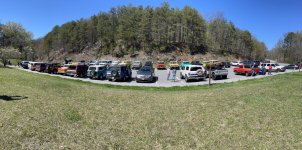
That looks like a good turn outDrove it around today, it’s been busy making friends
- Joined
- Jun 5, 2007
- Messages
- 1,292
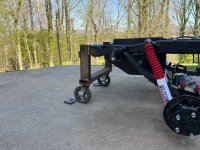
Pulled everything off the frame that was bolted down, plus cut off the shock towers. No broken bolts I’m happy to report. Just the suspension left. Wire wheeled most of the top.
Hopefully get the rest of the top side done tomorrow, then pull the suspension. Proceed to wire wheel the bottom. Maybe even get the hoops and rear shock mounts welded on.
Hopefully get the rest of the top side done tomorrow, then pull the suspension. Proceed to wire wheel the bottom. Maybe even get the hoops and rear shock mounts welded on.
Attachments
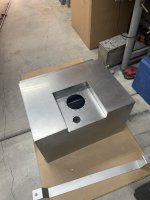
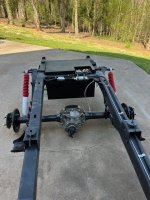
Finished bending and installing my stainless brake lines and installed my home made 20 something gallon tank. Also ran the fuel supply line up front and installed the pre-pump filter and pump. Need to
run my return line down the opposite rail and touchup a few places with paint, and I'm ready to install the body back on the frame.

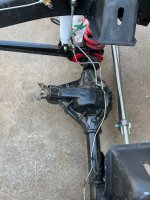
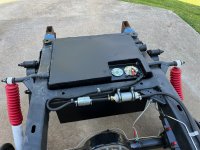
run my return line down the opposite rail and touchup a few places with paint, and I'm ready to install the body back on the frame.


Attachments
- Joined
- Jun 5, 2007
- Messages
- 1,292
Well in typical 56 year old off road vehicle fashion, the bronco did not want to give up the ghost. Fought all day with the radius arms. But they won in the end.
Both stripped the f out. So if anyone has a set near mn, hit me up. I’m looking. But did get the suspension off in the end.
Goal was to wire wheel the bottom of the frame, and around the spots that had springs in the way. But I Only work till 5 pm tomorrow/today though. Should get that goal done a day late.
Attachments
Last edited:
While painting my steering column parts (rebuilding 3 on the tree) I decided to paint my Grant steering wheel. It’s the cheaper polyurethane version (not wood) that was installed by the PO and I’ve never liked the color as it is reddish-brown and clashed with my reddish-orange paint.
A few coats of satin black krylon fusion came out pretty well (just lightly sanded and cleaned to prep). I’m considering wrapping it with one of those stitched leather kits (needed to paint it anyway as the color would have shown where nubs leading to the spokes are), but I think the paint would hold up pretty well and could always be touched up.


A few coats of satin black krylon fusion came out pretty well (just lightly sanded and cleaned to prep). I’m considering wrapping it with one of those stitched leather kits (needed to paint it anyway as the color would have shown where nubs leading to the spokes are), but I think the paint would hold up pretty well and could always be touched up.
Woke it up from winter storage! Pumped up the tires (still aired down from a Fall trail ride), charged the battery, and added tranny fluid. Started right up!
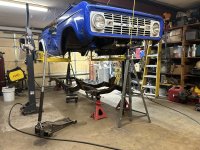
Got it moved to the new house finally, pulled the Dana 60 out. Swapped the tires onto the new rims, got it on jack stands.

Thank you sir, I cant take credit though. I dont even know the paint code. When we bought the bronco it was this color. I'll eventually paint it whiteWhat color is that Cmaxx252? Looks great.
She's got some rough corners and hail damage from the previous owner.
Last edited:
Finally got both sets of flip sleeve bushings to be able to continue TRO for my passenger side knuckle. I got the sleeves from WFO Concepts and Ruff Stuff. I did drill it to 3/4 already, but not to 7/8" yet. And it looks like neither are going to fit on the new (not installed yet) GM 1 ton tie rod end O'Reilly's part # ES 2234R. They go on, but do not seat all the way. Yes I tried both directions.
The sleeves do fit on the old passenger side tie road end, but they are a little worse for wear and I was going to change it, And those new sleeves seem to BIG for that old one.
Suggestions?
The sleeves do fit on the old passenger side tie road end, but they are a little worse for wear and I was going to change it, And those new sleeves seem to BIG for that old one.
Suggestions?
Are you going to go single or double shock up front?Just threw this duff hoop on for fun. Been sitting in my closet since 2007
- Joined
- Jun 5, 2007
- Messages
- 1,292
If I can make a sway bar work I’ll be going single. If not it will be double.Are you going to go single or double shock up front?
It’s a kit I've had in my closet since 2009 when I bought it off a member here. I think he bought it in 2007 ish. So it’s pretty old kit. Never used with no directions. Should be fine right
I stumbled across that same kit a few months back - unfortunately, I don't have a welder, so I was wondering how this hoop faired and considering it, if I can't find a generous neighbor.If I can make a sway bar work I’ll be going single. If not it will be double.
It’s a kit I've had in my closet since 2009 when I bought it off a member here. I think he bought it in 2007 ish. So it’s pretty old kit. Never used with no directions. Should be fine right
Haha...I suppose it should be fairly self-explanatory. With any bit of care, you'll get it on straight!
- Joined
- Jun 5, 2007
- Messages
- 1,292
I’m pretty sure duff still has all the plans. I’m going to call them for a copyI stumbled across that same kit a few months back - unfortunately, I don't have a welder, so I was wondering how this hoop faired and considering it, if I can't find a generous neighbor.
Haha...I suppose it should be fairly self-explanatory. With any bit of care, you'll get it on straight!
- Joined
- Nov 8, 2008
- Messages
- 116
Absolutely.Thank you sir.
- Joined
- May 28, 2013
- Messages
- 1,844
Reinstalled heater, pass stainless vent window and rehab’d the handle. Front ebrake cable mounted, rehab’d hardware. Installed/wired radio and retro sounds dash speaker. Mounted throttle cable to oem pedal. Installed beauty rings to marker lights, repaired one housing and replaced one pigtail. Also installed new glovebox. And Cleaned the garage!
Waiting on solo motorsports radius arms, then button up front end and install the motor!


Sent from my iPhone using Tapatalk
Waiting on solo motorsports radius arms, then button up front end and install the motor!


Sent from my iPhone using Tapatalk
Similar threads
- Replies
- 38
- Views
- 6K
- Replies
- 23
- Views
- 4K
- Replies
- 31
- Views
- 2K
- Replies
- 5
- Views
- 720


