B.C. Broncos 24 Gallon Fuel Tank
Tech article by admin and filed under Gas TanksProduct Review by Jon Hanna (Admin)
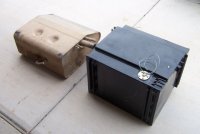
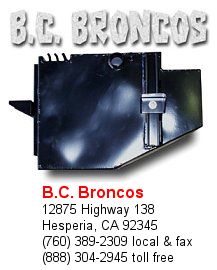 Let’s face it, Ford did a few things on our beloved Broncos that probably could have been done better; like those ridiculously small gas tanks. Having to stop 3 times on my way to Moab to fill up the 12 gallon stock tank in my ’72 was really getting annoying. Luckily B.C. Broncos and their heavy duty 24 gallon had the perfect solution to my fuel tank inadequacies.It’s obvious when you take it out of the box that the B.C. Broncos tank is a well constructed, heavy duty product. And at 24 gallons it’s the highest capacity Bronco tank available, which fit my needs perfectly. But the best feature of this tank is the flexible design. The unique and easy to adjust mounting system allows you to tuck the tank right up against the bottom of the bed. This lets you take advantage of any size body lift and get the tank up and out of harms way for maximum ground clearance. Plus the track mounting system doesn’t have any straps or ‘J’ bolts to deal with.
Overall I’m very happy with the tank. It’s a high quality product from a trusted vendor, installation was very easy and the unique design maximizes fuel capacity while still keeping the tank away from the rocks. Scroll down for installation instructions as provided by Chuck at B.C. Broncos. I’ve added some photos and tips (my comments in gray) that should help make installation a snap.
Remove the stock tank:
- It’s always a good idea to liberally spray all tank and skid plate mounting bolts with penetrating oil 1-2 days before you begin the removal process.
- Move the Bronco to a flat and level area and block the front wheels.
- Remove the negative battery cable from the battery. If you’re one of those people that normally skips this step, just do it! You’ll be dealing with gas fumes and the last thing you need is to accidentally bump some wire causing an ignition spark.
- Drain the main tank by either siphoning into an approved gas container or by running the tank dry.
- If necessary, raise the rear of the Bronco to have adequate height to remove and install the rear gas tank. Support the Bronco’s frame on jack stands as necessary. With my 3.5″ suspension lift it would have been possible to install the tank without jacking up the rear end. However, taking the rear tires off made it much easier to access the frame.
- Disconnect the fuel filler hose and any vent hoses, EFI return hoses or any emission hoses that may be present on the side of the fuel tank. I highly recommend ordering B.C. Broncos filler hose kit when you order the tank. After years of use both the filler and vent hoses will probably need to be cut off and you won’t be able to reuse them.
- Disconnect the fuel gauge sending unit wire at the rear of the fuel tank.
- Disconnect and plug the fuel line at the fuel gauge sending unit at the rear of the fuel tank.
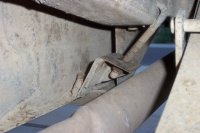
- Support the rear fuel tank with a scrap piece of plywood and a floor jack at approximately the center of the tank bottom.
- Loosen the nuts securing the tank mounting strap(s) and swing the strap down. Disengage the strap’s “T” end from the frame and remove the strap.
- Lower the fuel tank and disconnect the vent hose at the top of the tank.
- Lower and remove the fuel tank.
- Remove the 4 stock tank brackets from the frame.
B.C. Broncos Tank Installation:
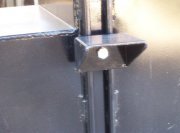
- Slide the special Unistrut nuts (with the nylon insert facing out) into the Unistrut rails.
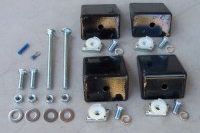
- Insert a provided mounting bolt through the tank-mounting tab and secure the tab to the tank’s Unistrut nuts (finger tight only). Orient the mounting tabs so the flat part of the mounting tab is up and against the frame rail/cross member.
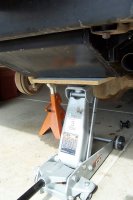
- Support the new fuel tank on a floor jack using a scrap piece of plywood to protect the finish and distribute the load across the bottom of the tank.
- Carefully raise the fuel tank so the fuel line and vent/return lines can be connected.
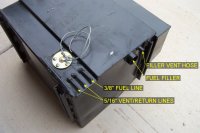
- Connect the 3/8″ fuel line and the 5/16″ return/vent lines using hose clamps. Note: If the return/vent lines are not needed connect the two tank nipples with a short length of 5/16″ hose and secure the ends with hose clamps. (see photo on the right)
- A piece of cork or old inner tube (NON porous material) can be cut and placed on the upper four corners of the fuel tank if the tank will be mounted touching the underside of the body. I found that shock mount bushings fit perfectly between the tank and body. They give just enough clearance to avoid rubbing the tank on the bed.
- Position the forward edge of the fuel tank against the forward frame cross member.
- Raise the tank into position. Slide the side mounting tabs up to make contact with the frame rails. Slide the forward mounting tabs up to make contact with the frame cross member.
- Position the tank to the frame rails so the gap is even on both sides.
- Locate the tank’s forward mounting tabs over the existing holes in the forward frame cross member.
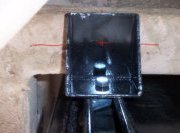
See the photos above for a trick to mark the frame hole location in the mounting tabs. Draw a cross on the frame, extending the lines in all directions from the hole. Then when you slide the mounting tab up against the frame you can mark the center of the lines and this will be where you drill into the mounting tab. - Locate, then center punch and drill a 7/16″ hole in each forward mounting tab.
- Insert 7/16″ bolts up through the fuel tank’s forward mounting tabs and through the forward frame cross member. Secure with 3/8″ nut and washer only finger tight at this point.
- Locate, then center punch and drill through the tank’s side mounting tabs and through the bottom of the frame rail using a 7/16″ drill bit.
I chose to use the existing oval holes in the frame rather than drill new ones. If you do this be sure to use an extra large washer on the backside of the hole. - Using an approximately 2′ length of stranded wire (speaker wire or equivalent), insert the wire up through the fuel tank’s side mounting tab and frame and out through the end of the frame rail at the rear of the Bronco. This is a good trick for getting bolts into hard to reach places. The wire is simply a tool to help you pull the bolt through. It isn’t for grounding or anything.
- Twist the wire strands around the provided 3/8″ bolt. Carefully fish the bolt though the end of the frame rail and down through the holes drilled in step 14.
- Secure with provided 3/8″ nut and washer only finger tight at this point.
- Raise the tank into its final mounting position.
- Tighten the mounting tab to the Unistrut bolts and to the frame mounting hardware. NOTE: It is highly recommended that the mounting tabs be tack welded at the points where there mounting tabs come in contact with the Unistrut. Both the bolts and tack welding will secure the tank. by grinding the tack welds the tank can be repositioned.
CAUTION: DO NOT OVER HEAT AND MELT THE NYLON INSERTS IN THE UNISTRUT NUTS DURING THE TACH WELDING PROCESS. To avoid overheating I only tach welded one area at a time and had a spray bottle of water handy. After each weld I sprayed the area down to quickly cool off the weld and avoid melting the nylon inserts. - Check all mounting hardware for tightness.
- Remove the supporting floor jack.
- Reconnect and secure the fuel filler hose, fuel line(s), vent hoses, EFI return hoses and any emission hoses.
- Reconnect the fuel gauge sender unit wire.
- If used, remove the jack stands and lower the Bronco.
- Fill the tank and check for leaks. If you’ve double checked all your hose connections you shouldn’t have any leaks. However, if you do it’s easier (and safer) to deal with them in your garage than at the gas station. Have a few gallons of gas to put into your tank before going down to the station.
- Reattach the negative battery cable.
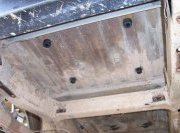
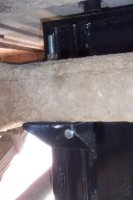
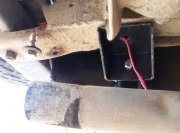
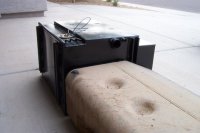
Other photos of the tank and hardware:













November 2nd, 2009 at 10:01 pm
Great article, very informative. I was hoping to get some info on converting to a dual tank set-up, starting from a 12 gallon tank.
November 13th, 2009 at 10:24 am
Dual tanks are pretty easy. You just need to locate the 2nd tank. Either find a stock Bronco tank or some of the aftermarket vendors sell them.