Heater Box Rebuild
Tech article by admin and filed under - Heater, InteriorTech article by John Morton (thesnake)
The heater box in my 66 Half Cab looked pretty sad. I still have the heater box from my previous 73 Bronco sport. The following are the steps I took to refurbish the heater box, plus seal it and installed a new heater core. I bought the following parts from Jeff’s Bronco Graveyarrd.
- Heater core.
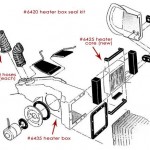
- Heater reseal kit.
Other items I bought:
- (1) can of black Rustoleum.
- (1) can of Krylon Black Fusion.
How to rebuild the box:
- Drain the radiator, this way you won’t get coolant all over the place when you disconnect the heater hoses. (Don’t worry about the two foam pieces around the heater tubes when you disconnect the heater hoses, there are new ones in the kit).
- Remove the four nuts that hold the heater box in place, these are located on the firewall. Passenger side.
- Remove the air duct that goes into the air inlet box on the passenger side kick panel. There are screws holding this in.
- Now you can pull the heater box away from the firewall. My 66 didn’t have any insulation, however my 73 did when I removed it, so you want to pull it away from the firewall carefully to not tear the insulation.
- Undo the defroster duct clamps, be careful with these as they are brittle and easy to tear.
- Disconnect all the cables going to the defrost and heat controls.
- Disconnect the wiring that goes to the blower motor. On my 66 it was a red wire and an orange wire. There is also a ground wire going to the box.
- Now the box should come out freely.
- Now remove all the screws on the heater box that hold the large hose to the intake. Once this is removed, you face the dreaded heater core.
- Remove the rest of the screws that hold the back panel on and pull the panel off.
- Once the back panel is off, you can remove the clip that holds the heater core.
- What I did was to pull the heater core out, pull out the old foam insulation.
- I drilled out the 7 pop rivets on the heater box, then thoroughly cleaned the heater box inside and out using degreaser/dish washing soap. Now let the heater box dry after rinsing.
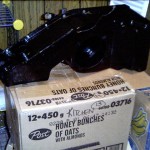
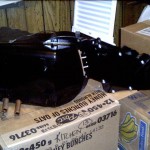
- After wire brushing off the rust, I sprayed all areas of metal on the heater box with black rustoleum (I forgot about using primer until I had it back together). I sprayed all areas of plastic with krylon black fusion. I insured that I got two good coats of both on all areas inside and outside of the heater box.
- After the heater box is fully dried, I installed the heater reseal kit along with the new heater core.
- Once the majority of the kit was installed, I used small screws, nuts and washers to secure the areas where the pop rivets had been.
- Now reverse the steps for installation. You’ll have a heater box that is not only sealed and has a reliable heater core, but it’ll look decent too!!!
Tech article by John Morton (thesnake)


