






Community

Buy / Sell



Bronco Tech
Fuel Tank Access Plate
3 Arm Wiper Setup
Fix Motor Mount
Roll Cage Braces
Throttle Body 65mm
Wheel Alignment
Heat Riser Replacement
Vent Window Repair
Center Console Mount
Straighten Bumper
Ford 6R80 6 spd
More Tech...
3 Arm Wiper Setup
Fix Motor Mount
Roll Cage Braces
Throttle Body 65mm
Wheel Alignment
Heat Riser Replacement
Vent Window Repair
Center Console Mount
Straighten Bumper
Ford 6R80 6 spd
More Tech...

-
Welcome to ClassicBroncos! - You are currently viewing the forums as a GUEST. To take advantage of all the site features, please take a moment to register. It's fast, simple and absolutely free. So please join our community today!If you have problems registering or can't log into your account, please contact Admin.
You are using an out of date browser. It may not display this or other websites correctly.
You should upgrade or use an alternative browser.
You should upgrade or use an alternative browser.
What have you done to your Bronco today?
- Thread starter Heus33
- Start date


Mac2Night
Bronco Guru
- Joined
- Aug 10, 2005
- Messages
- 2,204
So, I undertook what I had been wanting and planning on doing but just putting off...... I stripped the engine bay, had it painted to match the exterior and installed a newly built motor and accessories. It wasn't as smooth as I had hoped doing it by myself in the evenings after everyone was in bed, but it wasn't too bad either. I'm liking the results and now it's done!
Attachments




Ordered some parts from Wild Horses 4x4 and believe I got my p/s issue sort of figured out. It at least is steering now. I need to put my fuel tank skid plate from Toms on next.

- Joined
- Apr 19, 2014
- Messages
- 2,474
Looks terriffic Mac2night!

- Joined
- Mar 8, 2007
- Messages
- 81,996
Come on man, you got this 
So the new cap for the front of the steering box, required me to cut out a piece of the core support. Body saw time and modify my blue brace for what will soon be a new hyd assist line on the top and the end of the box.
So now the steering box is installed, both braces (Duffs and Blue) back on. Lines connected and its bleed.
Leak check complete. On to the pitman arm....
FYI yes that is a AGR top cap and NO I did not get it from them or have them do anything to the box. DIY4X for the front cap.
- Joined
- Mar 8, 2007
- Messages
- 81,996
So, I undertook what I had been wanting and planning on doing but just putting off...... I stripped the engine bay, had it painted to match the exterior and installed a newly built motor and accessories. It wasn't as smooth as I had hoped doing it by myself in the evenings after everyone was in bed, but it wasn't too bad either. I'm liking the results and now it's done!
Awesome brother...


Took the 76 for a drive to a local muscle car restoration shop. Had them take a look at it for body work and paint. I'm on their wait list for around December. They just happened to be working on a custom build 68, looks sweet, many custom touches. Turns out I have meet the owner of this 68 and I already have his number in my phone. Going to give him a call this weekend.
www.musclecarconcepts.com
www.musclecarconcepts.com
Attachments


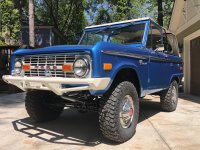
After 15+ years, mine is back on the road. Finished front end rebuild, rebuilt carb, finished front Ch*vy disc conversion.
Still needs lots of work... But hey, one step at a time.

Sent from my Pixel 4a using Tapatalk
Still needs lots of work... But hey, one step at a time.

Sent from my Pixel 4a using Tapatalk
- Joined
- Apr 19, 2014
- Messages
- 2,474
After 15+ years, mine is back on the road. Finished front end rebuild, rebuilt carb, finished front Ch*vy disc conversion.
Still needs lots of work... But hey, one step at a time.
Sent from my Pixel 4a using Tapatalk
Congratulations!
Got a new p/s belt and worked on bleeding the system some more. I think I am going to have to replace the pump....dang it.
- Joined
- Mar 8, 2007
- Messages
- 81,996
Very cool. Congrats!!
After 15+ years, mine is back on the road. Finished front end rebuild, rebuilt carb, finished front Ch*vy disc conversion.
Still needs lots of work... But hey, one step at a time.
Sent from my Pixel 4a using Tapatalk
Unloaded the new shoes, new tires, stepped up to 17 beadlocks. Post some pics once mounted. Can't wait
Awesome, so what is the plan for the old tires and rims?
- Joined
- Apr 19, 2014
- Messages
- 2,474
Yeah, awesome! and pics please, gotta have pics.


I center the Bronco in the garage. Took measurements of the suspension lean and rake as well as axle to frame dimensions. A whooping 3.125" of lean/rake from drivers front to passenger rear. I will post more details in my build thread later today or sometime this week.
Lunch is over, now back out to the garage to start the "2.5 DUCK TUFF" install.
Lunch is over, now back out to the garage to start the "2.5 DUCK TUFF" install.
Attachments


Well this bit of fun a while back, lead to needing one of these fancy gas tank skid plates. And when I installed the new bumpers, I mounted them (with the tubing going way inside the frame rails). So I go to mount it today and realized I have to go thru the old skid plate frame mount holes and drill into the tubing I inserted a while back. I need an inverted drill press...One step fwd, one step back.
Attachments


- Joined
- Sep 26, 2013
- Messages
- 2,398
Unloaded the new shoes, new tires, stepped up to 17 beadlocks
Post some pics once mounted. Can't wait
Stop teasing us, Dave
Similar threads

- Replies
- 38
- Views
- 9K

- Replies
- 23
- Views
- 6K

- Replies
- 34
- Views
- 5K
- Replies
- 5
- Views
- 2K
