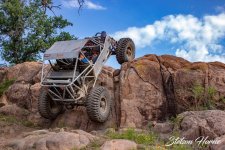
Put stickies on that and you could almost climb a vertical wall...That’s what I call a “minimalist” vehicle! What’s the curb weight, 1,800# ????
Community
Message Forum
Photo Gallery
Event Calendar
Book Reviews
Bronco Wallpaper
Bronco FAQ
Link Back to CB!
Photo Gallery
Event Calendar
Book Reviews
Bronco Wallpaper
Bronco FAQ
Link Back to CB!

Buy / Sell


Bronco Tech
3 Arm Wiper Setup
Fix Motor Mount
Roll Cage Braces
Throttle Body 65mm
Wheel Alignment
Heat Riser Replacement
Vent Window Repair
Center Console Mount
Straighten Bumper
Ford 6R80 6 spd
More Tech...
Fix Motor Mount
Roll Cage Braces
Throttle Body 65mm
Wheel Alignment
Heat Riser Replacement
Vent Window Repair
Center Console Mount
Straighten Bumper
Ford 6R80 6 spd
More Tech...

Install the app
-
Welcome to ClassicBroncos! - You are currently viewing the forums as a GUEST. To take advantage of all the site features, please take a moment to register. It's fast, simple and absolutely free. So please join our community today!If you have problems registering or can't log into your account, please contact Admin.
You are using an out of date browser. It may not display this or other websites correctly.
You should upgrade or use an alternative browser.
You should upgrade or use an alternative browser.
What have you done to your Bronco today?
- Thread starter Heus33
- Start date
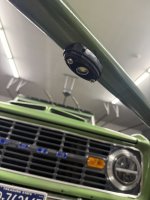
Roll cage is back in! Hopefully get a couple friends over to put the top back on this week.

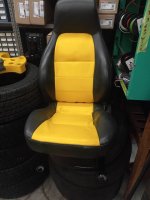
Not sure, my guess is 3300# there’s a Toyota mini truck in there somewhere lol, it turned out really nice. Took him 10 years to build it.That’s what I call a “minimalist” vehicle! What’s the curb weight, 1,800# ????
It has a lot more amenities than my minimalist vehicle, his has a backup camera, dash and pickup box, mine just has a master kill switch, and nothing that doesn’t provide brute usefulness
Yeah they both climb walls
Attachments
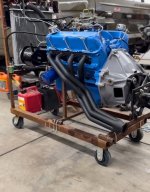
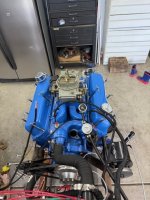
Finished setting up the engine run stand. Cerakoted the headers, installed v belt. installed correct starter for manual bell housing. Primed oil system, made a few rotations by hand. Troubleshooting the no crank issue currently. Should be able to fire and break in engine this weekend.
Attachments
Not much progress, but at least I’m getting in the shop. Should be finished in 3 or four more years!
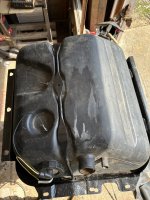
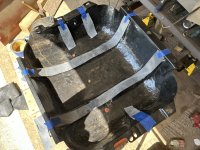
Decided to pad the tank with some strips of inner tube. Not sure if it’ll help but should keep it from squeaking. Lol
Got to cut fuel line and plumb both tanks.
Decided to pad the tank with some strips of inner tube. Not sure if it’ll help but should keep it from squeaking. Lol
Got to cut fuel line and plumb both tanks.
Attachments
- Joined
- Nov 3, 2003
- Messages
- 49,342
Since you have your tank out, conveniently (
 ), would you be able to take a picture of the inside?
Maybe pop the sending unit out and take a picture of how the main filled tube and the fill vent are oriented. Curious how the factory did it for the’77 model.
Not sure if you can see much from that angle, but if so, that would be great.
Maybe pop the sending unit out and take a picture of how the main filled tube and the fill vent are oriented. Curious how the factory did it for the’77 model.
Not sure if you can see much from that angle, but if so, that would be great.
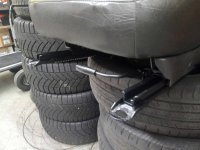
Is that considered an “air ride” system, just using tires? LolDriver side reassembled and ready for test fitting
View attachment 942239
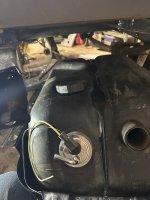
Not sure how well it will show, but it’s the best I can do without a flex cam. Note to self: Have a critical need to buy one this week!Since you have your tank out, conveniently (), would you be able to take a picture of the inside?
Maybe pop the sending unit out and take a picture of how the main filled tube and the fill vent are oriented. Curious how the factory did it for the’77 model.
Not sure if you can see much from that angle, but if so, that would be great.
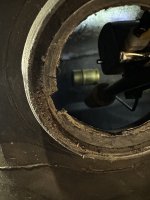
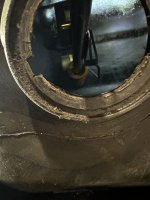
1st pic is outside the tank in the proper orientation. The others are kinda sorta in the tank. If I get the camera before the tank gets buttoned up I’ll do a better job and post.
Edit: just realized the 1st photo is NOT an out of tank photo. OOPSIE
Attachments
Last edited:
- Joined
- Nov 3, 2003
- Messages
- 49,342
Thanks! Interesting stuff going on in there. How do you get a picture of the outlet tube and float, when the outlet tube and float and sending unit are removed?
It doesn’t look like it was taken through the fill port, so I’m still trying to wrap my head around it.
Maybe a picture right down into the fill tube? Maybe with a flashlight?
Thanks for all the work!
It doesn’t look like it was taken through the fill port, so I’m still trying to wrap my head around it.
Maybe a picture right down into the fill tube? Maybe with a flashlight?
Thanks for all the work!
The 2nd and 3rd pics are with the sending unit about halfway in/halfway out of that hole. Had a flashlight shining in the fill port to give some illumination. Probably going to try to find a flexible camera that will link to my phone so I can get a reasonable pic of the sending unit completely in place.Thanks! Interesting stuff going on in there. How do you get a picture of the outlet tube and float, when the outlet tube and float and sending unit are removed?
It doesn’t look like it was taken through the fill port, so I’m still trying to wrap my head around it.
Maybe a picture right down into the fill tube? Maybe with a flashlight?
Thanks for all the work!
Well, not probably, WILL get a flexible camera tomorrow if there’s one in town. Lol
Stay tuned for better pics!
- Joined
- Nov 3, 2003
- Messages
- 49,342
Hah! Now, don’t go spending needleless money on something just because you’re working on a bronco!
But since you were using a flashlight, and really, I’m more interested in how the fill tube and fill vent tube extend, or don’t extend into the tank, you could shine the light down the big fill neck tube and let us see what the shape is.
And now I’m intrigued. There are flex cameras for phones? Now I’m pretty sure I need one of those too!
Paul,
I was hoping for a flexible camera that I could Bluetooth to my phone. The next best option was a rig that recorded to a micro SD card. If my computer wasn’t doing its best imitation of a dead horse I would have got that one. Anyhow, I did get some pics inside the tank, however grainy they may be.
1st pic is just a reference of how the tank is positioned for the other shots.

#1 only clear shot—taken directly by phone.

#2 upper portion of sending unit that is just inside the tank.

#3 better shot of upper sending unit.

#4 shot of inside power connection.

#5. Pic showing pickup and float.

#6. End of pickup tube and float.

All these in the same tank orientation as the 1st pic. Maybe they will be of some benefit to another ‘77 owner.
I was hoping for a flexible camera that I could Bluetooth to my phone. The next best option was a rig that recorded to a micro SD card. If my computer wasn’t doing its best imitation of a dead horse I would have got that one. Anyhow, I did get some pics inside the tank, however grainy they may be.
1st pic is just a reference of how the tank is positioned for the other shots.
#1 only clear shot—taken directly by phone.
#2 upper portion of sending unit that is just inside the tank.
#3 better shot of upper sending unit.
#4 shot of inside power connection.
#5. Pic showing pickup and float.
#6. End of pickup tube and float.
All these in the same tank orientation as the 1st pic. Maybe they will be of some benefit to another ‘77 owner.
Making progress on my Explorer 5.0/4R70W swap. Today marks 3 weeks since I drove it in and started removing the 4.9L. Last night I almost finished up the wiring, now when I turn the key on my relays fire up and it cranks from the key! After work I plan on securing the OBD II port and tidying up the under dash wiring and then i can start welding in my new core support. Fuel regulator should be coming in as well so I might be able to fire it up this weekend 
Similar threads
- Replies
- 38
- Views
- 6K
- Replies
- 23
- Views
- 4K
- Replies
- 31
- Views
- 2K
- Replies
- 5
- Views
- 720


