• Welcome to ClassicBroncos! - You are currently viewing the forums as a GUEST. To take advantage of all the site features, please take a moment to register. It's fast, simple and absolutely free. So please join our community today!
    If you have problems registering or can't log into your account, please contact Admin.

4R70W crossmember issues

levib1

Jr. Member
Joined
Dec 7, 2016
Messages
58
Hello All,

Finally getting around to putting engine and transmission in.

Here's what I have:

1) SBF 302 block
2) 4R70W
3) AA adapter kit - https://www.wildhorses4x4.com/produ...dapter-converter/Bronco_Transmission_Adapters
4) D20 T-shift
5) BC Broncos crossmember - https://bcbroncos.com/shop/engine/e...1-4-speed-cross-member-4r70w-using-d20-tcase/

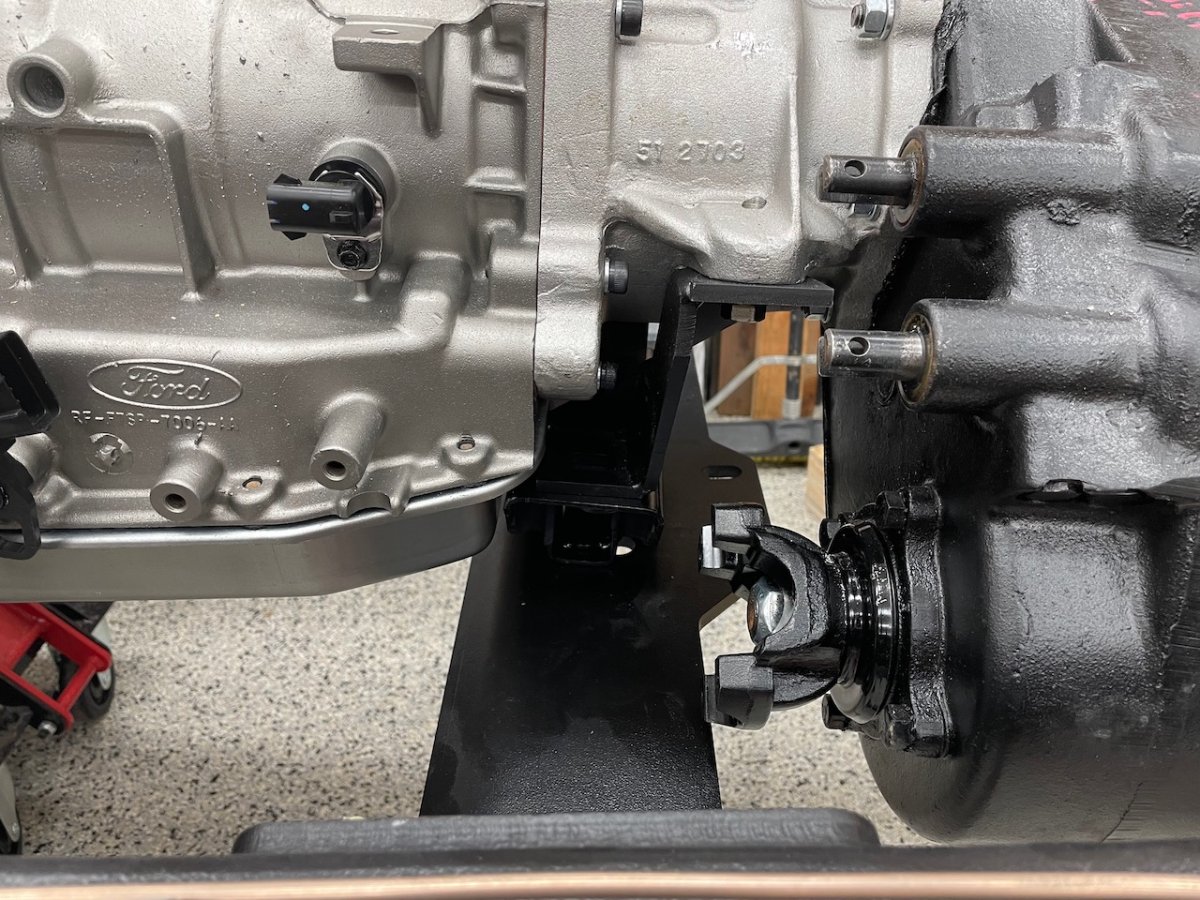
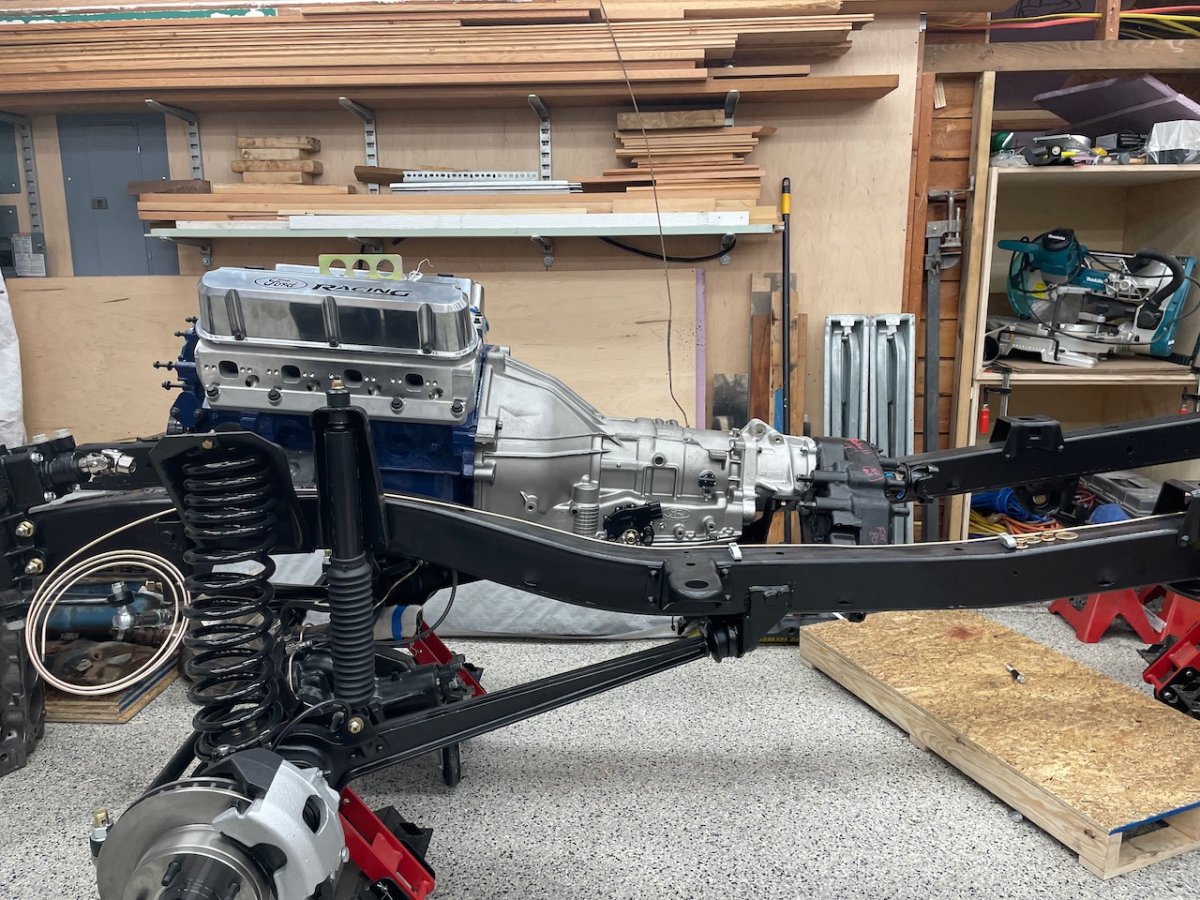
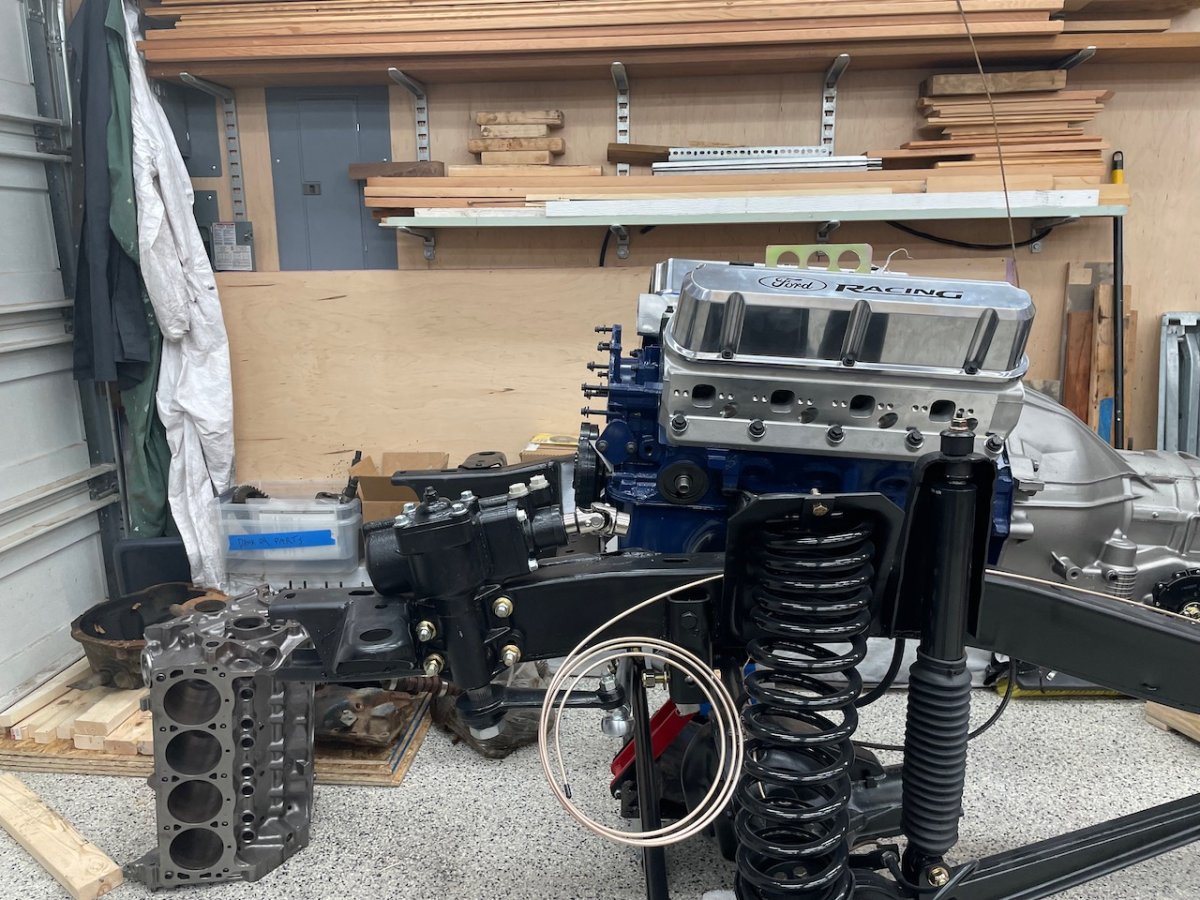
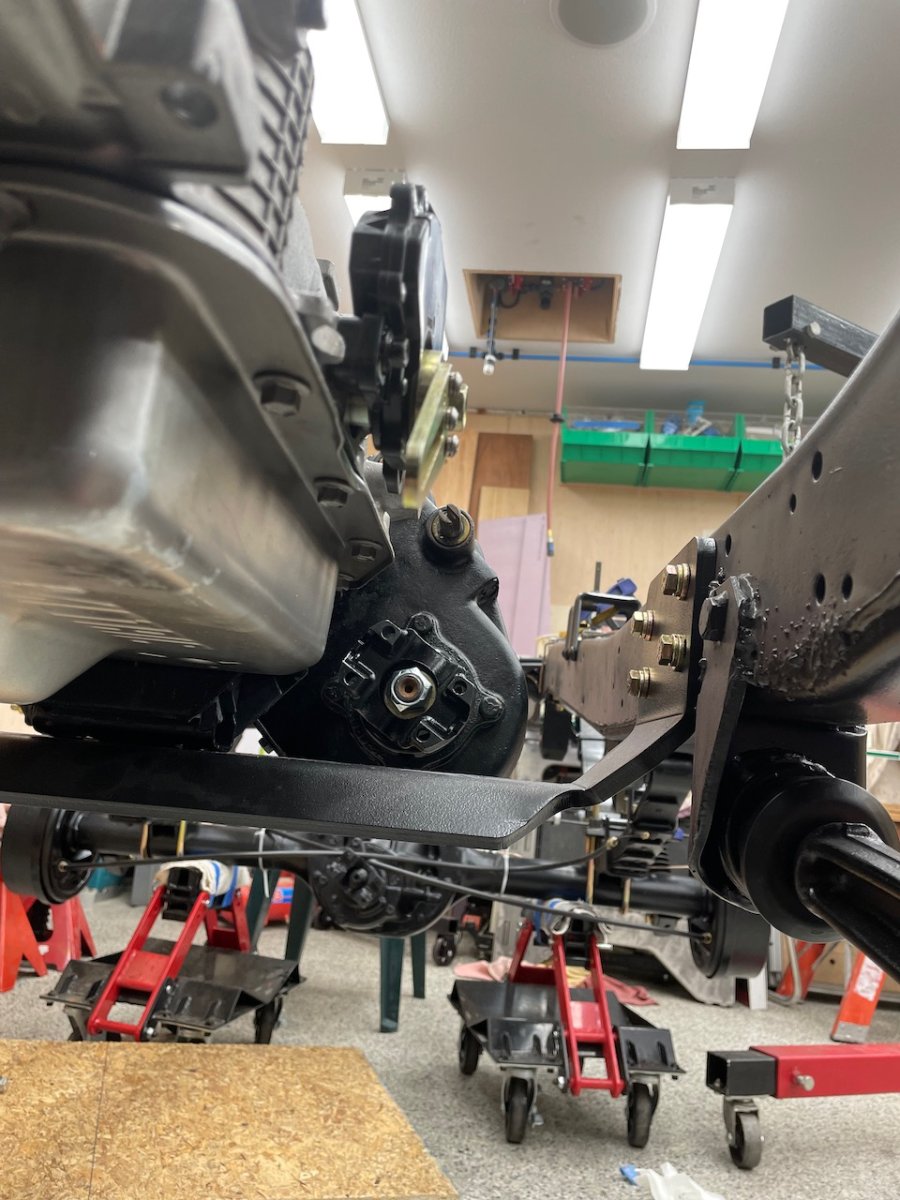
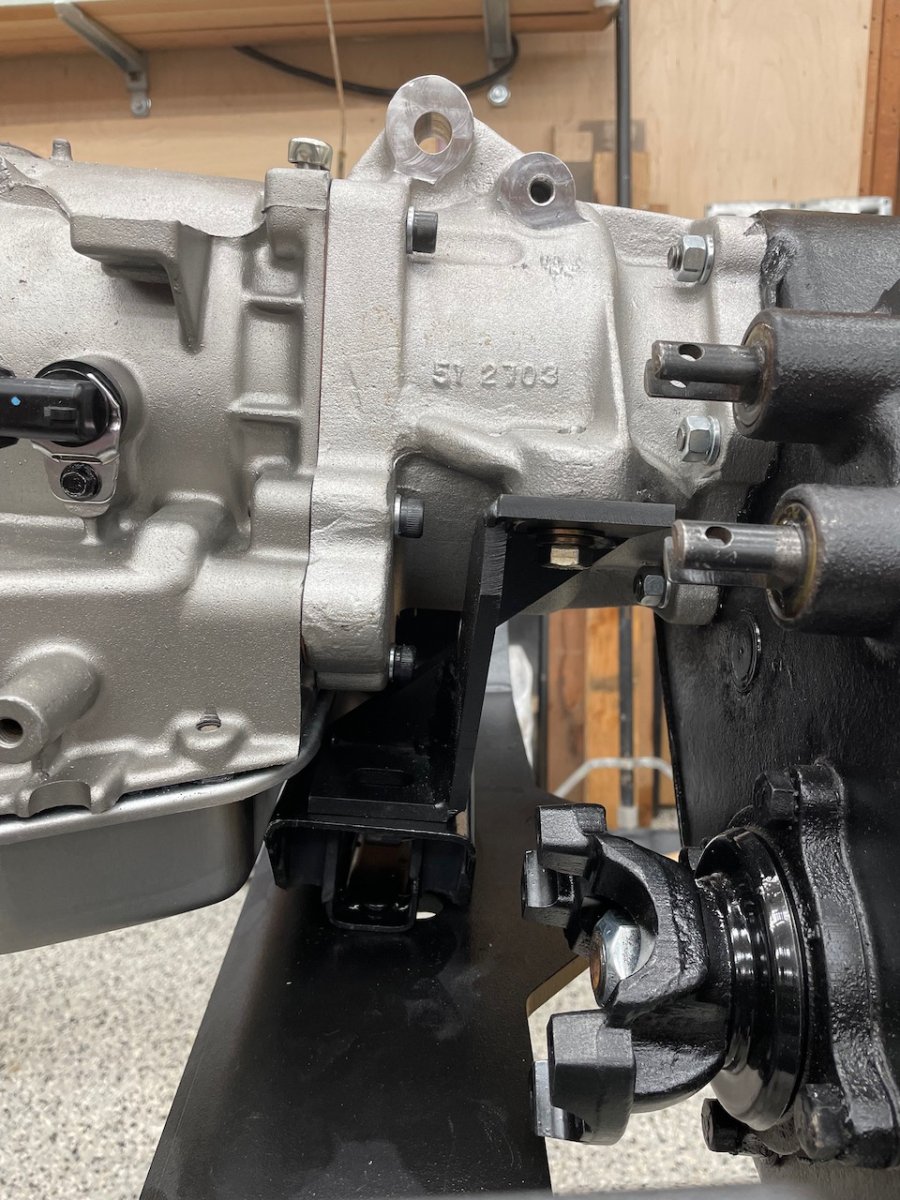
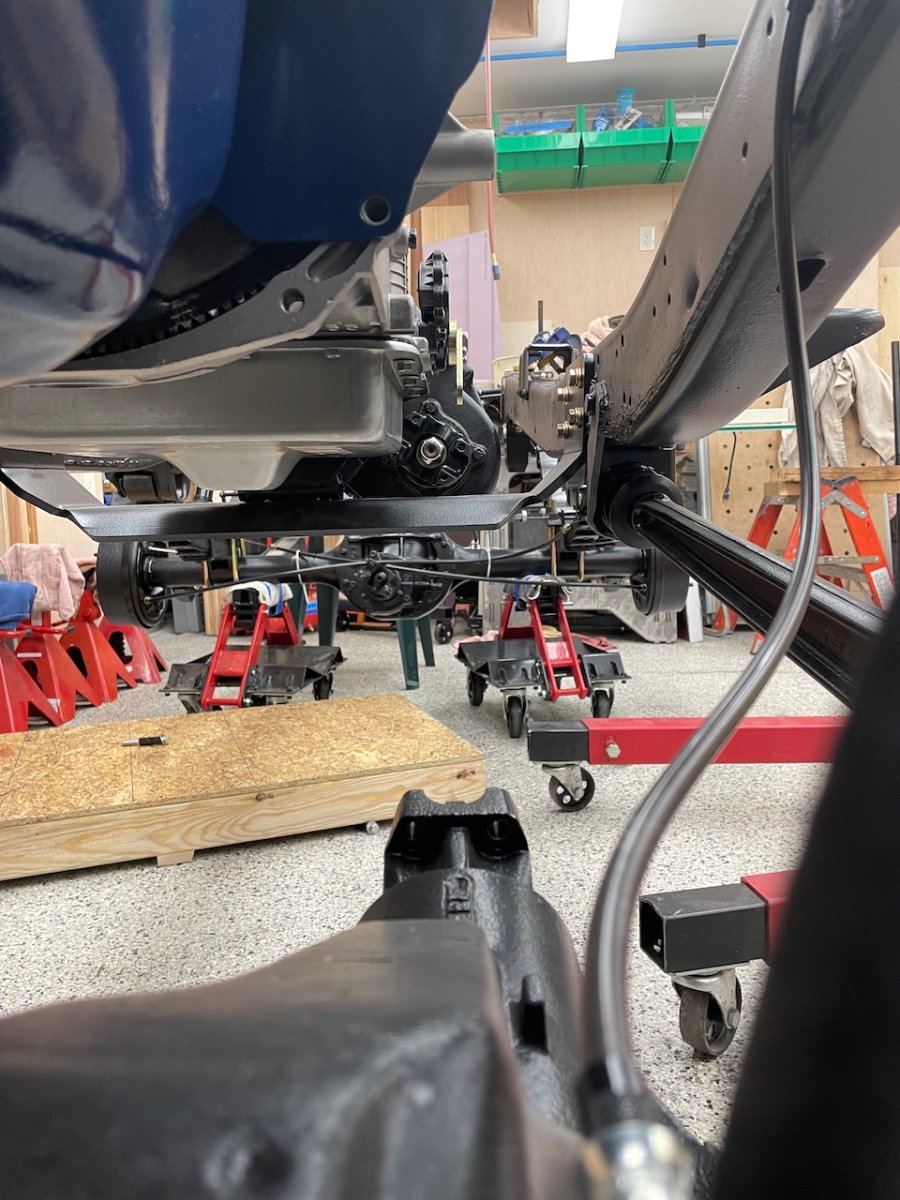
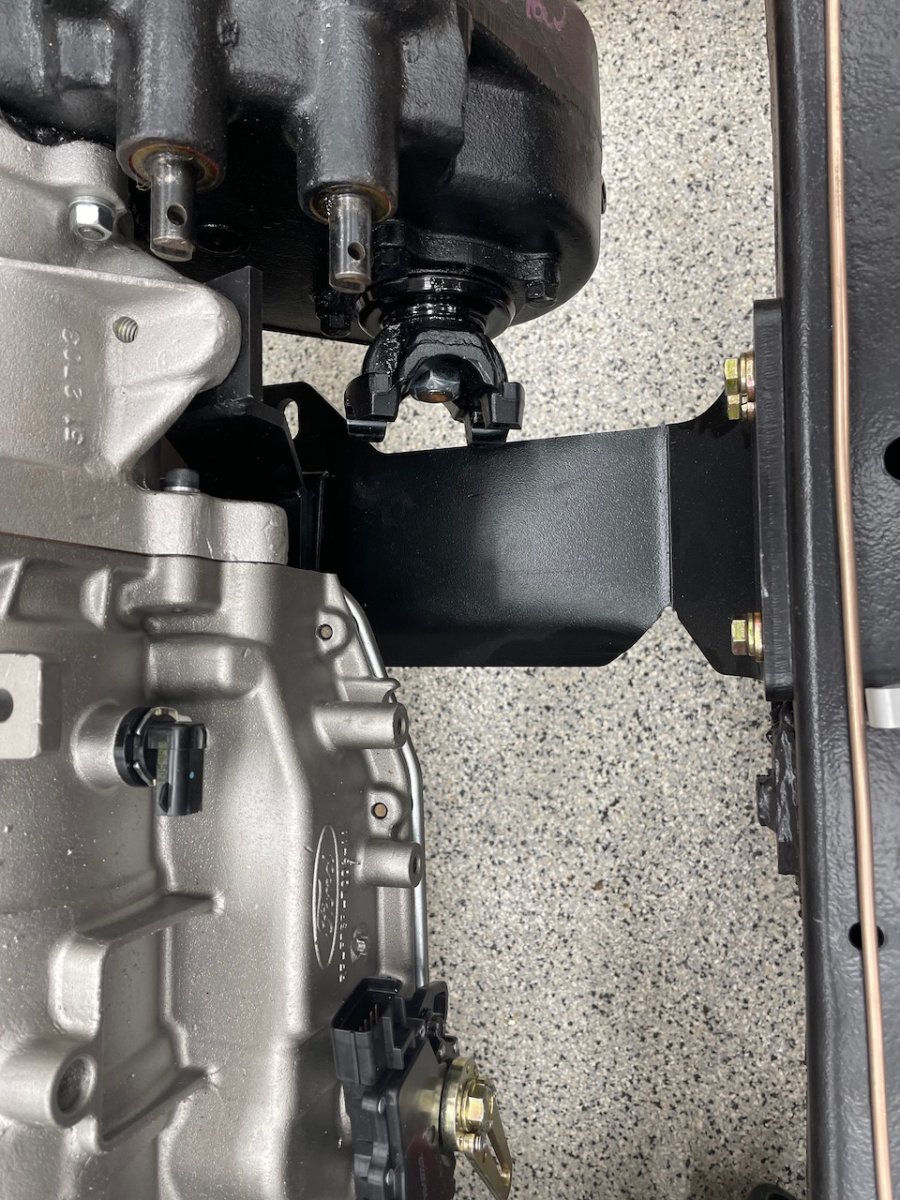
I've installed the crossmember from BC Broncos and once the engine/tranny combo in, something seems not right... Attached are some photos.

Issues:

1) Engine/tranny seem tipped back - what I mean is it seems the engine not sitting in the chassis properly. Maybe that's how it's supposed to be, but just looks funny. Engine seems tilted and the mounting bracket for the AA kit is not parallel with the crossmember, if that makes any sense. Are there any measurements for any of this? Vague I know...

2) There is no clearance for the driveline from the tcase yoke to the d44 yoke. The crossmember interferes.

Let me know what other Information I can provide.

I've also reached out to BC Broncos and will let you know what I hear.

Maybe the best choice is to modify the original crossmember like the AA instructions say to. I just thought a turn key crossmember would be the answer, as I'm not a metal fabricator.

Thanks in advance,

Levi
IMG_1299.jpeg

IMG_1300.jpeg

IMG_1301.jpeg

IMG_1302.jpeg

IMG_1303.jpeg

IMG_1304.jpeg

IMG_1305.jpeg
 

spap

Bronco Guru
Joined
Jan 2, 2010
Messages
2,642
Wow that s clean geez
I made my own bracket from the AA instructions and it does tilt back a little but not as much as yours, sorry not much help. Can you put spacers in there? I know you prob do t want to do that but could help
 

JKH67302

Full Member
Joined
Apr 25, 2009
Messages
189
I used the Toms bracket as well, no issues. One thing I dont see is transfercase mounts between the bracket and adapter. Maybe they are not needed with this kit, but those would likely give you the height for driveline and pan clearance. You will probably have to trim the bushings like the AA instructions say, I had to with the Tom's mount.

Sent from my SM-G975U using Tapatalk
 

67 Halfcab

Full Member
Joined
Nov 20, 2011
Messages
251
Did this crossmember assembly come with instructions? I ask because I couldn't find a digital copy available on the BC site.
 
OP
OP
L

levib1

Jr. Member
Joined
Dec 7, 2016
Messages
58
I will inquire about bushings and yes, it came with instructions, but vague instructions. I’ll post when I get home.

Bushings would make sense, but not discussed in the instructions.

I am waiting to hear back from them.
 

spap

Bronco Guru
Joined
Jan 2, 2010
Messages
2,642
It really looks like your missing the bushing between the adapter and the transfer case , even on the toms site it’s says recommended Parts
i would try to find rubber mounts transfer case mounts
I think they just absorb more of the vibration than the poly urethane ones
right now you would be metal on metal and would splendid vibration to the frame
 
OP
OP
L

levib1

Jr. Member
Joined
Dec 7, 2016
Messages
58
A related question for those that have installed 4R70.

Is there a way to measure orientation of engine/transmission in relation to frame to ensure properly mounted? For example, should the valve covers be parallel with the frame, or the tranny pan parallel with a portion of the frame? I would think this has a correct value to keep the engine proper distance from core support/firewall. For example fan parallel to radiator.

In one of the above pics, the engine seems tilted back. I'm looking for the proper mounting angle.

Let me know if that doesn't make sense. Not sure quite how to put it...

Thanks
 
OP
OP
L

levib1

Jr. Member
Joined
Dec 7, 2016
Messages
58
Any ideas on relation to frame? I don’t have the body on yet So not certain what ‘level’ is.
 

1buckeyefan1

Sr. Member
Joined
Sep 21, 2017
Messages
641
Here's my thread from a year or so ago.

https://classicbroncos.com/forums/threads/explorer-swap-what-to-level.309033/

From what i gathered, the block is approximately 4.75 degrees tilted back from factory. From comparing pictures, you have a slightly different bushing setup than mine.. I know there is a F150 tailpiece that can be used also. I ended up chatting with Jason at BC and he said that they often shim up to 1.5" without the different tailpiece. So I welded up a piece of 1.5" stock and got it to roughly the original angle and called it a day. that should also net you the clearance you need for your front driveshaft.
 
Last edited:

67 Halfcab

Full Member
Joined
Nov 20, 2011
Messages
251
Any ideas on relation to frame? I don’t have the body on yet So not certain what ‘level’ is.

That straight run of frame your radius arm brackets are welded to should be pretty close to level when the body is on. Compare the intake manifold carb base to it.

Have you tried rotating that bracket 180 degrees yet? There is no way it should be oriented in that position.

BC's picture of their 4r70W to Atlas crossmember shows it bolted to the back holes of the crossmember.

IMG_8734.jpg
 
OP
OP
L

levib1

Jr. Member
Joined
Dec 7, 2016
Messages
58
I will check with reversing it tomorrow.


I used the front set of holes because the instructions state the rear holes are for a 6R80 transmission.

Thanks for the replies
 

67 Halfcab

Full Member
Joined
Nov 20, 2011
Messages
251
I will check with reversing it tomorrow.


I used the front set of holes because the instructions state the rear holes are for a 6R80 transmission.

Thanks for the replies

That's weird. From your pics it looks like if it was orientated in its current position you would have to remove the crossmember and mounting bracket to service your trans filter. If that is the case, send that thing back to BC and buy Tom's bracket (for a lot less money). You shouldn't have to remove the crossmember and support the t-case with a jack to do routine maintenance.
 
Last edited:

spap

Bronco Guru
Joined
Jan 2, 2010
Messages
2,642
4r70w with Dana 20
With AA adapter instructions to rebuild the cross member
 

Attachments

  • 2115C3BA-C622-439D-A552-79A0096AEA6F.png
    2115C3BA-C622-439D-A552-79A0096AEA6F.png
    1 MB · Views: 227

Chub_Rock

New Member
Joined
Nov 12, 2014
Messages
30
Hello All,

Finally getting around to putting engine and transmission in.

Here's what I have:

1) SBF 302 block
2) 4R70W
3) AA adapter kit - https://www.wildhorses4x4.com/produ...dapter-converter/Bronco_Transmission_Adapters
4) D20 T-shift
5) BC Broncos crossmember - https://bcbroncos.com/shop/engine/e...1-4-speed-cross-member-4r70w-using-d20-tcase/

I've installed the crossmember from BC Broncos and once the engine/tranny combo in, something seems not right... Attached are some photos.

Issues:

1) Engine/tranny seem tipped back - what I mean is it seems the engine not sitting in the chassis properly. Maybe that's how it's supposed to be, but just looks funny. Engine seems tilted and the mounting bracket for the AA kit is not parallel with the crossmember, if that makes any sense. Are there any measurements for any of this? Vague I know...

2) There is no clearance for the driveline from the tcase yoke to the d44 yoke. The crossmember interferes.

Let me know what other Information I can provide.

I've also reached out to BC Broncos and will let you know what I hear.

Maybe the best choice is to modify the original crossmember like the AA instructions say to. I just thought a turn key crossmember would be the answer, as I'm not a metal fabricator.

Thanks in advance,

Levi
View attachment 878174
View attachment 878175
View attachment 878176
View attachment 878177
View attachment 878178
View attachment 878179
View attachment 878180
I am just finally buttoning mine up after a couple months of making things just right. I went with the Toms bracket because I can't weld the old crossmember up after notching. In the end it would have been best for me to take the stock one to a fabricator for a minimal fee. Couple of things: 1) You definately need the bushings under the AA. The instructions are weak but you install them just as you would if using the stock crossmember. 2) Regarding the front driveshaft clearance issue. I had this as well and Toms sent me a 1/4" thick spacer plate to lift up the u-shape bracket from the bottom crossmember. This gave just enough clearance for the front driveshaft off the cross member and below the pan. 3) I had to have the pan modified a bit on the passenger corner nearest the crossmember. Without shaving the corner under full articulation the front driveshaft would make contact with the pan. I have a 2.5" diameter DS and am considering a 2" for a little extra clearance. In the end the fab work I paid a guy to do on the pan meant I didn't get away with bolt on with the cross member. Further, the crossmember is much more bulky and does not play well with my current exhaust. My exhaust is now in several pieces and will need to be re-done at a muffler shop. I got everything buttoned up today and hope to trailer it to a muffler shop in the next few days. I moved it 8" forward and 8" back. Over $4K and 10 weeks I'll take that as progress!! Needless to say this is stretching my capabilities but I'm learning.
 
Last edited:

Chub_Rock

New Member
Joined
Nov 12, 2014
Messages
30
4r70w with Dana 20
With AA adapter instructions to rebuild the cross member
I'm guessing if he gets those bushings installed as intended that it will lift the AA/D20 off the crossmember to where the front driveshaft will no longer have clearance issues.
 
Top