• Just a reminder that you won't be able to start new posts or reply to existings posts in the Archive forum.

    This is where all the old posts go so they can still be used for reference and searched.
  • Welcome to ClassicBroncos! - You are currently viewing the forums as a GUEST. To take advantage of all the site features, please take a moment to register. It's fast, simple and absolutely free. So please join our community today!
    If you have problems registering or can't log into your account, please contact Admin.

73 trail/daily driver build thread

4lofun

Sr. Member
Joined
Mar 6, 2007
Messages
949
nice work going on here.. the engine looks very nice and clean now...the fan should keep it cool!!!! its huge,,,what fan is that??
any pics of final twin stick mounting?
why is there tape on wheels? I would say so paint doesnt blow through from backside while painting?
god work and nice pictures,thanks for the inspiration
 
OP
OP
rjrobin2002

rjrobin2002

Contributor
Bronco Guru
Joined
Oct 13, 2007
Messages
2,716
nice work going on here.. the engine looks very nice and clean now...the fan should keep it cool!!!! its huge,,,what fan is that??
any pics of final twin stick mounting?
why is there tape on wheels? I would say so paint doesnt blow through from backside while painting?
god work and nice pictures,thanks for the inspiration

That tape was put there by the sand blaster when they covered the wheels and i never removed it. That is a stock Explorer fan. I have not messed with the twin sticks lately.
 
OP
OP
rjrobin2002

rjrobin2002

Contributor
Bronco Guru
Joined
Oct 13, 2007
Messages
2,716
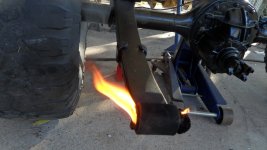
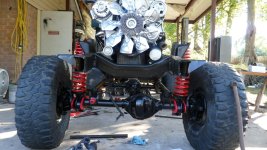
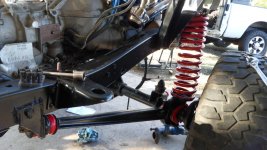
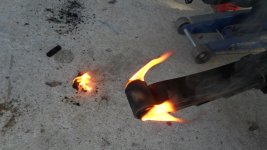
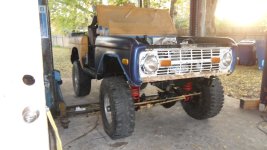
Got the front 4.5" Wild Horses suspension in with 7 degree bushings, working on getting the rear spring bushings out so I can install my new red ones to match the front. Fire works well to remove seized rubber bushings.
 

Attachments

  • suspension and headers installed 012.JPG
    suspension and headers installed 012.JPG
    176.6 KB · Views: 175
  • suspension and headers installed 013.JPG
    suspension and headers installed 013.JPG
    213.2 KB · Views: 185
  • suspension and headers installed 014.JPG
    suspension and headers installed 014.JPG
    208 KB · Views: 166
  • suspension and headers installed 016.JPG
    suspension and headers installed 016.JPG
    187.7 KB · Views: 143
OP
OP
rjrobin2002

rjrobin2002

Contributor
Bronco Guru
Joined
Oct 13, 2007
Messages
2,716
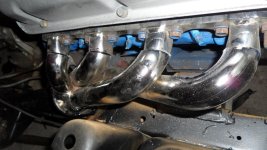
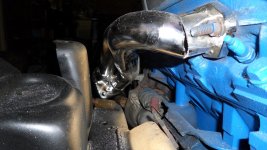
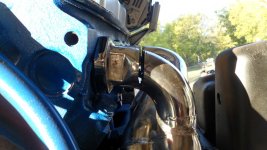
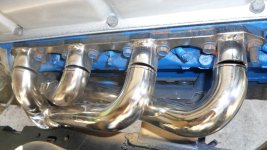
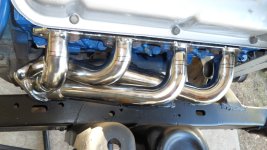
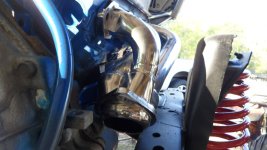
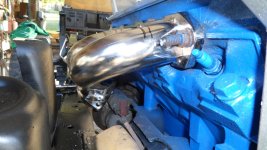
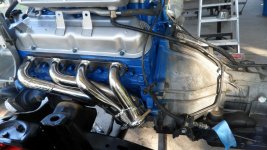
50 dollar craigslist Mustang BBK headers trying to make fit.

Working on getting these BBK mustang headers to fit. I think this will work.
 

Attachments

  • suspension and headers installed 027.jpg
    suspension and headers installed 027.jpg
    91.8 KB · Views: 158
  • suspension and headers installed 026.JPG
    suspension and headers installed 026.JPG
    187 KB · Views: 165
  • suspension and headers installed 021.JPG
    suspension and headers installed 021.JPG
    202.1 KB · Views: 166
  • suspension and headers installed 020.JPG
    suspension and headers installed 020.JPG
    188.7 KB · Views: 171
  • suspension and headers installed 019.JPG
    suspension and headers installed 019.JPG
    198.5 KB · Views: 173
  • suspension and headers installed 018.JPG
    suspension and headers installed 018.JPG
    195.7 KB · Views: 165
  • suspension and headers installed 017.JPG
    suspension and headers installed 017.JPG
    190.5 KB · Views: 176
  • suspension and headers installed 015.JPG
    suspension and headers installed 015.JPG
    200.7 KB · Views: 195

Bronco_69

Bronco Guru
Joined
Jun 14, 2001
Messages
2,070
Loc.
Monette Ar
why didnt you just get the header flange milled at an angle. it would pull the collector in without having to cut the tubes.
 
OP
OP
rjrobin2002

rjrobin2002

Contributor
Bronco Guru
Joined
Oct 13, 2007
Messages
2,716
why didnt you just get the header flange milled at an angle. it would pull the collector in without having to cut the tubes.

I dont have a mill or have much money to spare to complete this build. Plus, I am sure it would of been a trial and error that required me to make 3-4 trips to the shop. I have a welder at the house and enjoy welding. I had to get the collector to move about 5", no sure I could of got that out of the flange.
 

Stutsmo

Contributor
Bronco Guru
Joined
Jan 24, 2009
Messages
2,551
Nice work on this build! I am not sure I would have thought to cut the headers like that. Seems pretty simple after seeing someone else do it!
 
OP
OP
rjrobin2002

rjrobin2002

Contributor
Bronco Guru
Joined
Oct 13, 2007
Messages
2,716
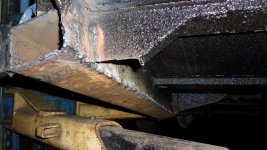
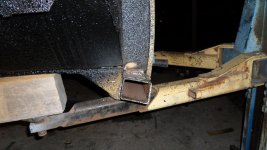
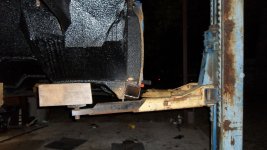
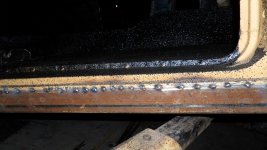
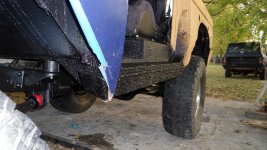
Got my sliders how I want them, I originally mounted the 3x4 tubing at 90 degrees and did not like them. I cut them off and mounted them at an angle that looked a lot better. I am going to do some type of removable brace that goes from 2 body mounts to each end of the slider by drilling and taping the 1/4" tubing. I can now finish spraying my bed liner Tues.
 

Attachments

  • angled rock sliders 209.JPG
    angled rock sliders 209.JPG
    198.9 KB · Views: 145
  • angled rock sliders 208.JPG
    angled rock sliders 208.JPG
    190.6 KB · Views: 147
  • angled rock sliders 207.JPG
    angled rock sliders 207.JPG
    188.9 KB · Views: 154
  • angled rock sliders 206.JPG
    angled rock sliders 206.JPG
    192.4 KB · Views: 155
  • angled rock sliders 204.JPG
    angled rock sliders 204.JPG
    191.8 KB · Views: 182
  • angled rock sliders 200.JPG
    angled rock sliders 200.JPG
    189.1 KB · Views: 165

Nightstick

Bronco guy
Joined
Feb 6, 2010
Messages
2,929
Man, you are kickin this build's ass!!!! Nice work!

Any luck on the fender and hood?
 
OP
OP
rjrobin2002

rjrobin2002

Contributor
Bronco Guru
Joined
Oct 13, 2007
Messages
2,716
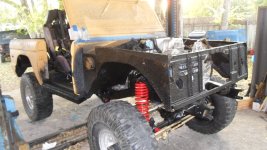
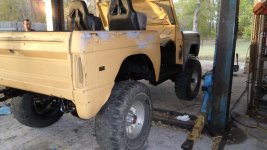
Got the tub finished and set down on the fresh suspension and 1" body lift. Time to start plumbing and wiring. It is nice to not have the body and frame separate and taking up my entire shop.
 

Attachments

  • bed lined body on frame 253.JPG
    bed lined body on frame 253.JPG
    200.1 KB · Views: 240
  • bed lined body on frame 255.JPG
    bed lined body on frame 255.JPG
    192 KB · Views: 228
  • bed lined body on frame 260.JPG
    bed lined body on frame 260.JPG
    200.3 KB · Views: 237
  • bed lined body on frame 261.JPG
    bed lined body on frame 261.JPG
    186.7 KB · Views: 215
  • bed lined body on frame 266.JPG
    bed lined body on frame 266.JPG
    193.6 KB · Views: 213
OP
OP
rjrobin2002

rjrobin2002

Contributor
Bronco Guru
Joined
Oct 13, 2007
Messages
2,716
That first photo makes the motor look photo shopped in a black engine bay. LOL
 

Bigbird

Sr. Member
Joined
Jan 12, 2004
Messages
505
What is the textured "paint" that you sprayed on?

edit: I found it in your post. Thanks!
 
Last edited:

Pestanza

Jr. Member
Joined
Jun 2, 2011
Messages
59
Loc.
Sunnyvale
How much time do you have in the build so far? I am contemplating a frame-off vs. a rolling restoration. I really like the looks of the front ends suspension and red bushings.
 
OP
OP
rjrobin2002

rjrobin2002

Contributor
Bronco Guru
Joined
Oct 13, 2007
Messages
2,716
Probably 5-10 full working days at the shop, I dont really know though.
 
Top