• Welcome to ClassicBroncos! - You are currently viewing the forums as a GUEST. To take advantage of all the site features, please take a moment to register. It's fast, simple and absolutely free. So please join our community today!
    If you have problems registering or can't log into your account, please contact Admin.

Big changes to the trail rig

OP
OP
stout22

stout22

Contributor
Bronco Guru
Joined
Dec 13, 2006
Messages
2,817
Loc.
Athens, AL
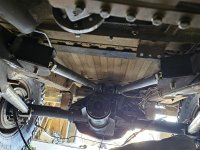
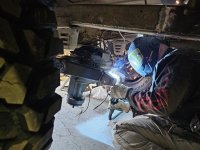
It took a community to get his build done. Yeller's neighbor and co-conspirator in most projects, John, pitched in. Here he is welding on the Barnes truss to the Sterling. It's a well made piece that fit great. We then got both axles wrestled under the Bronco and started doing some ciphering.
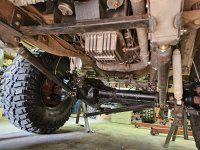
The Barnes truss was modified to allow for the axle vent. The back half of the exhaust had to be removed.
 

Attachments

  • 20241012_092149.jpg
    20241012_092149.jpg
    313 KB · Views: 98
  • 20241012_110922.jpg
    20241012_110922.jpg
    303.5 KB · Views: 87
  • 20241012_113149.jpg
    20241012_113149.jpg
    260.4 KB · Views: 85
  • 20241012_101652.jpg
    20241012_101652.jpg
    273.4 KB · Views: 81
  • 20241012_140057.jpg
    20241012_140057.jpg
    319.8 KB · Views: 91
OP
OP
stout22

stout22

Contributor
Bronco Guru
Joined
Dec 13, 2006
Messages
2,817
Loc.
Athens, AL
Yes, I kept the stock gas tank position, but we ended up with about 1//2 to 3/4" of clearance.
 
OP
OP
stout22

stout22

Contributor
Bronco Guru
Joined
Dec 13, 2006
Messages
2,817
Loc.
Athens, AL
By the end of Saturday the rear 4-link was "tacked" into position. We quit a little early so we could go celebrate our wedding anniversary, 39 years and counting.
I am blessed with a wonderful wife.
 

Attachments

  • 20241012_133826.jpg
    20241012_133826.jpg
    224.9 KB · Views: 93
  • 20241012_141408.jpg
    20241012_141408.jpg
    231.1 KB · Views: 88
  • 20241012_160220.jpg
    20241012_160220.jpg
    262.7 KB · Views: 87
  • 20241012_194255.jpg
    20241012_194255.jpg
    216.1 KB · Views: 90

Yeller

Contributor
Bronco Guru
Joined
Mar 27, 2012
Messages
6,653
Loc.
Rogers County Oklahoma
John was a huge help, handled some of the welding on the rear axle and the brackets, let me spend more time figuring.

It was an honor to share a meal with you and Mrs Stout22 on your anniversary. I think I enjoyed chauffeuring to dinner as much as anything. Felt like being the limo driver for a fancy event in the white cowboy limo
 
OP
OP
stout22

stout22

Contributor
Bronco Guru
Joined
Dec 13, 2006
Messages
2,817
Loc.
Athens, AL
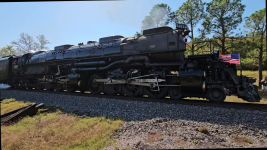
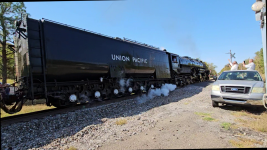
Monday (Oct 14) we got started on the front 3-link.
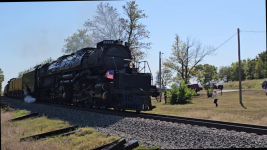
I did get sidetracked when the Big Boy rolled through town - once in a lifetime opportunity
 

Attachments

  • vlcsnap-2024-10-20-20h15m37s183.png
    vlcsnap-2024-10-20-20h15m37s183.png
    1.2 MB · Views: 39
  • IMG_6215.JPG
    IMG_6215.JPG
    159.8 KB · Views: 34
  • vlcsnap-2024-10-20-20h16m11s353.png
    vlcsnap-2024-10-20-20h16m11s353.png
    1.4 MB · Views: 35
  • vlcsnap-2024-10-20-20h16m57s322.png
    vlcsnap-2024-10-20-20h16m57s322.png
    1.3 MB · Views: 38
OP
OP
stout22

stout22

Contributor
Bronco Guru
Joined
Dec 13, 2006
Messages
2,817
Loc.
Athens, AL
Another one of Yeller's neighbors, Mark, came over and tig welded the links together.
Mark also machined a couple of parts for us. He has a lathe and mill in his home garage. :cool:
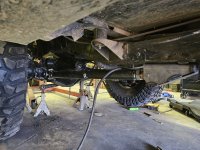
The rear had all the final welds applied. We were able to determine the ride height and get the driveshafts turned in for modifications.
 

Attachments

  • 20241014_140043.jpg
    20241014_140043.jpg
    217.5 KB · Views: 58
  • 20241014_140105.jpg
    20241014_140105.jpg
    221.1 KB · Views: 57
  • 20241015_085819.jpg
    20241015_085819.jpg
    237.8 KB · Views: 58
  • 20241015_085838.jpg
    20241015_085838.jpg
    293.8 KB · Views: 58
  • 20241015_085927.jpg
    20241015_085927.jpg
    299.1 KB · Views: 61
OP
OP
stout22

stout22

Contributor
Bronco Guru
Joined
Dec 13, 2006
Messages
2,817
Loc.
Athens, AL
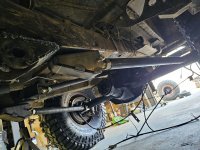
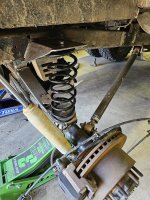
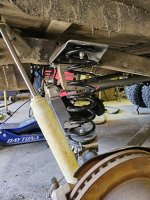
Rear axle got the springs and shocks attached and was able to support the Bronco.
Steve fabbed the upper coil mounts on his brake.:cool:
 

Attachments

  • 20241015_114119.jpg
    20241015_114119.jpg
    322.4 KB · Views: 76
  • 20241015_114350.jpg
    20241015_114350.jpg
    306.3 KB · Views: 80
  • 20241015_115950.jpg
    20241015_115950.jpg
    299.5 KB · Views: 77
OP
OP
stout22

stout22

Contributor
Bronco Guru
Joined
Dec 13, 2006
Messages
2,817
Loc.
Athens, AL
The front 3-link required more imagination.
Both axles were kept at full width. The front driver side was crowded. Yeller got creative with the upper track bar bracket.
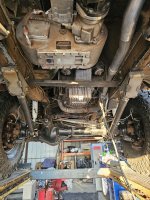
The pitman arm is a combination of Bronco and F250. That was done to keep the stock Bronco steering gear and the stock F250 steering linkage.
If you haven't caught on yet, one of the goals was to stick with stock parts - stock axle shafts, stock steering linkage, stock brakes..
The track bar is a custom piece that Yeller's neighbor, Mark, provided.
We had to clearance the front crossmember.
 

Attachments

  • 20241015_150122.jpg
    20241015_150122.jpg
    283 KB · Views: 68
  • 20241016_173016.jpg
    20241016_173016.jpg
    211.5 KB · Views: 68
OP
OP
stout22

stout22

Contributor
Bronco Guru
Joined
Dec 13, 2006
Messages
2,817
Loc.
Athens, AL
We were able to drive it out of the shop Sunday afternoon (Oct 20).
It still had a lot of work to do but this meant we could take it to the muffler shop first thing Monday morning Try not to get distracted by the mustang in the background 😁.
 

Attachments

  • 20241017_173613.jpg
    20241017_173613.jpg
    390.5 KB · Views: 107
  • 20241018_075915.jpg
    20241018_075915.jpg
    317.8 KB · Views: 99
  • 20241018_075923.jpg
    20241018_075923.jpg
    316.8 KB · Views: 88
  • 20241018_080015.jpg
    20241018_080015.jpg
    309.2 KB · Views: 88
  • 20241018_080022.jpg
    20241018_080022.jpg
    248.7 KB · Views: 94

Madgyver

Contributor
Bronco Madman
Joined
Jul 30, 2001
Messages
14,859
Rear axle got the springs and shocks attached and was able to support the Bronco.
Steve fabbed the upper coil mounts on his brake.:cool:
What springs are those?
For mock -up or actual springs to be used?
 

Yeller

Contributor
Bronco Guru
Joined
Mar 27, 2012
Messages
6,653
Loc.
Rogers County Oklahoma
What springs are those?
For mock -up or actual springs to be used?
The rear springs are..... caugh, choke, wheeze.... Stock replacement rear springs for a Jeep JK. I've found them to be much better suited for the rear of a bronco than using front springs, I find them to be too stiff and these seem about right, besides being super cheap and if you have a cooperative offroad shop, free. and if you want some lift, there are lots of options. Anyone that wants to try them I can measure the installed height on my bronco, that is what we did on this and set the buckets at the same height and it worked out perfectly.
 

Madgyver

Contributor
Bronco Madman
Joined
Jul 30, 2001
Messages
14,859
The rear springs are..... caugh, choke, wheeze.... Stock replacement rear springs for a Jeep JK. I've found them to be much better suited for the rear of a bronco than using front springs, I find them to be too stiff and these seem about right, besides being super cheap and if you have a cooperative offroad shop, free. and if you want some lift, there are lots of options. Anyone that wants to try them I can measure the installed height on my bronco, that is what we did on this and set the buckets at the same height and it worked out perfectly.
I found a set of those spring when you recommended them. they were free from a local jeep guy.
 

Boss Hugg

Contributor
Bronco Guru
Joined
Jun 8, 2010
Messages
2,203
How much time went into figuring anti-squatch or whatever for each end? And did you install the new muffler bearings right side up??
 

Howard2x4x4

Contributor
Bronco Guru
Joined
Apr 19, 2014
Messages
2,465
That's a mighty impressive team you have there Roger, doing some mighty impressive work!
 
Last edited:
OP
OP
stout22

stout22

Contributor
Bronco Guru
Joined
Dec 13, 2006
Messages
2,817
Loc.
Athens, AL
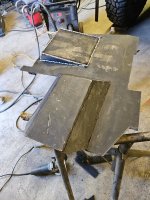
The Atlas was clocked one notch in order to improve the drive angle. This required a change to my skid plate. After doing lots of hammer massaging and trimming for clearance, we deemed it ready for a test run.
 

Attachments

  • 20241018_161717.jpg
    20241018_161717.jpg
    248.7 KB · Views: 46
  • 20241018_171629.jpg
    20241018_171629.jpg
    187.8 KB · Views: 46
  • 20241018_171647.jpg
    20241018_171647.jpg
    294.7 KB · Views: 47
OP
OP
stout22

stout22

Contributor
Bronco Guru
Joined
Dec 13, 2006
Messages
2,817
Loc.
Athens, AL
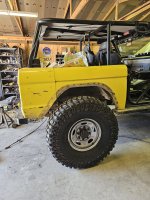
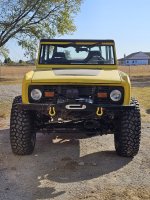
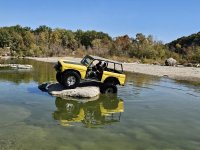
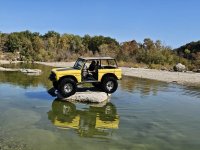
One of the top goals for this build was it had to fit between the fenders on a standard trailer - it does. We have a camper/hauler that it had to fit in without driving over the fenders.
Another goal was to try and use as many stock/unmodified parts as possible - full width 2008 SD axles with stock brakes, shafts and lockouts, stock F250/350 steel 8"x17" wheels, stock steering components.
 
Top