• Welcome to ClassicBroncos! - You are currently viewing the forums as a GUEST. To take advantage of all the site features, please take a moment to register. It's fast, simple and absolutely free. So please join our community today!
    If you have problems registering or can't log into your account, please contact Admin.

CHUZIE's 4R70W install

OP
OP
chuzie

chuzie

Contributor
Bronco Guru
Joined
Jul 21, 2006
Messages
2,756
Evan,

That is great news! We all owe your dad a huge debt of gratitude for going the extra mile.

He could leave the D20 empty and let the engine run for 10-20 min to get the trans pan to temp. This would lessen the distance needed to travel to get the fluid warm while nothing is lubricating the D20. I don't see any problem going a couple miles with no oil in there. Anyone else?

I'm stoked but also realize the fat lady has yet to sing.

The other folks? Well, I wonder how many of them have actually checked their D20s. I see no way for this not to happen. It should become a Bronco TSB!
 

77broncodriver

Full Member
Joined
Nov 21, 2009
Messages
344
I will know wednesday if everything is good, Im going back to test it and hopefully finally bring it back with me.

Good luck with the rest of your 4r swap! the rest was pretty easy

Evan
 
OP
OP
chuzie

chuzie

Contributor
Bronco Guru
Joined
Jul 21, 2006
Messages
2,756
In that case, I will let you know on Tuesday since that is when my seal comes in. Should have it on the road for a test by lunch.

Sent from my Droid using Tapatalk 2
 

rjrobin2002

Contributor
Bronco Guru
Joined
Oct 13, 2007
Messages
2,716
Do you have to do anything other than plug the opti shift in, like set it up for TPS different vehicle volts?
 
OP
OP
chuzie

chuzie

Contributor
Bronco Guru
Joined
Jul 21, 2006
Messages
2,756
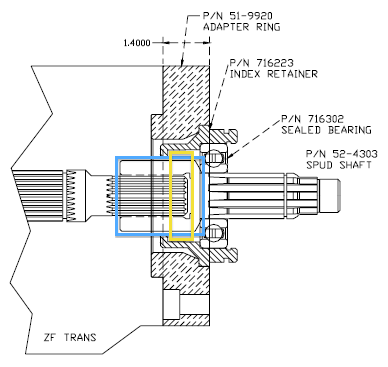
Just so we are clear, I am tearing down the drive gear, spud shaft, and adapter assembly to place this seal on the back side of the bearing between the bearing and the adapter, correct?

When I say adapter, I am referring to the bearing adapter housing not the D20 adapter.

Sent from my Droid using Tapatalk 2
 

77broncodriver

Full Member
Joined
Nov 21, 2009
Messages
344
yes between the bearing and the inner aluminum housing. the yellow outline is where it goes.

ZFAdapter-1.png
 
OP
OP
chuzie

chuzie

Contributor
Bronco Guru
Joined
Jul 21, 2006
Messages
2,756
That is what I was thinking but wanted to confirm before I tore that assembly down. Oh joy, more fun without a press.
 

77broncodriver

Full Member
Joined
Nov 21, 2009
Messages
344
I got it all apart without a press or anything, it all came out with a hammer and socket, didnt think it would be too hard to put it together the same way, but I think my dad brought the rest to a shop for them to press it together
 
OP
OP
chuzie

chuzie

Contributor
Bronco Guru
Joined
Jul 21, 2006
Messages
2,756
I just beat the piss out of it with a rubber mallet. To quite a bit of doing but it is out. What really sucks is I heated and cooled the parts of the assembly to get them together without a press. I don't think I can get away with that with this seal unless someone knows the temp limits on this particular seal.

BTW- I used LocTite on the adapter to D20 bolts. That was tons of fun. At least I know my old bottle is still good!
 
OP
OP
chuzie

chuzie

Contributor
Bronco Guru
Joined
Jul 21, 2006
Messages
2,756
As of now, just the gasket. Do you have reason to think I should use silicone? Both surfaces seemed pretty smooth and true. Is that gasket "off the shelf?"
 
OP
OP
chuzie

chuzie

Contributor
Bronco Guru
Joined
Jul 21, 2006
Messages
2,756
Quick update from the garage. The seal is in, she is driving and no leaks yet. More to come later...

Sent from my Droid using Tapatalk 2
 
OP
OP
chuzie

chuzie

Contributor
Bronco Guru
Joined
Jul 21, 2006
Messages
2,756
Okay, we had some progress today.

The seal came in a day earlier than expected! Everything was already torn down and ready for the seal so no too much work.

I wanted to reassemble the parts using the same heating / cooling methods as before but I was concerned about the temperature limits of the seal. I called National and found this seal has a tolerance of -40 / +220 degrees F. The transmission does have the ability to reach the upper end of this spectrum but I seriously doubt that temp would ever reach this seal.

Set the oven to 200 degrees F for the adapter housing and threw the shaft/bearing and seal in the freezer.

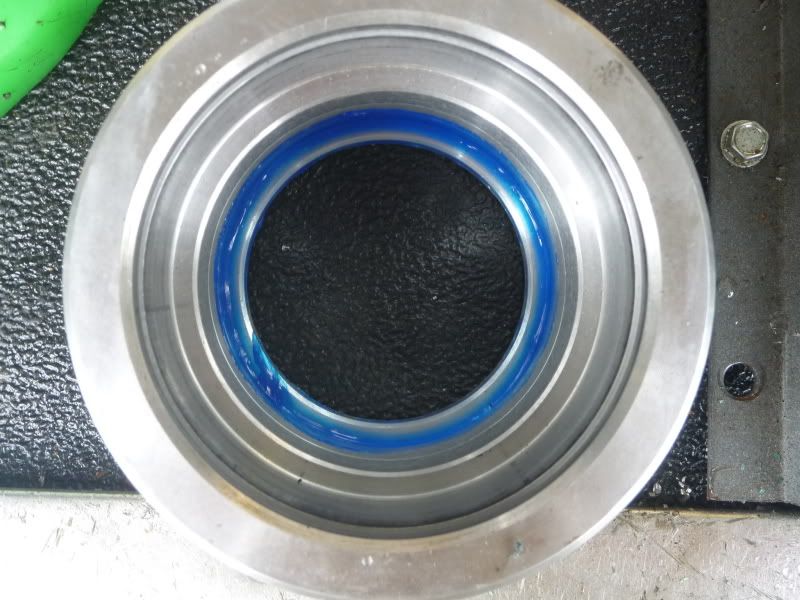
While they were all "cooking," I laid on a light coat of blue RTV gasket maker where the seal will rest in the adapter just for peace of mind.

P1040936.jpg


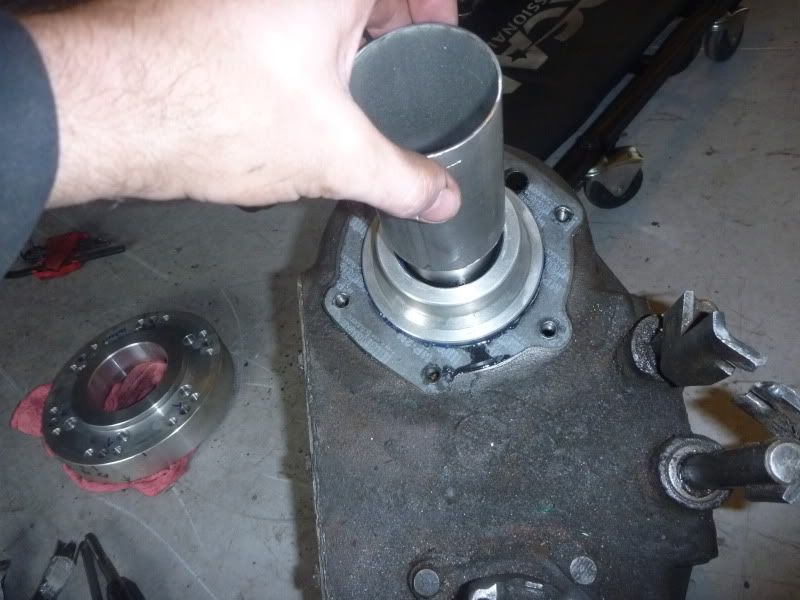
I gave the seal about 15 minutes in the freezer. Remember the open end of the seal goes in facing the transmission. I used a spare piece of 2.5" exhaust tube and a mallet to drift the seal in evenly.

P1040938.jpg


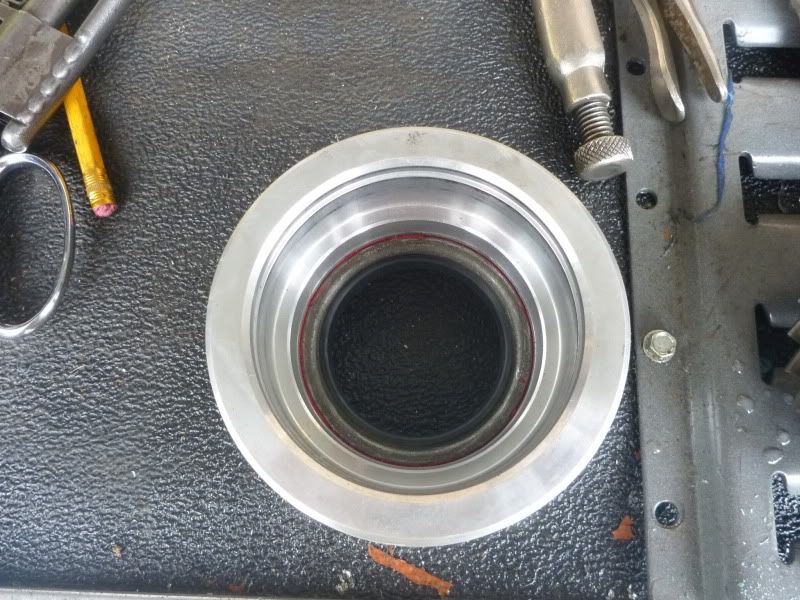
I used the depth function of my caliper to verify it was fully seated all the way around. Next I sprayed a coat of silicone lubricant on the seal lips just to make sure it would stay happy for the duration.

P1040937.jpg


From that point, the rest of the assembly / install was as previously described in the write-up.

For some reason, it only took 10 quarts to fill the transmission. I don't recall if I ever drained the torque converter. I think that would account for the other 3.

A few loose ends to include the cooler lines, exhaust, driveshafts, etc had to be buttoned up, but I ended up taking it for a test drive and it all went well. I ran with the D20 empty, only for a couple miles. I parked it with the drain plug removed. I hope I do not see a red mess on my garage floor tomorrow morning. I think this seal will work out just fine.

I need to get in the programming mode and modify the shift points and maybe adjust the linkage on the shifter slightly as it is requiring me to really put some upward force on the column shifter to get it to that sweet spot between park and a sensed computer error. No biggie.

Tomorrow I need to install my aux cooler, center console, twin stick boot and upload the new program. Also need to order a good transmission filter and a shorter Autometer trans temp sender. The one I have is the longer version and bottoms out in the brass 1/8" pipe tee I am using.

:cool:
 
OP
OP
chuzie

chuzie

Contributor
Bronco Guru
Joined
Jul 21, 2006
Messages
2,756
Not really. I am new at this just like you. If I come up with something, I will be sire to let you know.
 

77broncodriver

Full Member
Joined
Nov 21, 2009
Messages
344
alright thanks, I know people do something with the second gear shift at a stop light but i didnt see any easy buttons to do that..
 

Broncobowsher

Total hack
Joined
Jun 4, 2002
Messages
35,462
Do you have any tips for tuning the shift points? I have tried but was lost and gave up

Start with a basic pattern.
Then work on a single upshift. Say 1-2 at light throttle and work up to mid throttle. Skip full throttle at first.
Then work on the 2-3 upshift the same way.

Arbutrarly set the downshift a fixed offset from the upshift. Look at the basic table and you will see the offset.

Keep working on the upshifts for deeper throttle and higher speeds.

Then start on the downshifts. Note when you feel it downshifted too soon, downshift not needed. Note speed and throttle. Also when it doesn't downshift until you dig too deep in the throttle. That is you dig deeper in the throttle and get nothing then a downshift and start pulling harder then you want.
Adjust those points and smooth the lines in between.

That will take care of 90% of the shifting. Then it is simply fine tuning as you find that one spot that isn't right and fix it. I remember one of mine was in Vegas cruising the strip it needed a shift into OD. But the shift speed was about 2 MPH higher then traffic flowed. So I pulled over, took the laptop and adjusted the light throttle 3-4 upshift point down 3 MPH and changed nothing else. PERFECT! Everything else worked and I could cruise the strip at idle instead of holding a fast idle for no good reason.

Just take it in steps.
 
OP
OP
chuzie

chuzie

Contributor
Bronco Guru
Joined
Jul 21, 2006
Messages
2,756
Thanks for the details Broncobowsher! A huge help as always.

FYI- No transmission fluid on the ground or in the D20 this morning. I think we are in the clear.
 
OP
OP
chuzie

chuzie

Contributor
Bronco Guru
Joined
Jul 21, 2006
Messages
2,756
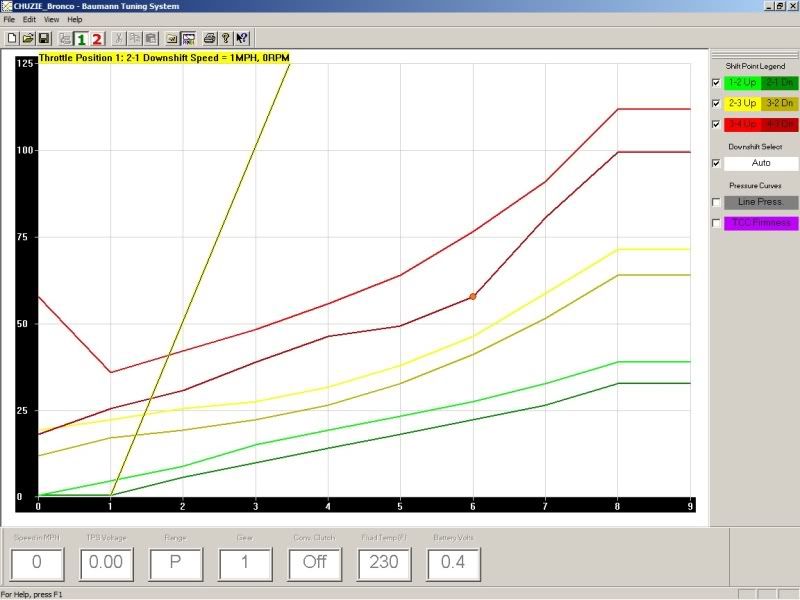
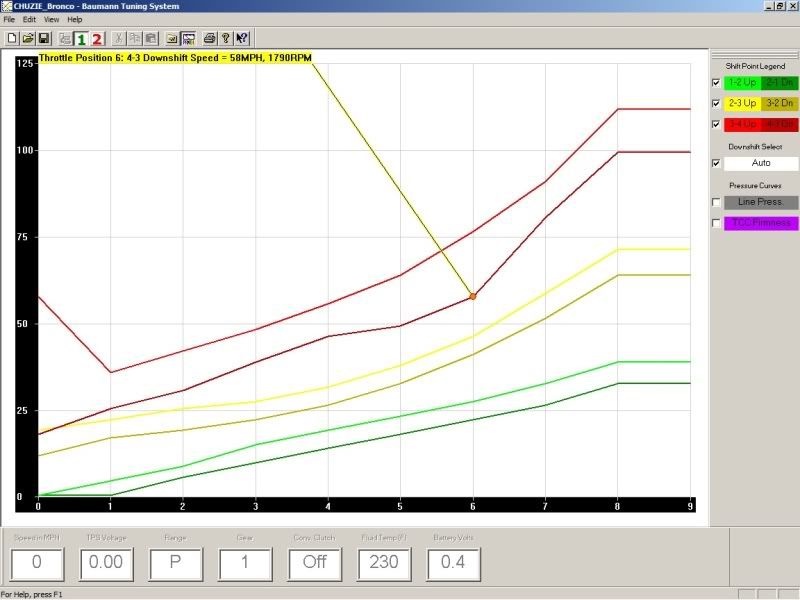
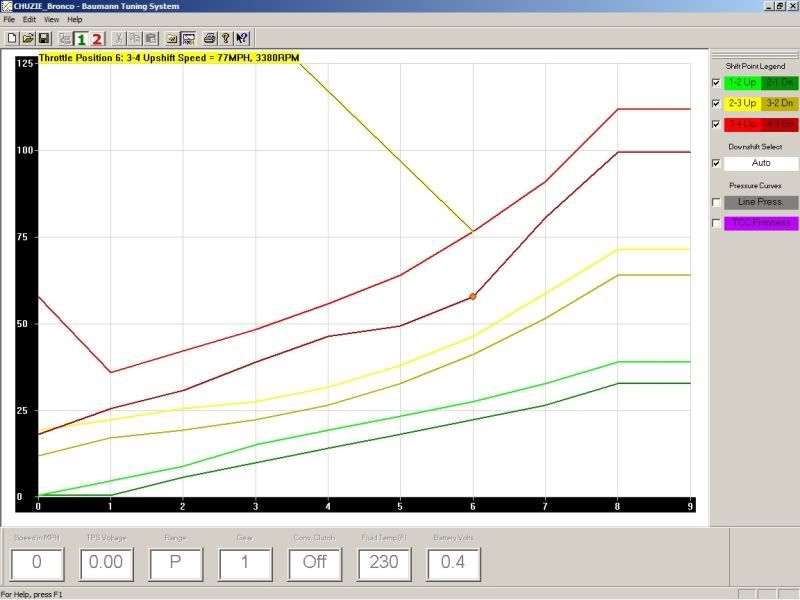
Just made my first attempt at programming this puppy. I will say the learning curve is steeper than first thought and it is a pain to be driving and watching the computer at the same time. You really need two experienced people doing this.

I made a couple modifications below.
This shows the 1-2 section. I initially ran the up / down shift areas to 0 in the first 20% of the throttle. I liked it but I felt it took too much throttle to get it to go down to first from second from a stop so i shifted them slightly as reflected below and I am happy with the results.

data1.jpg


data2.jpg


Running @ 60MPH = appx. 1900 RPM. I felt I had give too much throttle to get it to downshift so i made the changes below.

data3.jpg


data4.jpg


Still haven't messed with 2-3 or 3-4 upshifts yet.

Keep in mind I am running 4.56 and 34.5" tires.

Also tried to attach my calibration file if anyone wants to get a better look or make any suggestions but we only have privileges for picture files. tried to change extension from BTC to JPG and the system still called me out on it. Booo!!

Thx.
 
Last edited:
Top