


ryan287
Full Member
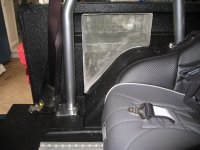
I used to have my rear speakers held in with Bungy cords, so I decided to step it up with fiberglass when I got my Bronco painted. There are tons of youtube videos on how to do this, which I found very helpful. I also was able to get supplies from a local boat fiberglass guy and aside from info on mixture ratio and time to hardening, he gave me some other pointers, such as:
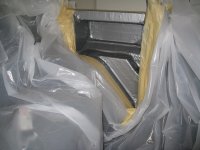
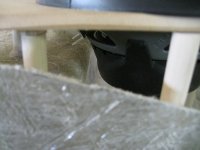
It is super important that the mold you make is air tight, otherwise you will get resin all over the inside of your Bronco - I used multiple layers of duct tape. To keep the fiberglass from sticking to the mold, I got the idea of Frog tape and tin foil from a youtube video, but i have to say they didn't work and stuck to the fiberglass pretty badly when I popped it out. I took a lot of picking and sanding to get rid of it.
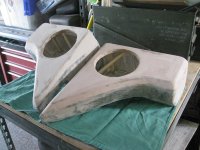
Once I popped the castings out and cleaned the backs, I trimmed the edges and glue gunned dowels in that support the face. The face had to be a critical distance from the back of the casting to allow the speaker to fit. All the dowels had to be trimmed to reach the face and support it (the glue gun worked great because it hardens so quickly). Dyna mat was placed all over the inside. Once the face was glued into place, I filled the edges with surf board foam (free left overs from boat guy), then draped resin and cloth over the front and let it cure.
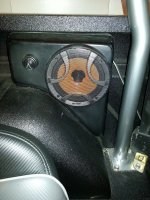
I was going for a smoother look, so I used some Bondo and sanded the outside. This part sucks, so as you can see in the photos I painted the boxes before they were smooth.
The boxes pretty much wedge into place without fixation and are very sturdy.
Speakers: (2) Hertz Audio ESK 6.5"
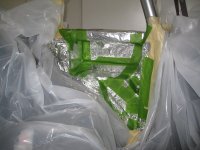
- cut woven cloth into manageable palm sized squares
- dip the cloth into the resin and squeeze out excess, then lay down by hand and dab with a brush (wear gloves)
- lay down at least three layers and get the bubbles out using resin and a stiff brush
It is super important that the mold you make is air tight, otherwise you will get resin all over the inside of your Bronco - I used multiple layers of duct tape. To keep the fiberglass from sticking to the mold, I got the idea of Frog tape and tin foil from a youtube video, but i have to say they didn't work and stuck to the fiberglass pretty badly when I popped it out. I took a lot of picking and sanding to get rid of it.
Once I popped the castings out and cleaned the backs, I trimmed the edges and glue gunned dowels in that support the face. The face had to be a critical distance from the back of the casting to allow the speaker to fit. All the dowels had to be trimmed to reach the face and support it (the glue gun worked great because it hardens so quickly). Dyna mat was placed all over the inside. Once the face was glued into place, I filled the edges with surf board foam (free left overs from boat guy), then draped resin and cloth over the front and let it cure.
I was going for a smoother look, so I used some Bondo and sanded the outside. This part sucks, so as you can see in the photos I painted the boxes before they were smooth.
The boxes pretty much wedge into place without fixation and are very sturdy.
Speakers: (2) Hertz Audio ESK 6.5"
Attachments
-
 20130507_225503 (Copy).jpg106.3 KB · Views: 127
 -
 IMG_4879 (Copy).JPG130.6 KB · Views: 107
 -
 IMG_4880 (Copy).JPG81.9 KB · Views: 98
 -
 IMG_4881 (Copy).JPG99.1 KB · Views: 96
 -
 IMG_4884 (Copy).JPG98.4 KB · Views: 95
 -
 IMG_4888 (Copy).JPG116.9 KB · Views: 96
 -
 IMG_4891 (Copy).JPG105.1 KB · Views: 99
 -
 IMG_4892 (Copy).JPG131.1 KB · Views: 89
 -
 IMG_5000 (Copy).JPG126.3 KB · Views: 90
 -
 20130507_225512 (Copy).jpg95.3 KB · Views: 98
 -
 IMG_4996 (Copy).JPG116 KB · Views: 83
 -
 IMG_4902 (Copy).JPG80.6 KB · Views: 78